Using Dialogues
Once you have created a dialogue, you can use it in different ways, as we have already seen in the create a dialogue section, but there are more details you should keep in mind.
How to use a dialogue
To use the dialogues from Sprouty Dialogs in your game, as we have already seen in the create a dialogue section, we have the two following options.
Using dialog players (Recommended)
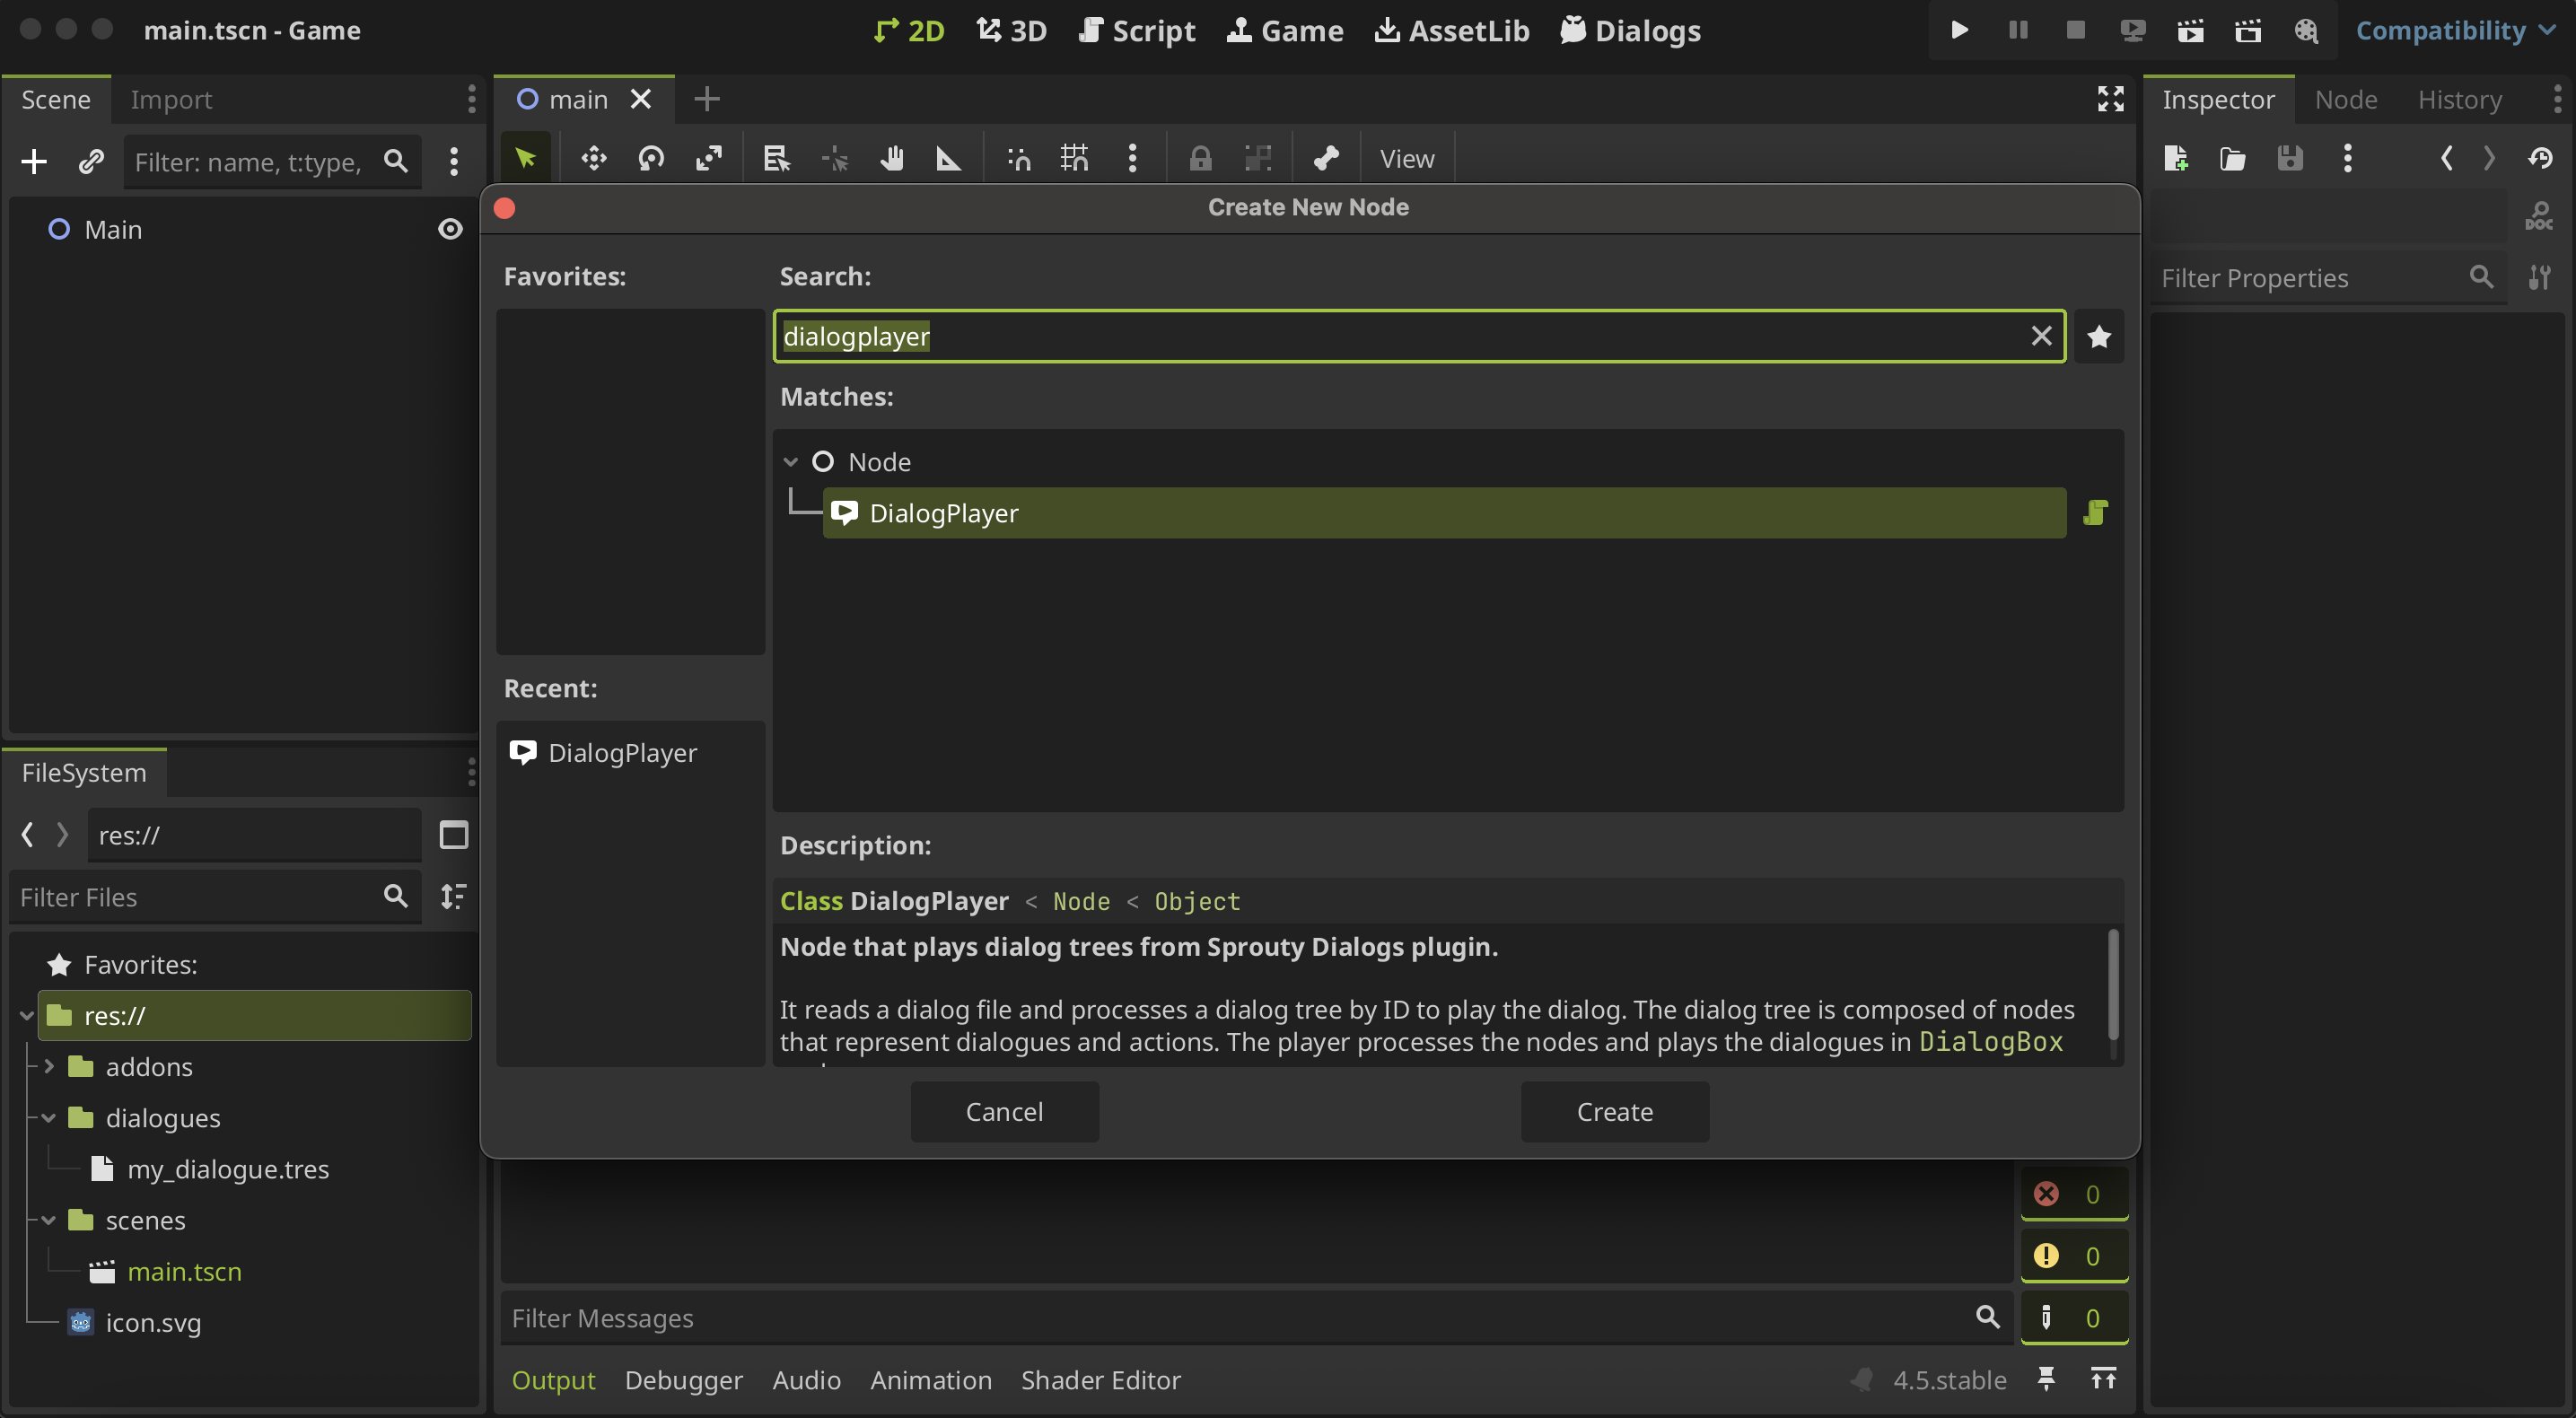
The recommended way to run your dialogues is using dialog players. To use a DialogPlayer node, first you need to add it to the scene where you want to run the dialogue.
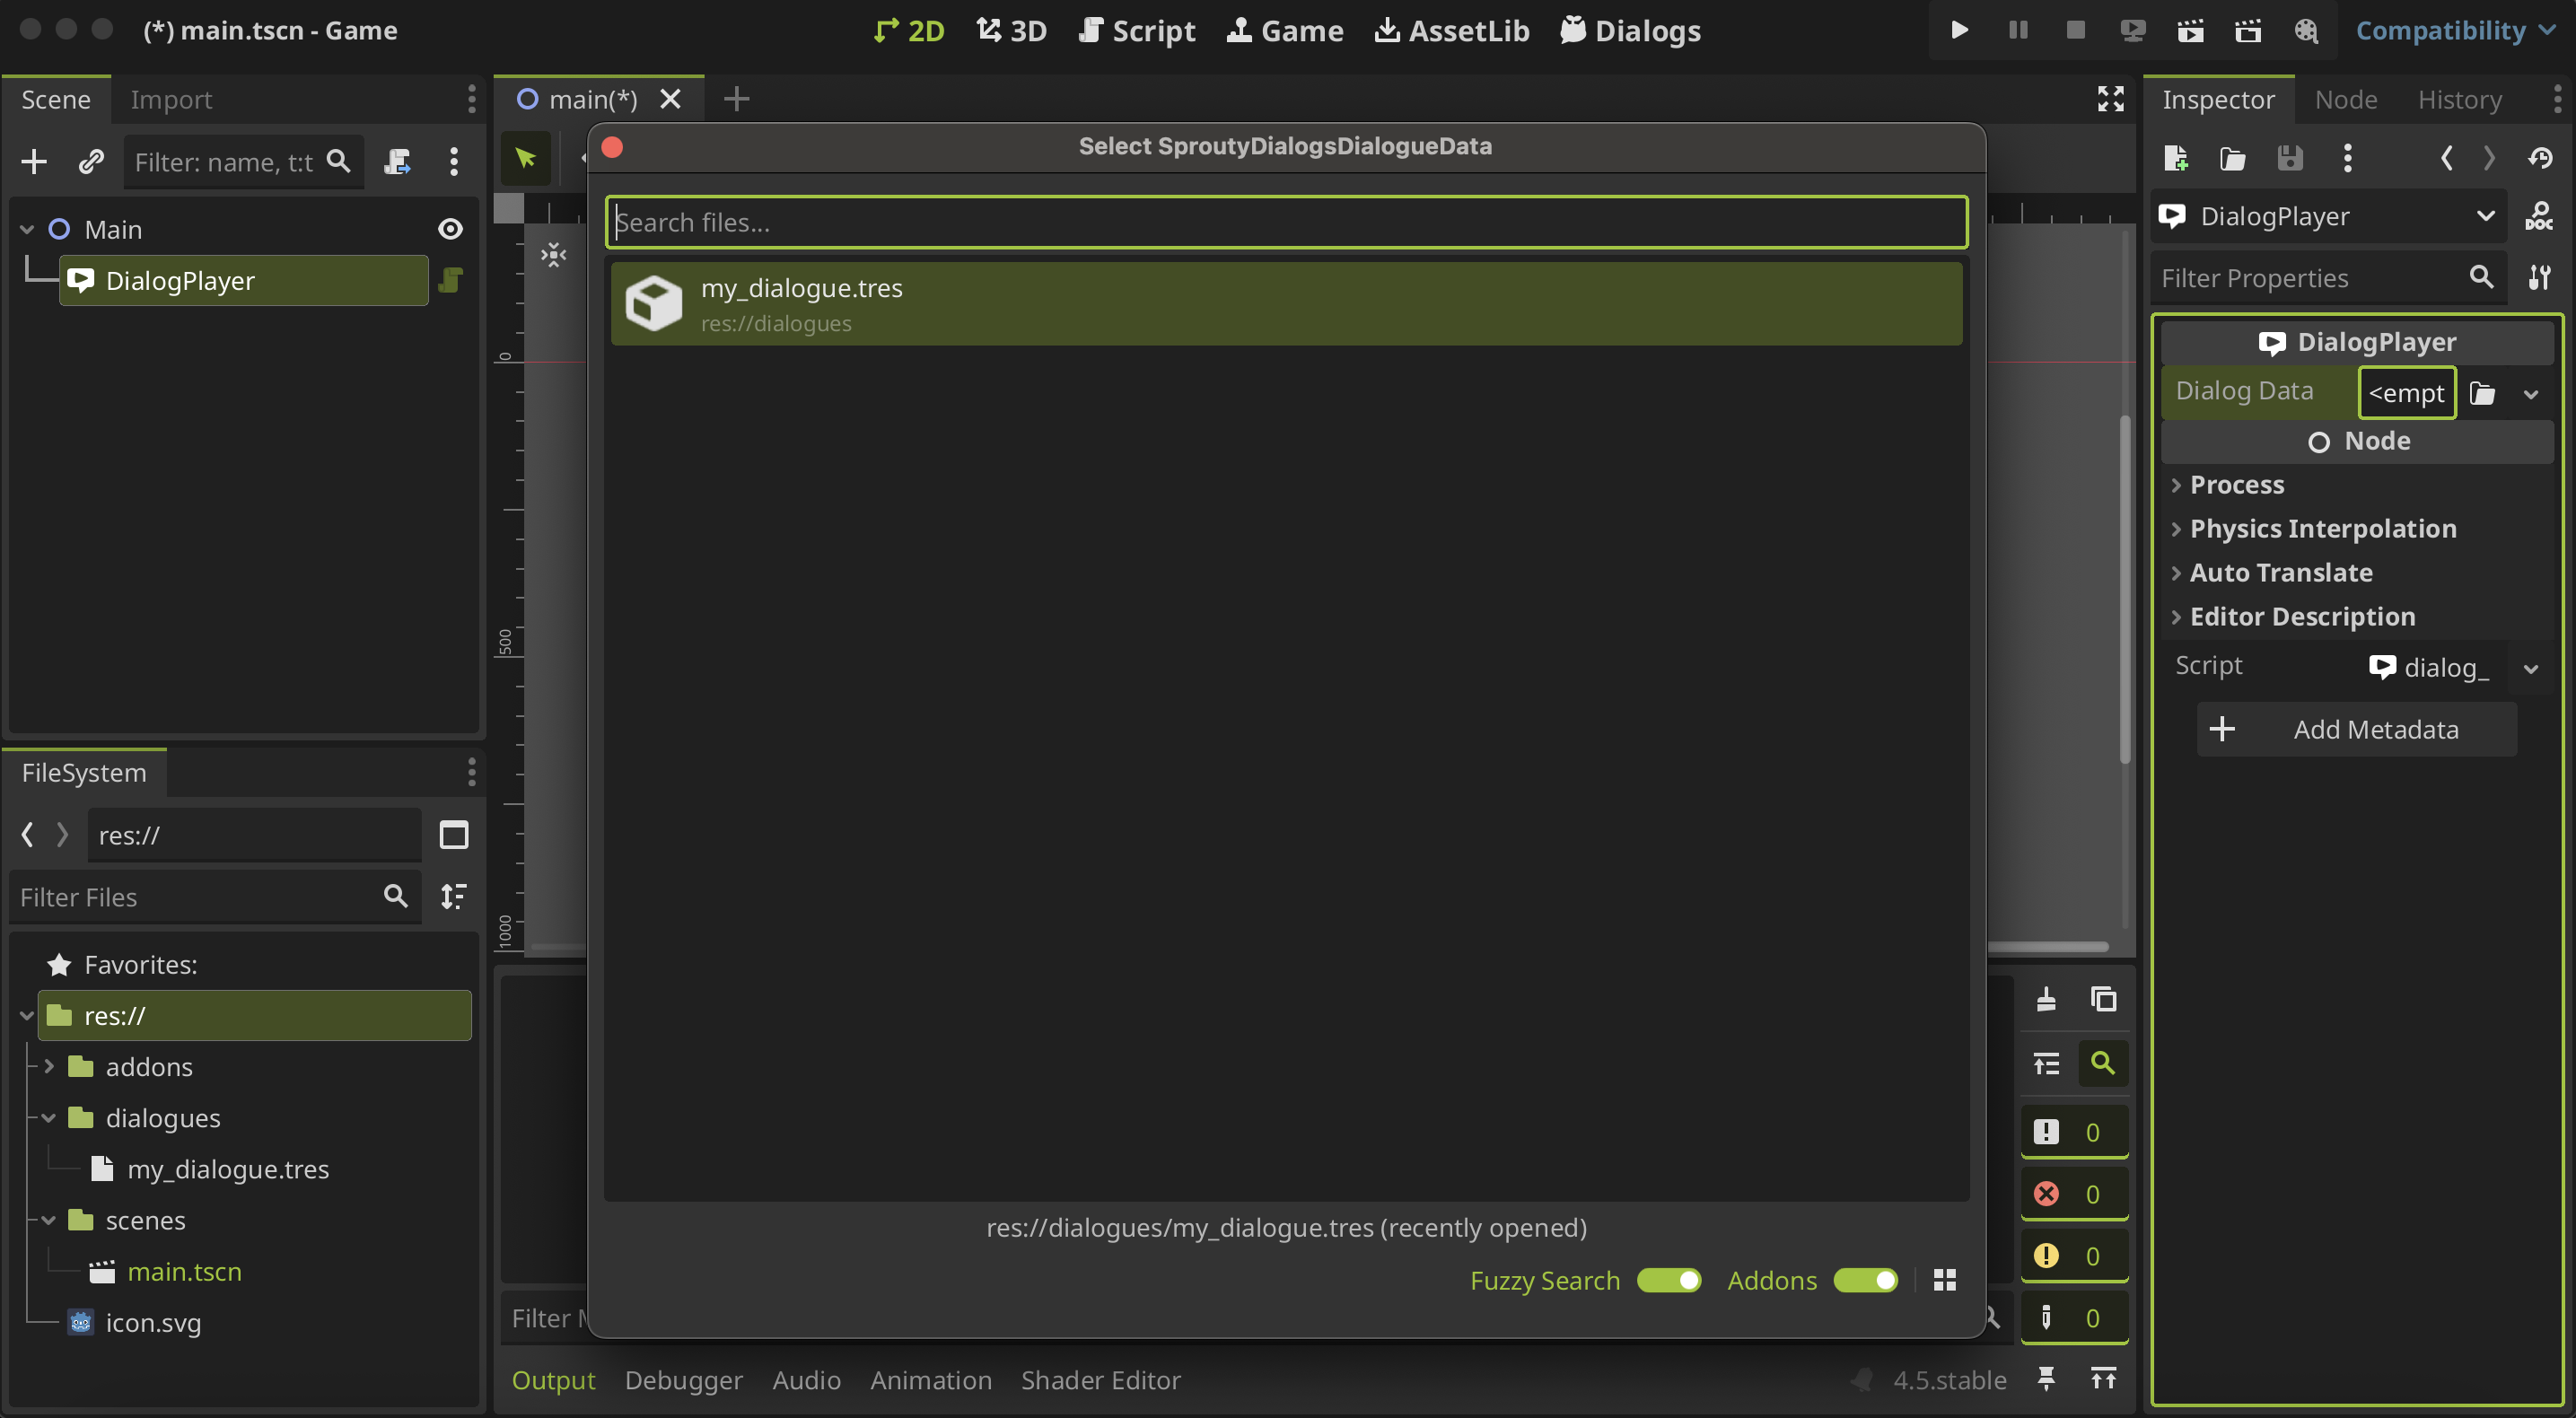
Then, you must assign the Dialog Data or dialogue data file where your dialogue is.
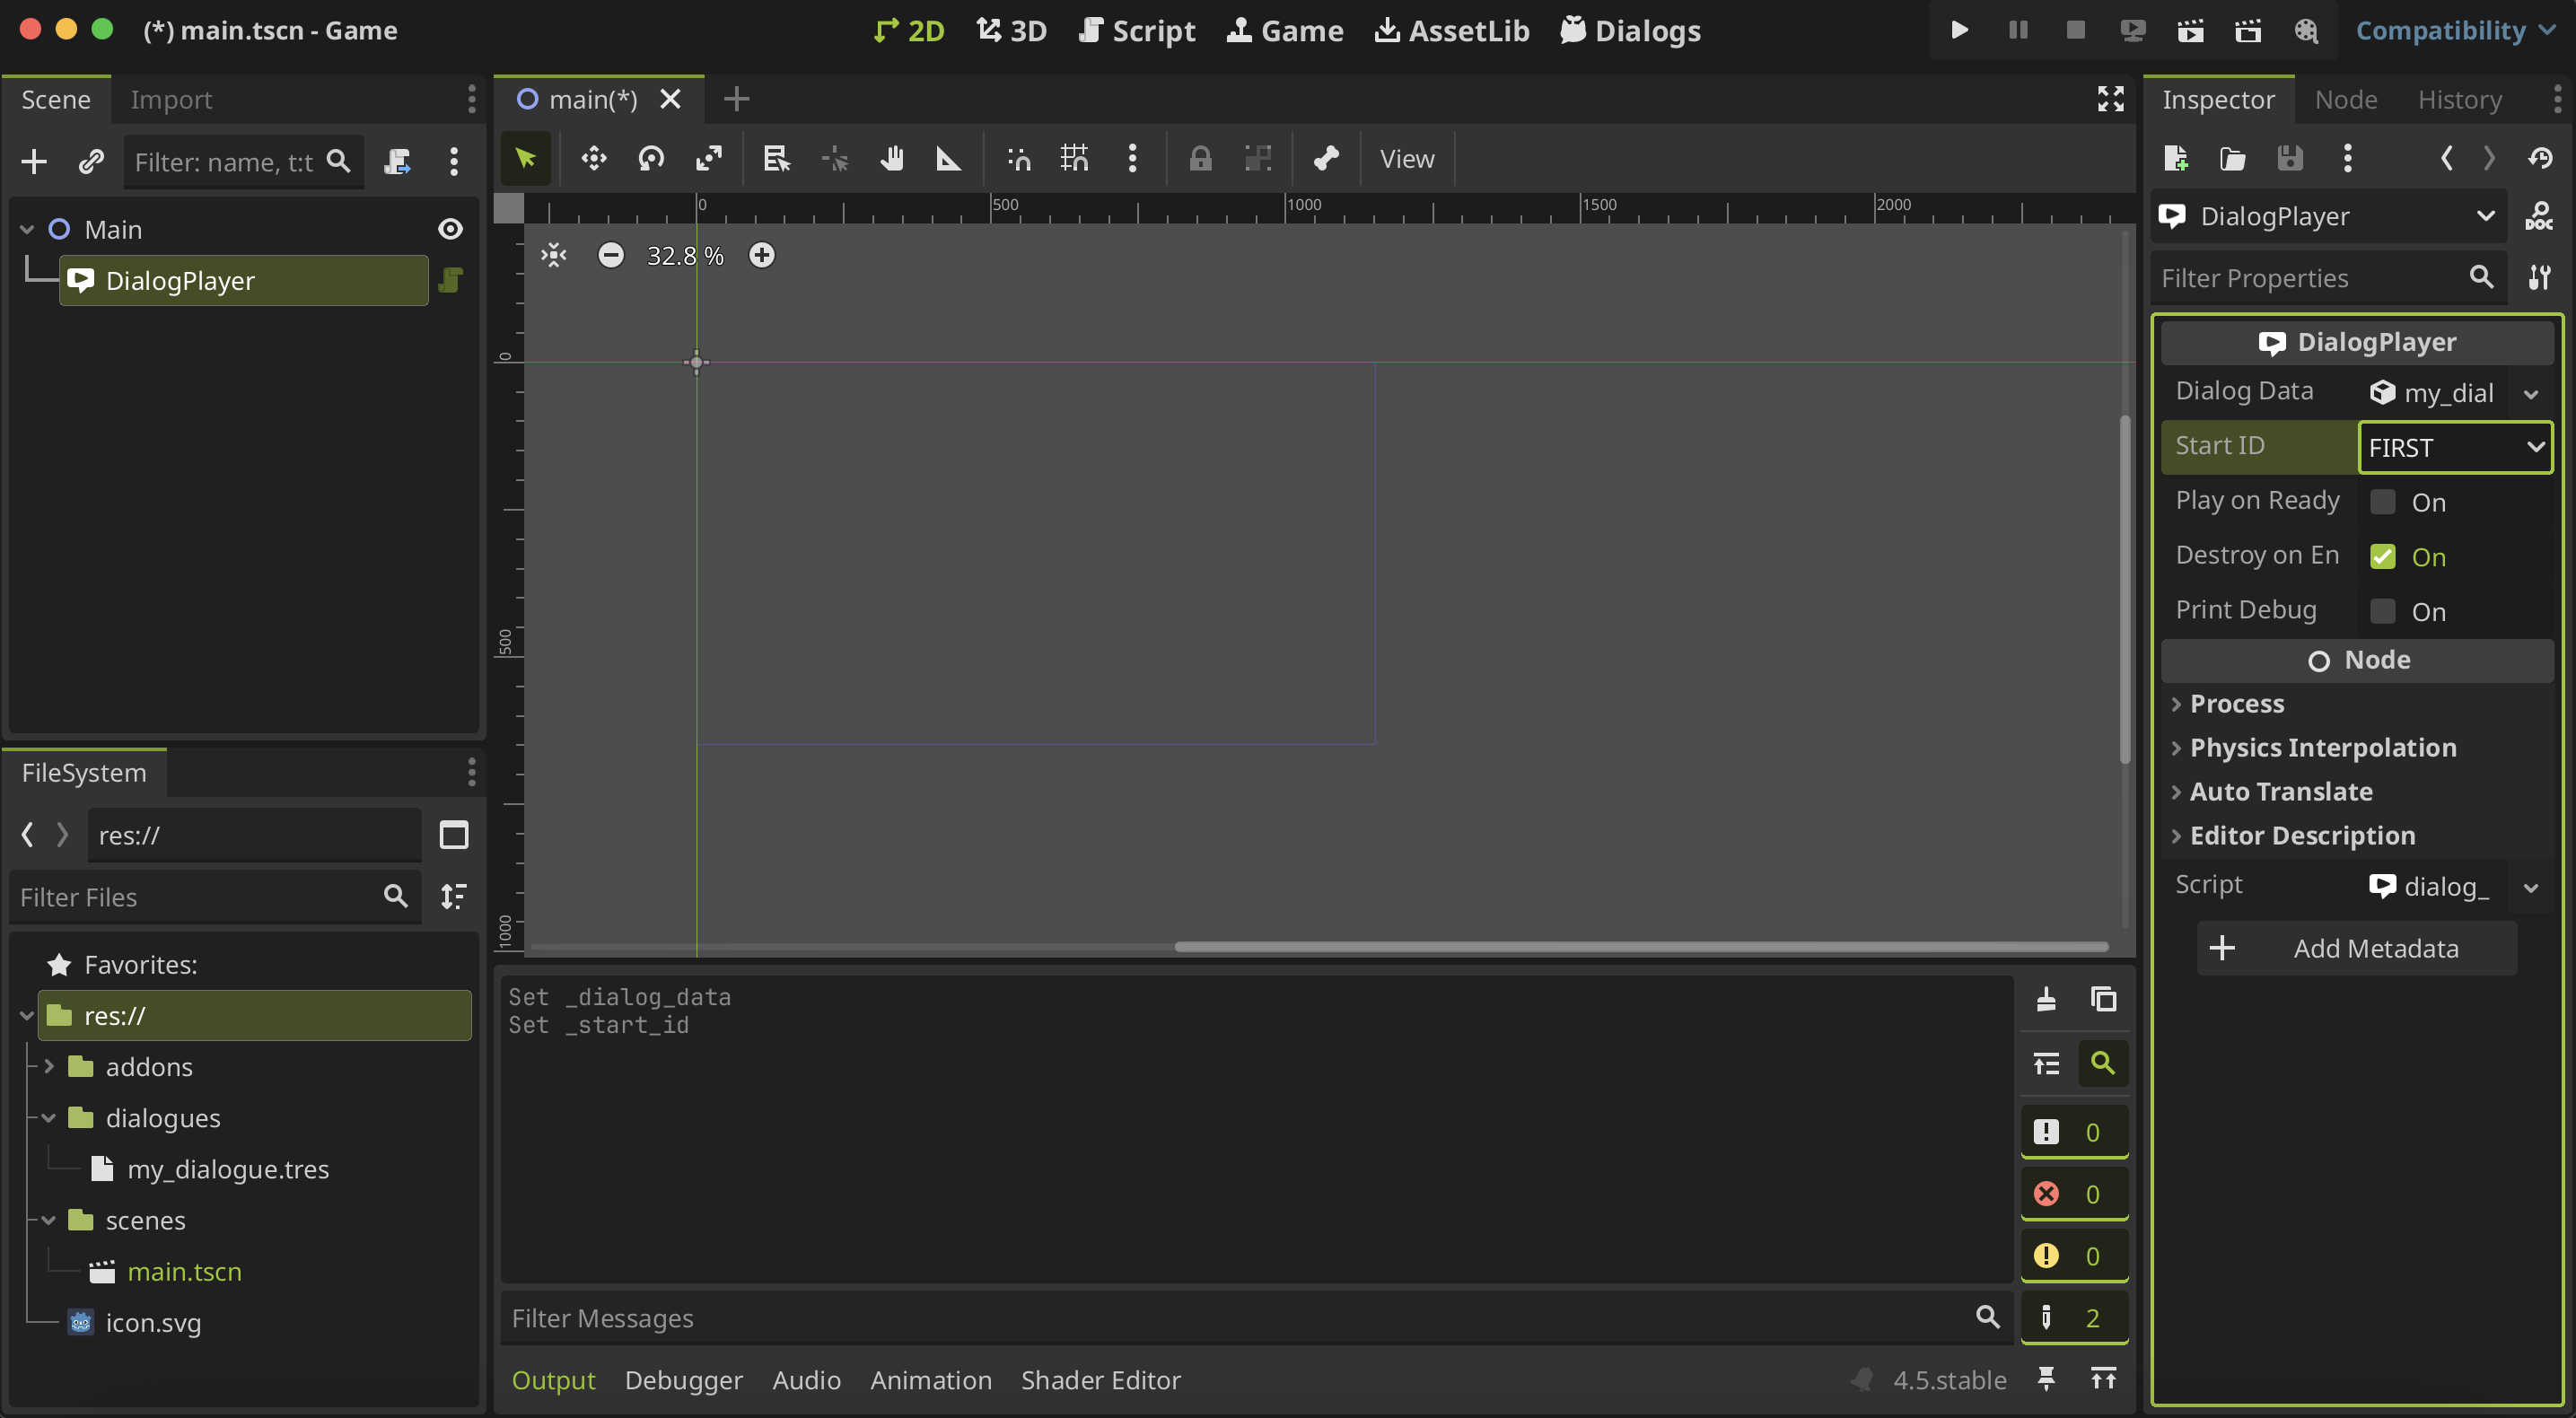
When you select a file, the inspector automatically going to update and now you will see some settings for the DialogPlayer.
You must choose the dialogue tree ID of the dialogue you want to play from the Start ID dropdown; otherwise, the player will not know which dialogue tree to run.
Now that you have your dialog player configured, you can call the dialogue from code, using the start() method from the DialogPlayer node.
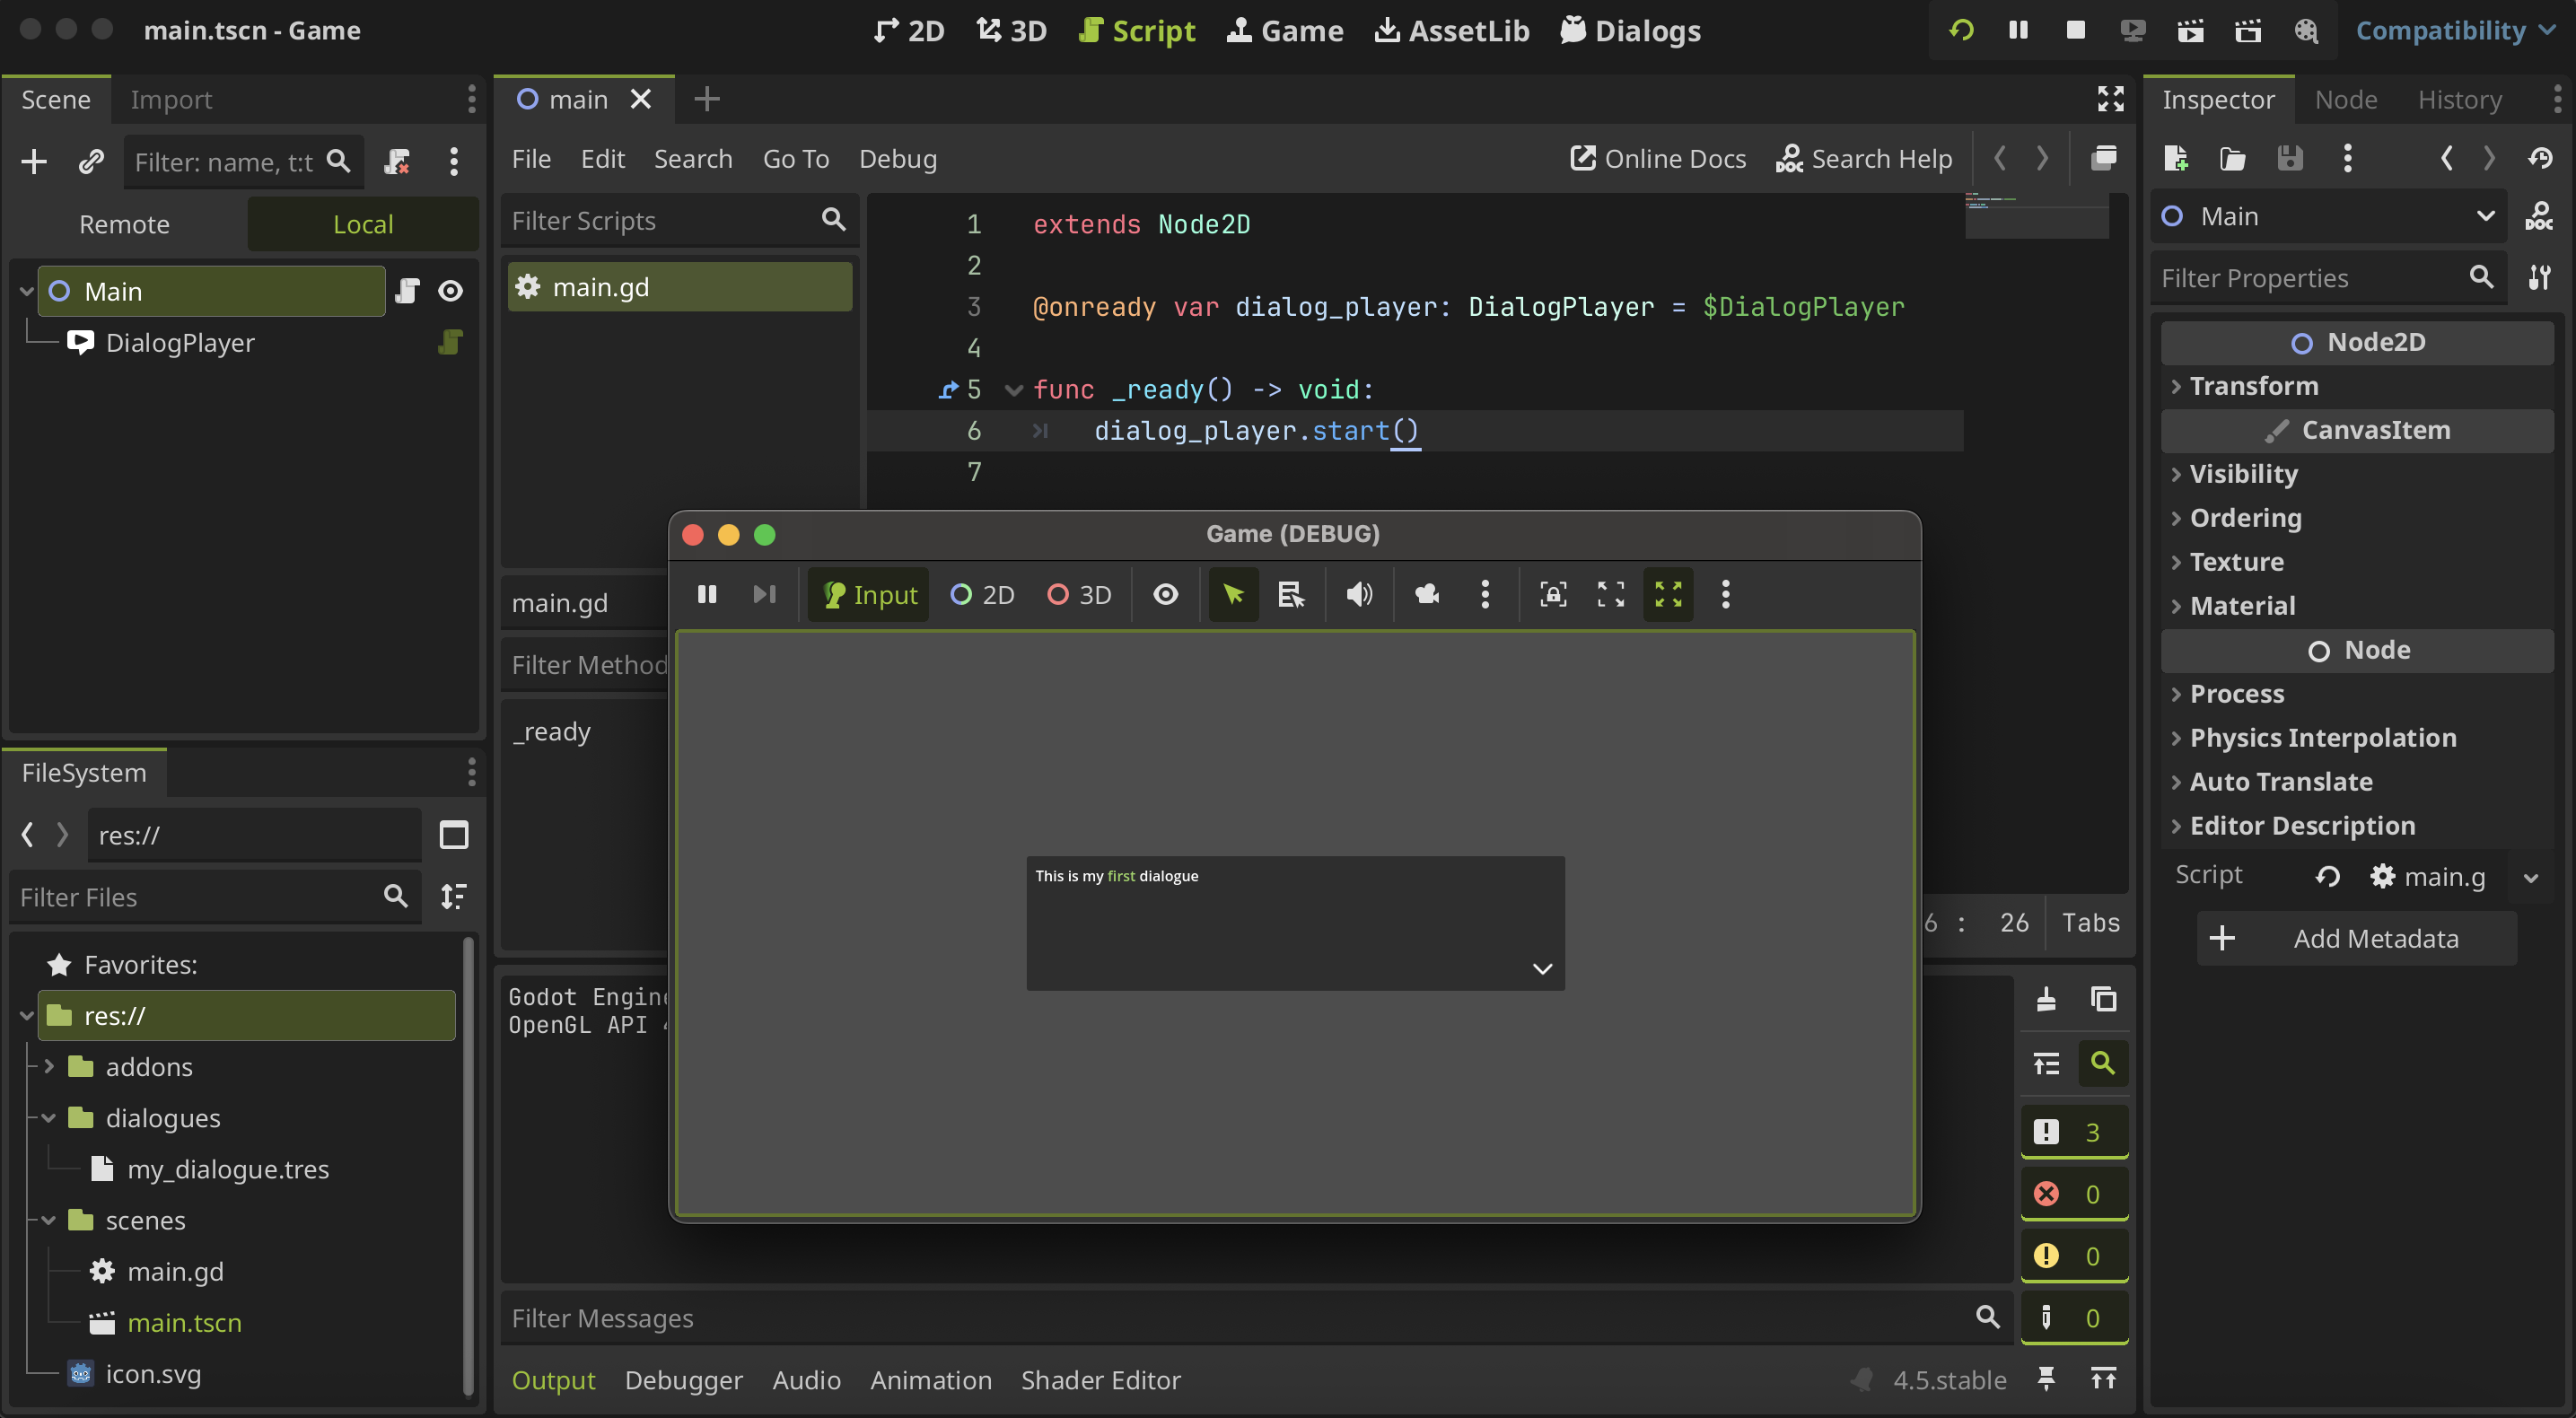
For example, we can add a script to the main node and add a reference to the DialogPlayer that we create before to then call the start() method where we want in the script.
extends Node2D

@onready var dialog_player : DialogPlayer = $DialogPlayer

func _ready() -> void:
	dialog_player.start()
In this case, we run the dialog in the _ready() method of the main node or when the scene begins again, so when you run the scene you will see the dialogue.
And that's it! So easy right? 🥳
You can also, create a dialog player node from code and use it in the same way, but you must first add it to the tree and configure the dialogue data file and start ID before running it.
extends Node2D

var dialog_data := load("res://dialogues/my_dialogue.tres")

func _ready() -> void:
	var dialog_player = DialogPlayer.new()
	add_child(dialog_player)

	dialog_player.set_dialog(dialog_data, "FIRST")
	dialog_player.start()
All the resources needed for the dialog will be loaded at once when the set_dialog() method is called, which can cause slowdowns if large resources need to be loaded.
For more details see the about dialogue resources section.
Using SproutyDialogs autoload
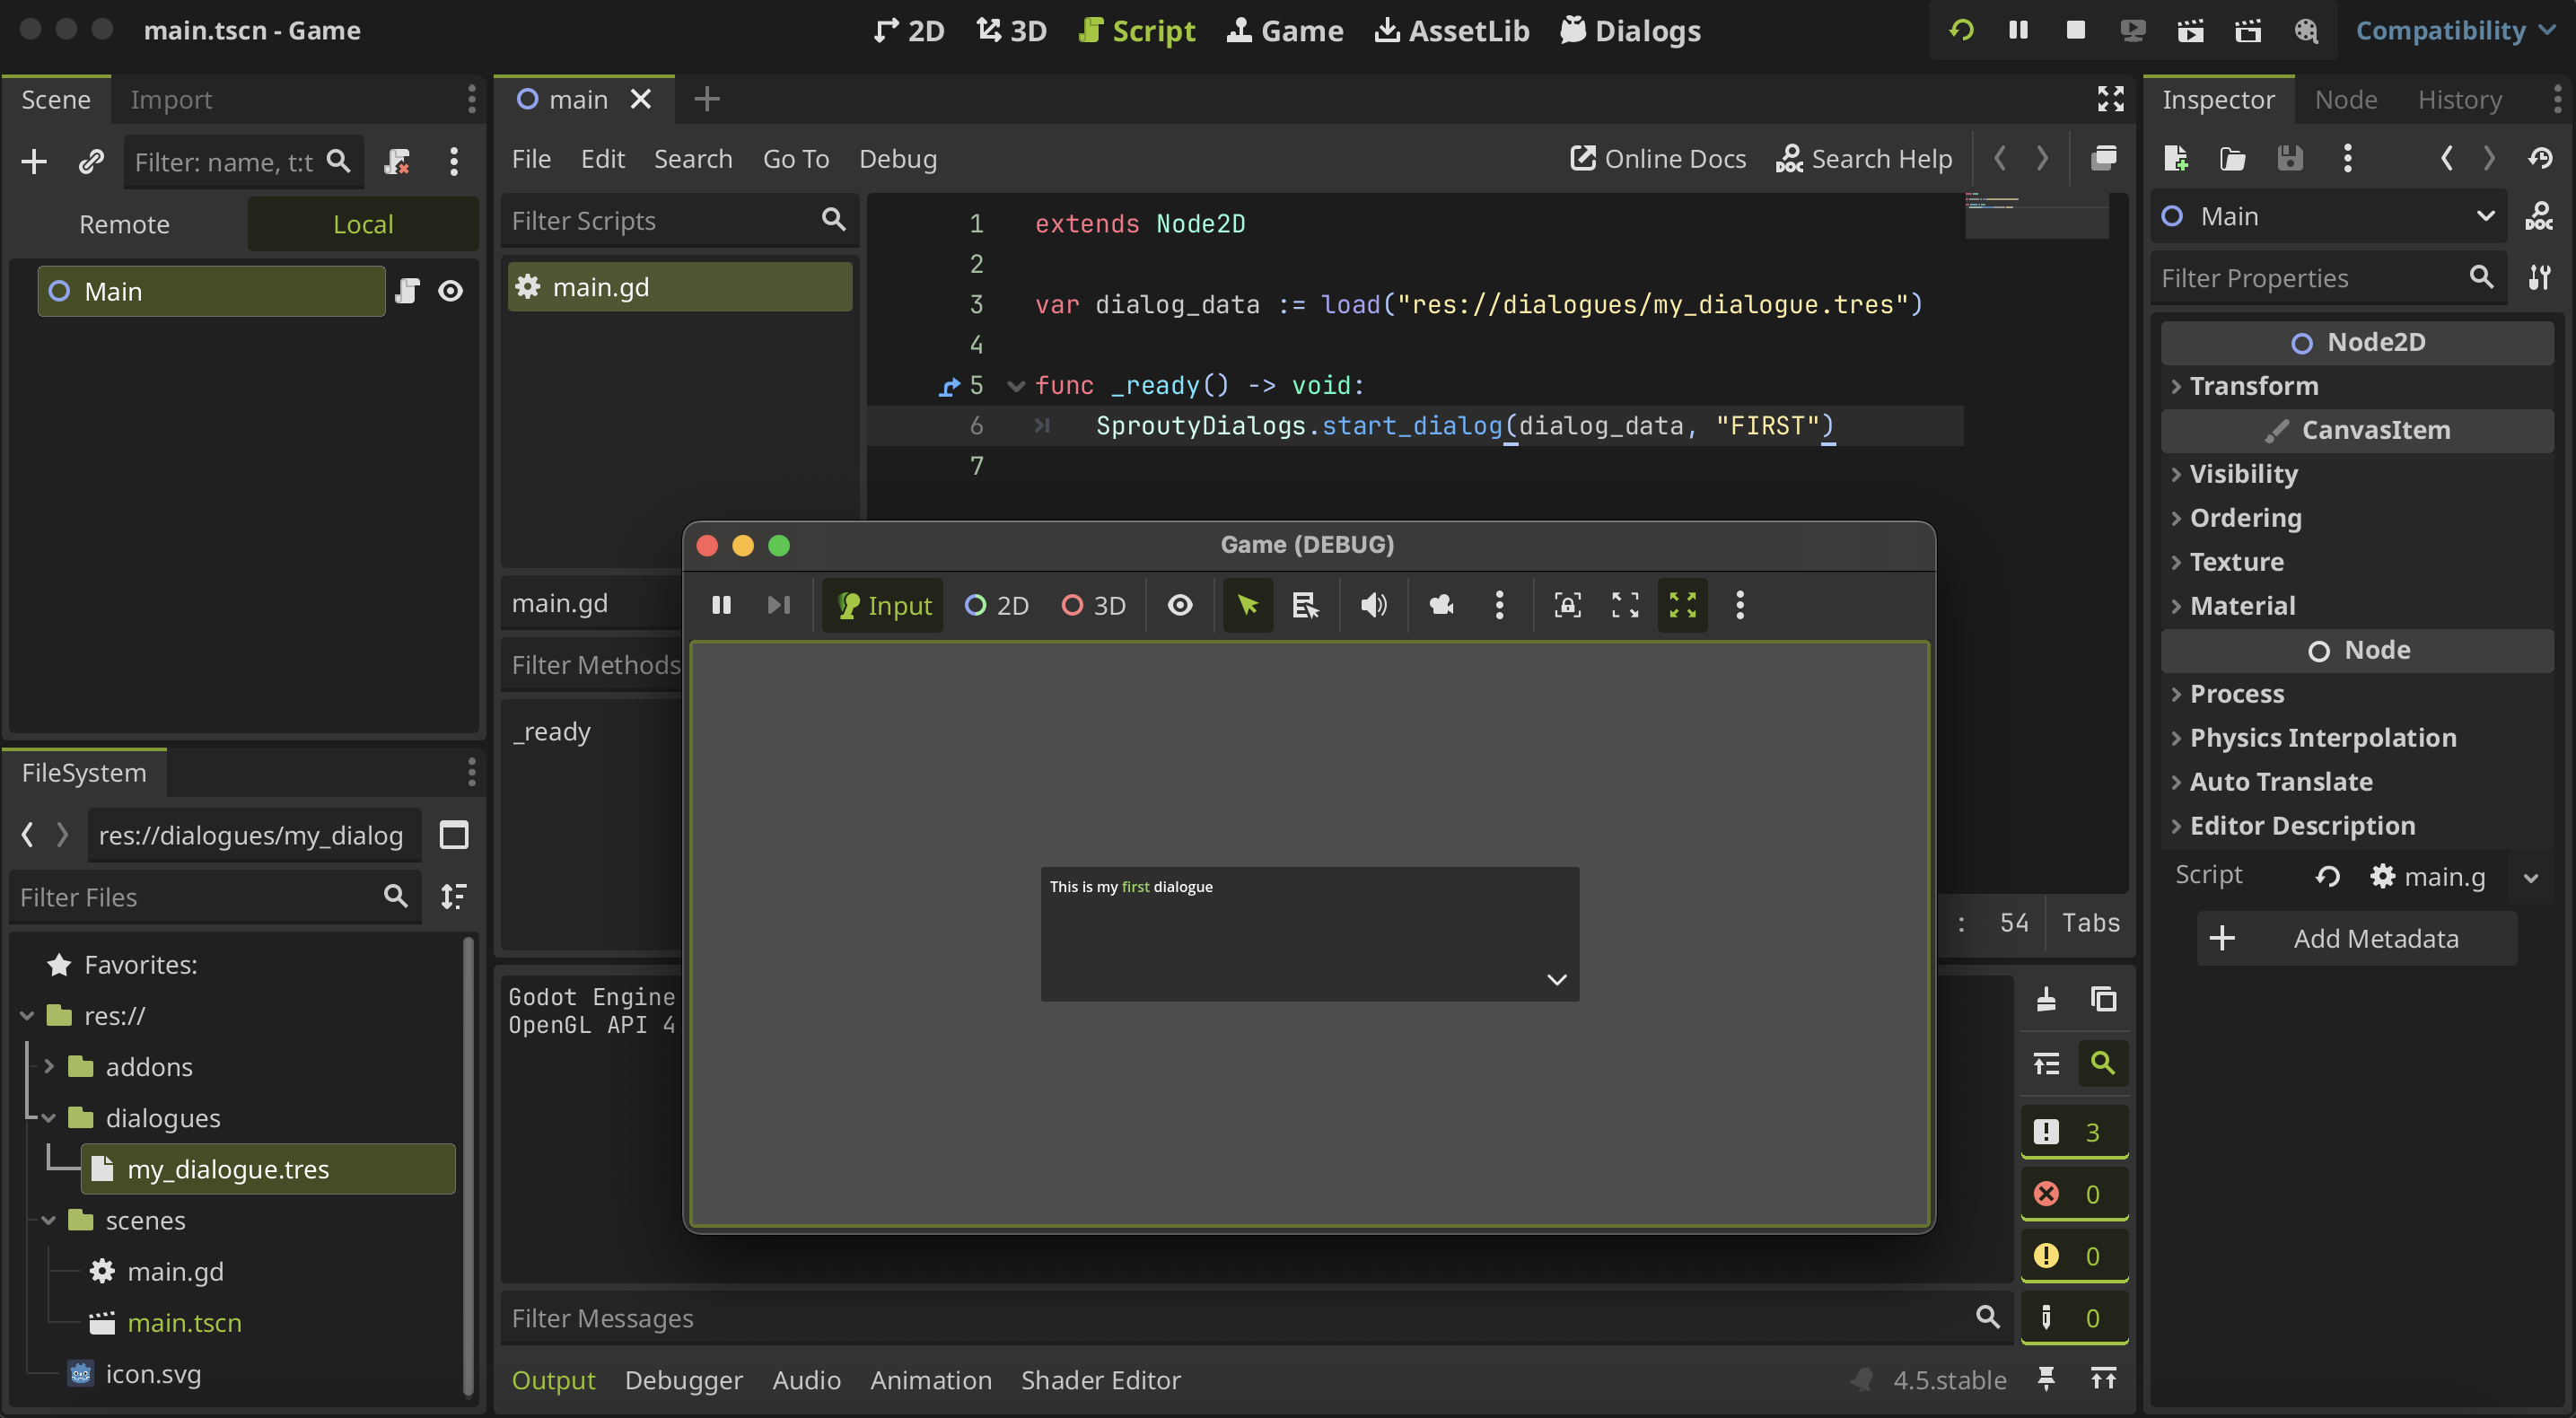
Otherwise, instead of create a DialogPlayer node in the scene, you can play a dialogue using the Sprouty Dialogs Autoload. You can call the start_dialog() method from the SproutyDialogs autoload passing the dialogue data resource and the ID of the dialogue tree you want to run.
extends Node2D

var dialog_data := load("res://dialogues/my_dialogue.tres")

func _ready() -> void:
	SproutyDialogs.start_dialog(dialog_data, "FIRST")
And in this way you can also see the dialogue when you run the scene.
This method also loads all the resources needed for the dialogue at once when the method is called, so may cause a slowdown if you have large resources to load.
For more details see the about dialogue resources section.
About dialogue resources
When you set a DialogPlayer node in a scene to run a dialogue, this node will load all the resources needed (dialog boxes, characters, portraits, etc) on ready, using the Resource Manager singleton.
The Resource Manager is going to keep track of the resources required for all the dialogues that will run in the current scene, which means, the resources needed by all the dialog players in the scene. The resource manager ensures that each resource is only loaded once, even if more than one dialog player uses it.
This way, resources are loaded only once at the start of the scene and then instantiated when needed in a dialog. Furthermore, they are destroyed when they are no longer needed.
For this reason, care must be taken when loading large resources, such as complex portrait scenes. If you set the dialog players from the code or use the Sprouty Dialogs autoload, the resources will be loaded when you call the set_dialog() or start_dialog() methods.
If you call these methods during runtime, there will be a slowdown due to resource loading. However, if you have set the DialogPlayer node directly in the scene, you will ensure that resources are loaded when the scene starts.
Override display parents
You can override the parents of your dialog boxes and portraits for each character in a dialogue to change the position of the dialog box or portrait on screen for a given dialogue, for example, or wharever you want. This allows more flexibility to display the dialogue components, for example, to use dialogue bubbles as dialog boxes that follow the position of the NPCs.
When you assign a dialogue data file that use characters in a DialogPlayer node, the inspector will add a new group of properties called Override Display Parents.
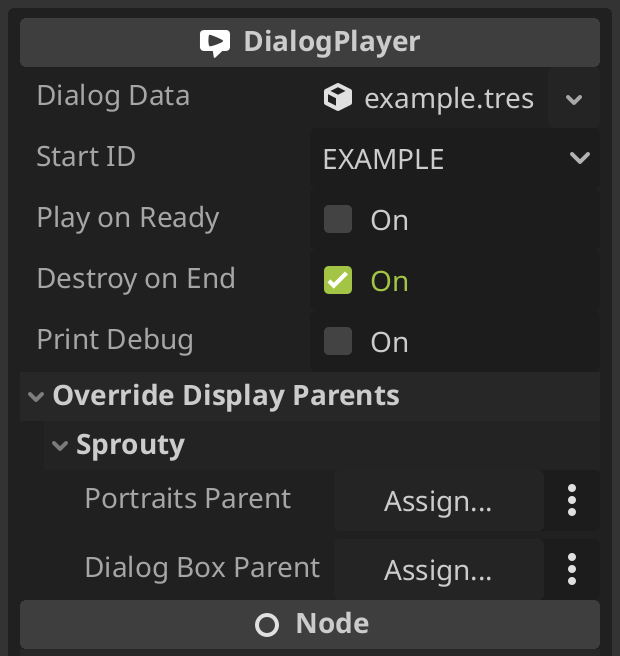
Here you will find a section for each character in the dialogues of the selected dialog data, where you can assign any nodes in the scene to override the parent of the character portraits or dialog box.
Also, you can set this from code. You must define a dictionary of the new portraits or dialog box parents, where each key is the character's key name (file name), and the value is the desired new parent node.
extends Node2D

var dialog_data := load("res://dialogues/example.tres")
var portrait_parents : Dictionary = {
	"sprouty": get_node("PortraitParent")
}
var dialog_box_parents : Dictionary = {
	"sprouty": get_node("DialogBoxParent")
}
You can then pass these dictionaries to the set_dialog() method in the dialog player node.
func _ready() -> void:
	var dialog_player = DialogPlayer.new()
	add_child(dialog_player)

	dialog_player.set_dialog(dialog_data, "EXAMPLE", portraits_parents, dialog_box_parents)
	dialog_player.start()
Or you can pass them in the start_dialog() method when you use the Sprouty Dialogs autoload.
func _ready() -> void:
	SproutyDialogs.start_dialog(dialog_data, "EXAMPLE", portraits_parents, dialog_box_parents)
Using DialogPlayer signals
The DialogPlayer nodes have some signals that you can use to handle the state of the dialogue. This signals are the following:
## Emitted when the dialog starts.
signal dialog_started()
## Emitted when the dialog is paused.
signal dialog_paused()
## Emitted when the dialog is resumed.
signal dialog_resumed()
## Emitted when the dialog is ended.
signal dialog_ended()
Also, there are two special signals:
## Emitted when a dialog option is selected.
signal option_selected(option_index: int, option_dialog: Dictionary)
## Emitted when a signal event is emitted.
signal signal_event(signal_id: String, args: Array)
First, the option_selected signal is emitted when an option is selected in the dialogue and returns the option index and a dictionary with the dialogue and translations of the selected option in the following format:
{
	"en" : "This is the option in Engligh"
	"es" :" Esta es la opción en Español"
}
For the other hand, the signal_event signal is emitted when a Signal Node is trigger in the dialogue tree. This signal returns the argument that you give to the event node to do wharever you need with it.
You can also handle the same signals from the Sprouty Dialogs autoload.
extends Node2D

var dialog_data := load("res://dialogues/example.tres")

func _ready() -> void:
	SproutyDialogs.dialog_ended.connect(_on_dialog_ended)
	SproutyDialogs.start_dialog(dialog_data, "EXAMPLE")

func _on_dialog_ended() -> void:
	SproutyDialogs.dialog_ended.disconnect(_on_dialog_ended)
	print("The dialogue has ended!")