Event Nodes
The event nodes are the building blocks of the dialogue system. They are graph nodes that can trigger different events in the dialogue. Let's take a look at each of them.
Start Node
This node define the beggining of a dialogue tree. You must assign it an ID that will be the name or reference for calling the dialogue tree later. Also, you can see that this node have a play button, you can click on it to test your dialogue tree.
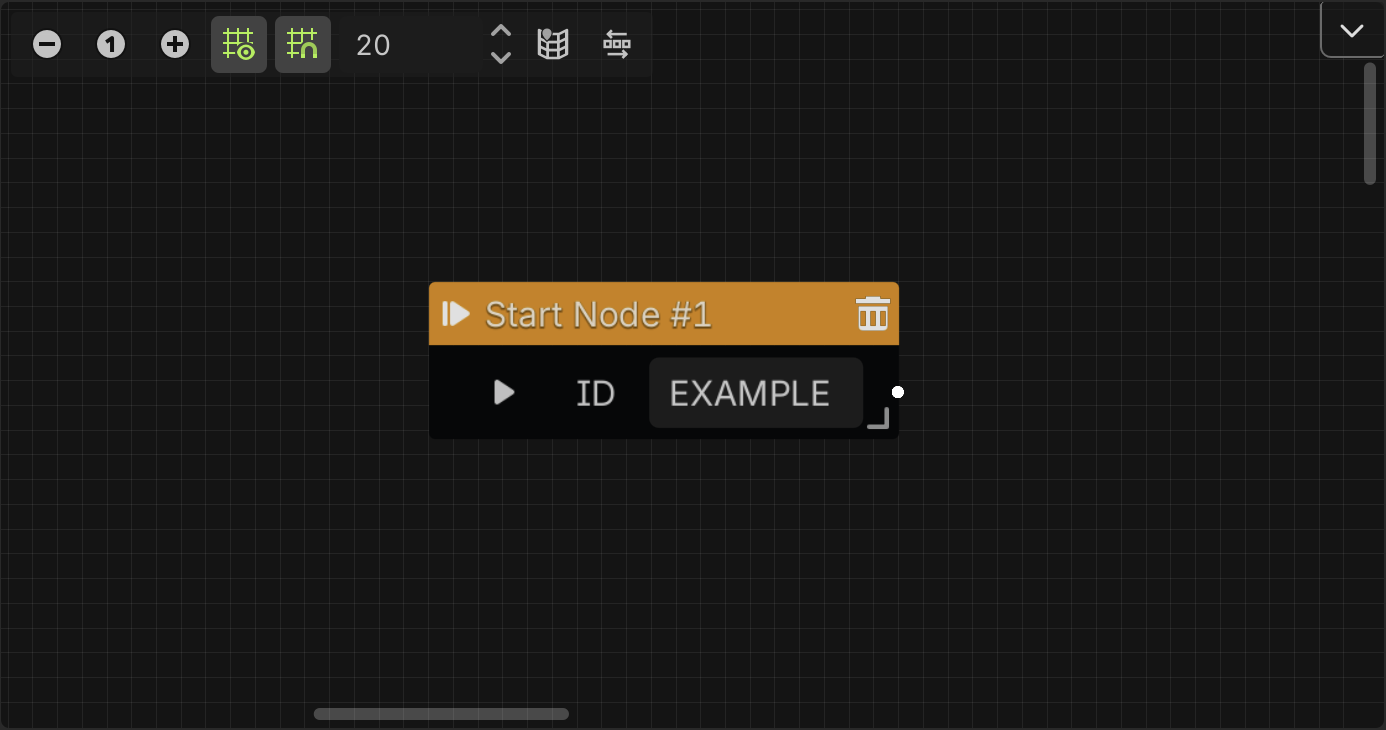
You can have more than one dialogue tree in the same dialogue data file, so each Start Node needs an unique ID. This identifier not only defines the dialogue tree, they are also used to identify the dialogues itself.
If you want to use translations with CSV files, you must ensure that all your dialogue trees in the project have unique IDs, not only the dialogue trees in the same file.
Dialogue Node
This node is where you set the dialogues to display. This node allows you to write your dialogues and assign a character to the dialogue, selecting a character data file, and then select a portrait from it to display on screen when the dialogue is played.
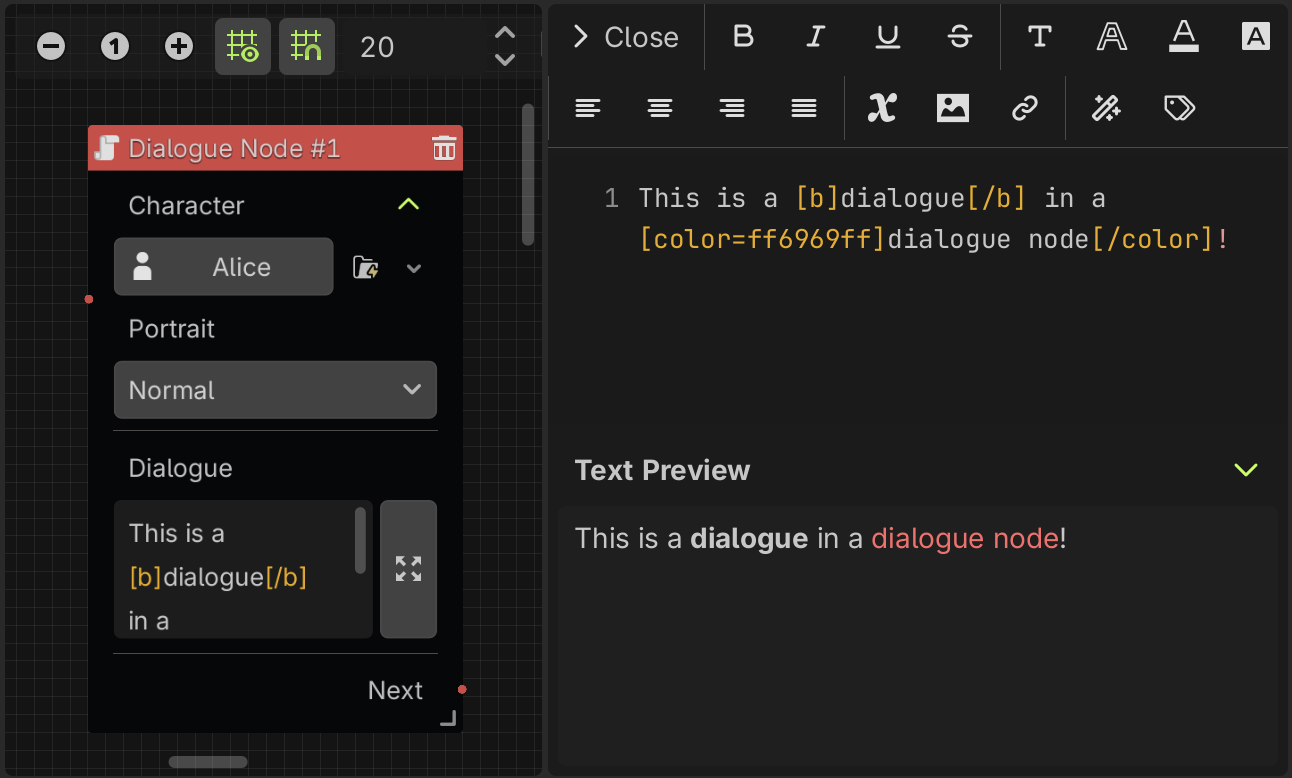
To write your dialogues, you can expand the text box clicking on the right button that will open the text editor on the right side. Here you can easily add BBCode tags to the text in a user-friendly interface, so you don't have to remember all the tags and its properties. For more details about the text editor, see the text editor section.
When you use translations, this node also allows you to edit the translations here in the same way. A text box is added for each locale or language that you have set in the translation settings, and can be accessed through a new expandable section called "translations" at the bottom of the node.
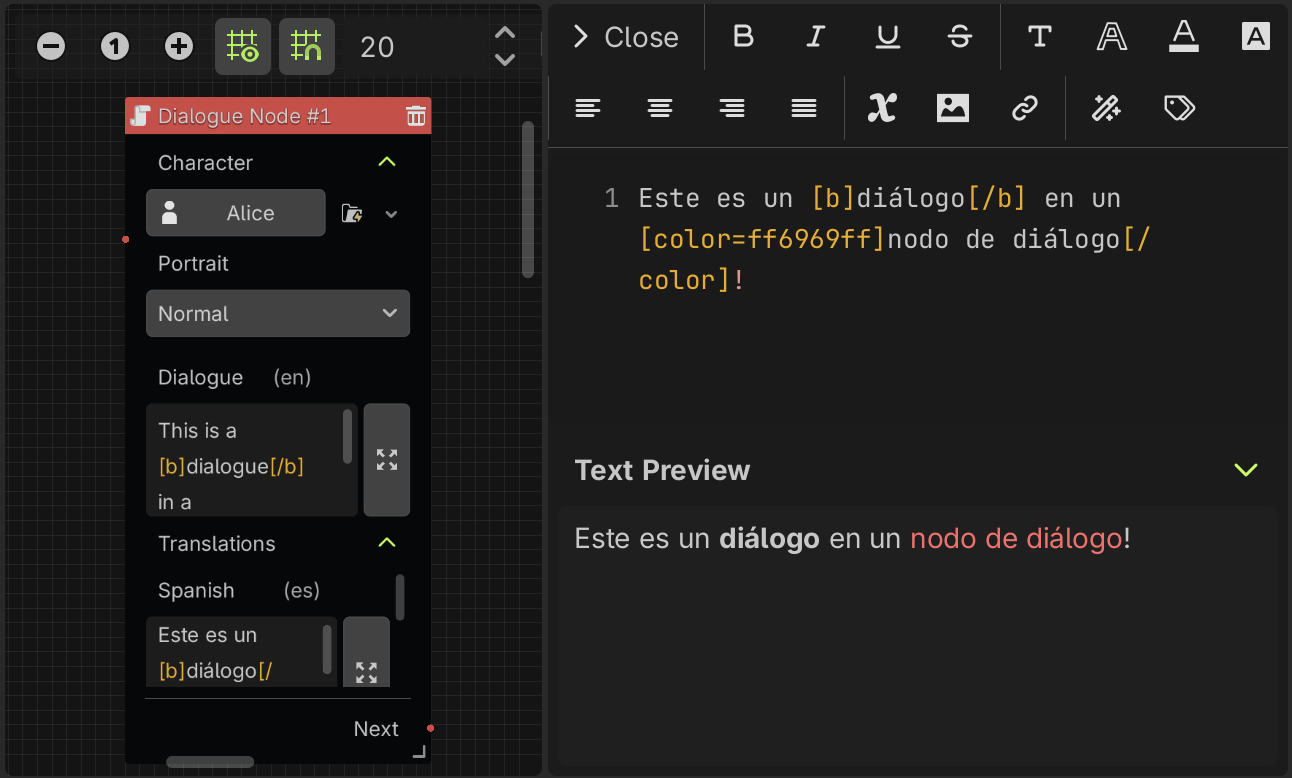
The main dialogue text box is going to have the dialogue in the default locale, that you can set in the translation settings. In this example, you can see that the default locale is English (en).
Options Node
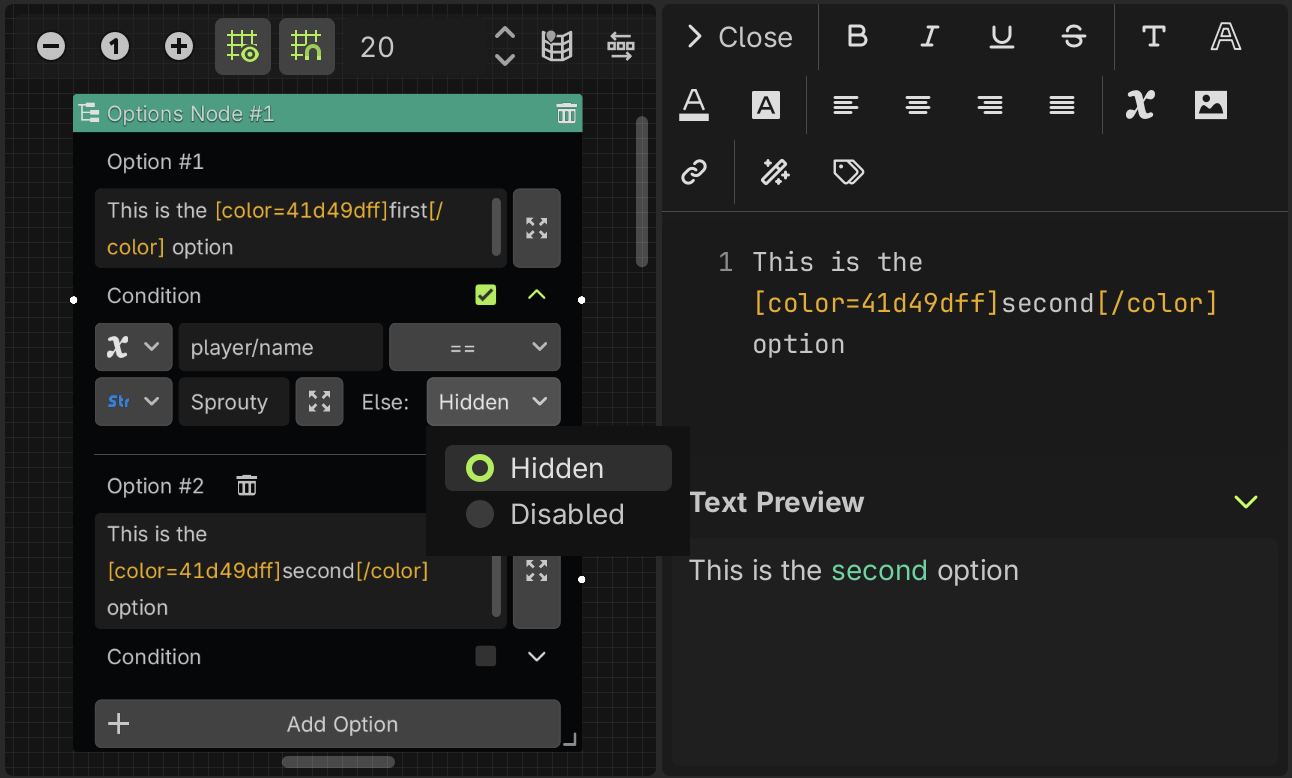
This node allows you to add options or choices to the dialogue. You can add multiple options and connect them to any node to define different actions or branches of the dialog tree depending on the selected option.
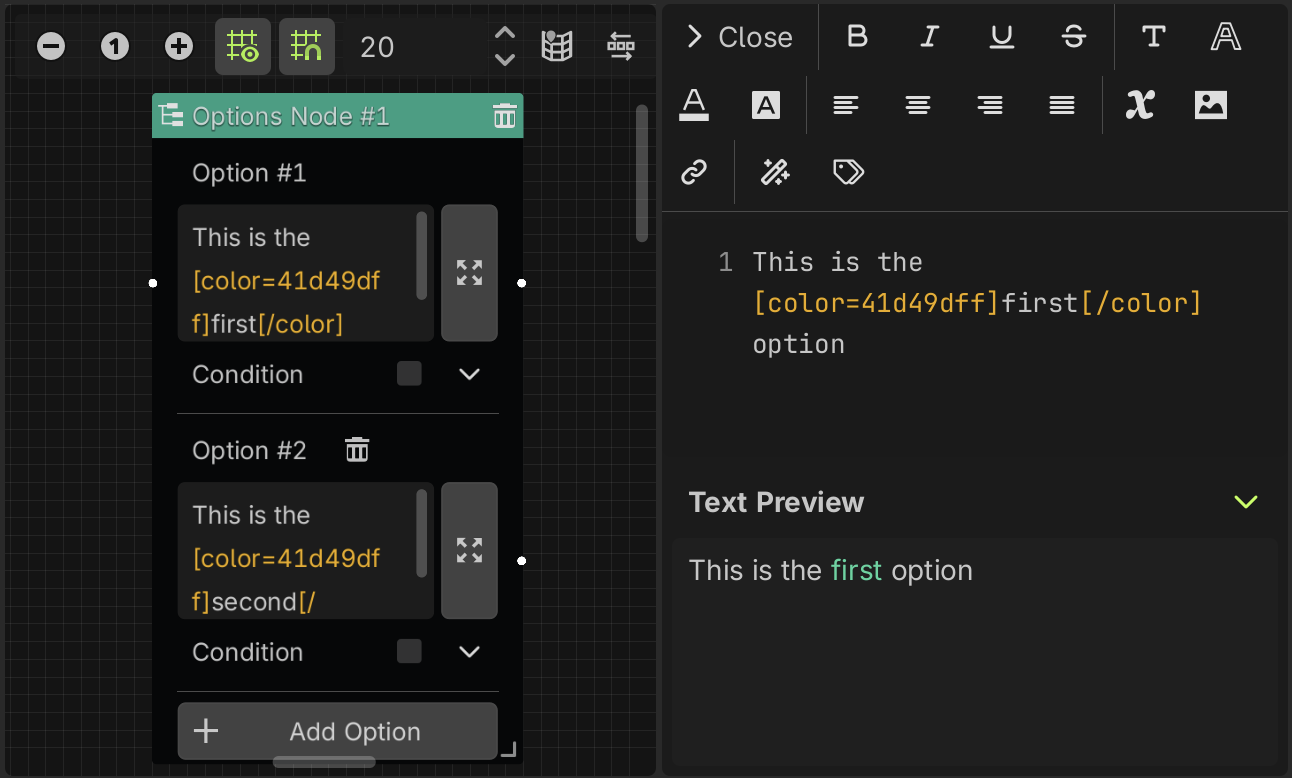
You can set conditions to display the options, if the condition is not met, you can set the option as "hidden" or "disabled", otherwise, the option will be displayed normally.
Each option will be displayed in a DialogOption node when the dialogue runs. You can customize how looks the options buttons in your dialog box. For more information see the customize options section.
When you use translations, this node also allows you to edit the translations here in the same way that in the dialogue nodes. For each option, a new expandable "translations" section is added at the bottom, with a text box for each locale or language that you have set in the translation settings.
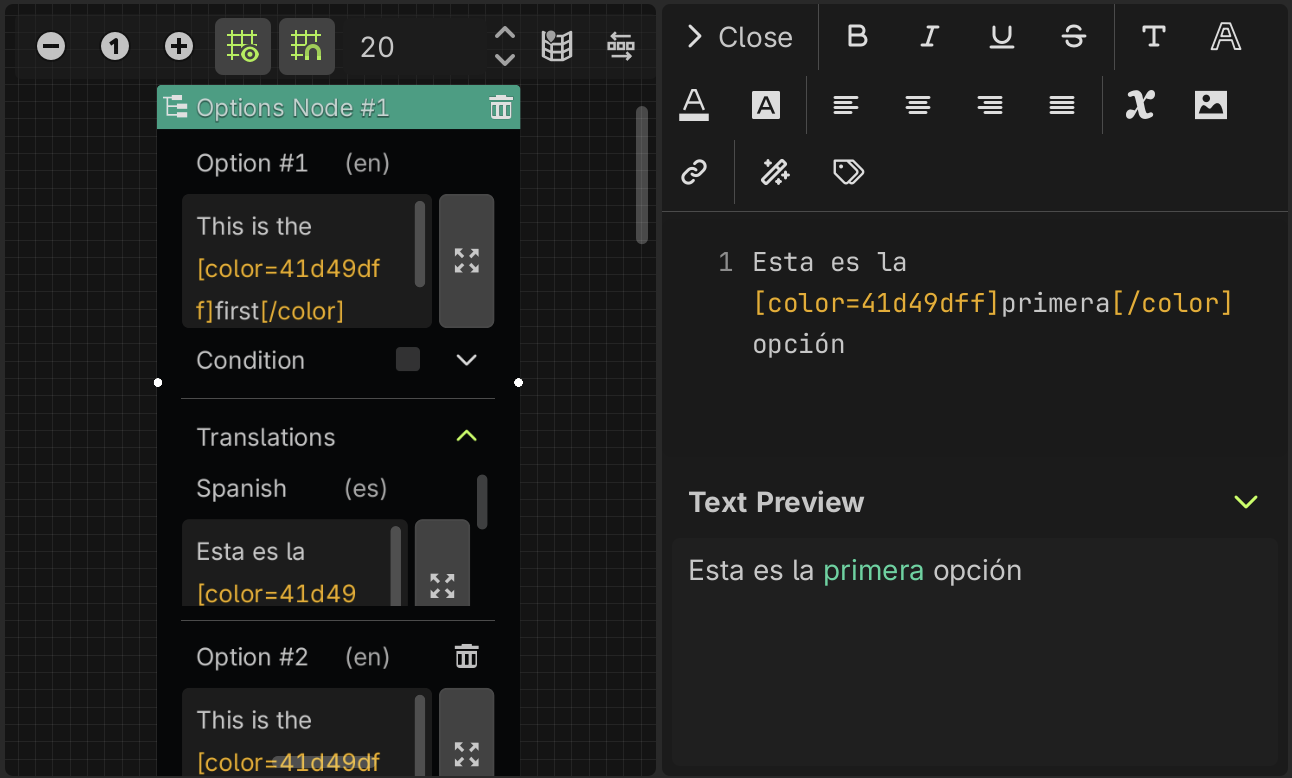
In the same way as before, the main option text box is going to have the dialogue in the default locale, that you can set in the translation settings. In this example, the default locale is English (en).
Condition Node
This node allows you to condition the flow of the dialogue tree. You can check a relation between different types of variables, and then if the condition is true, the dialogue tree is going to continue with the event node connected to the true slot, otherwise, is going to continue with the event node connected to the false slot.
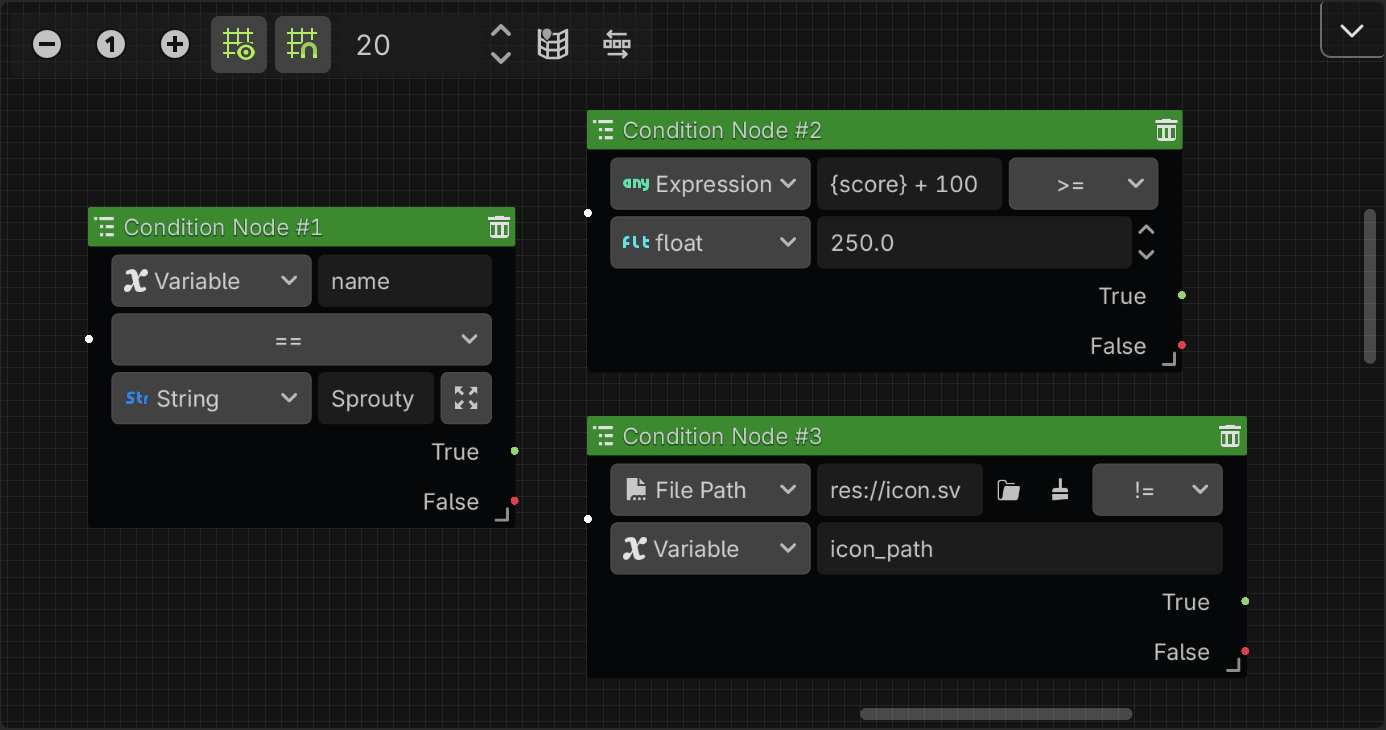
You can compare variables, expressions, values, etc. For more information about it, see the variables section.
Set Variable Node
This node allows you to change the value of a variable during the dialogue tree. You can select the type of the variable, then write the name of the variable that you want to change, select an assignment operator (such as: =, +=, *=, etc) and give it the new value. The value field updates depending on the variable type.

You can set the variables defined in the plugin or global variables. Considering the following:
- If you variables is inside a group you need to specify the whole path to it:
group1/group2/variable - If you want to use global variables, you need to specify the autoload name followed by a dot and the variable name:
AutoloadName.variable.
For more information about variables, see the variables section.
Call Method Node
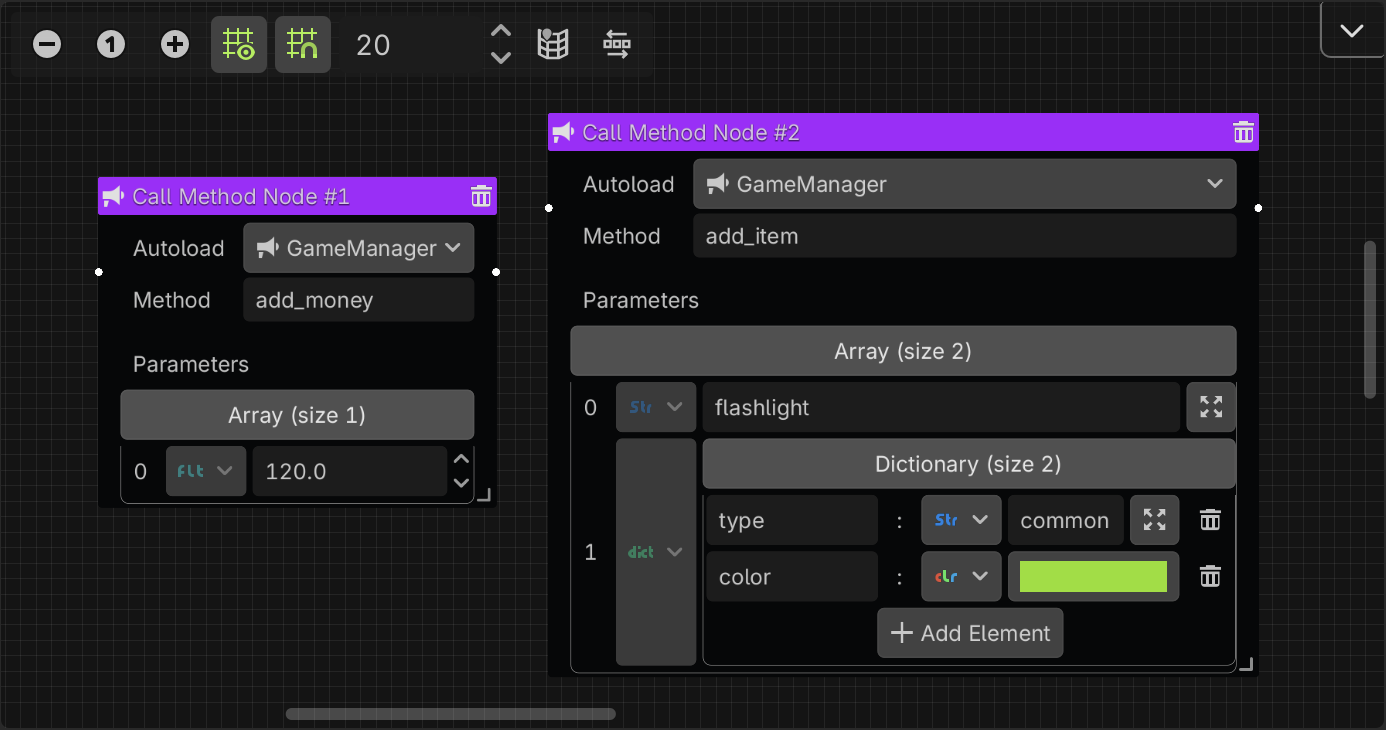
This node allows you to call a method from an Autoload. First, you need to select an Autoload, then search the method name and select one from the popup list. If the method have parameters, you will see that the parameters array is going to update. You can click the array field button to see and edit each value.
Signal Node
This node allows you to emit a signal during the dialogue. It has a identifier field, that is an String that you can use to identify the signal when its emitted, and allows to add extra arguments in an array.
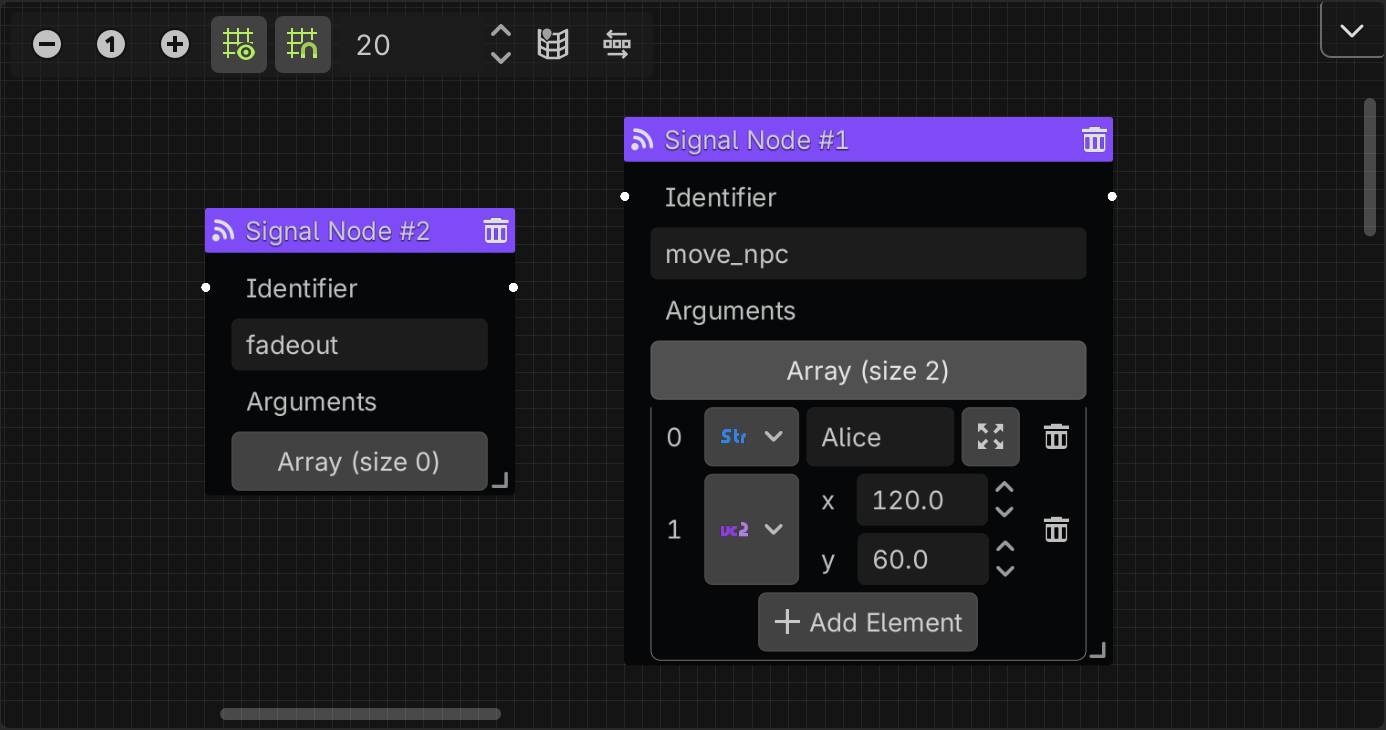
This will emit a signal with two arguments: the identifier string and the extra arguments array.
To catch the signal, you need to connect the signal_event signal from the DialogPlayer node where you run the dialogue. As shown in the using dialogues section.
Wait Node
This node allows you to wait a few seconds between events in a dialogue tree. You must define the wait time in seconds in the input field.
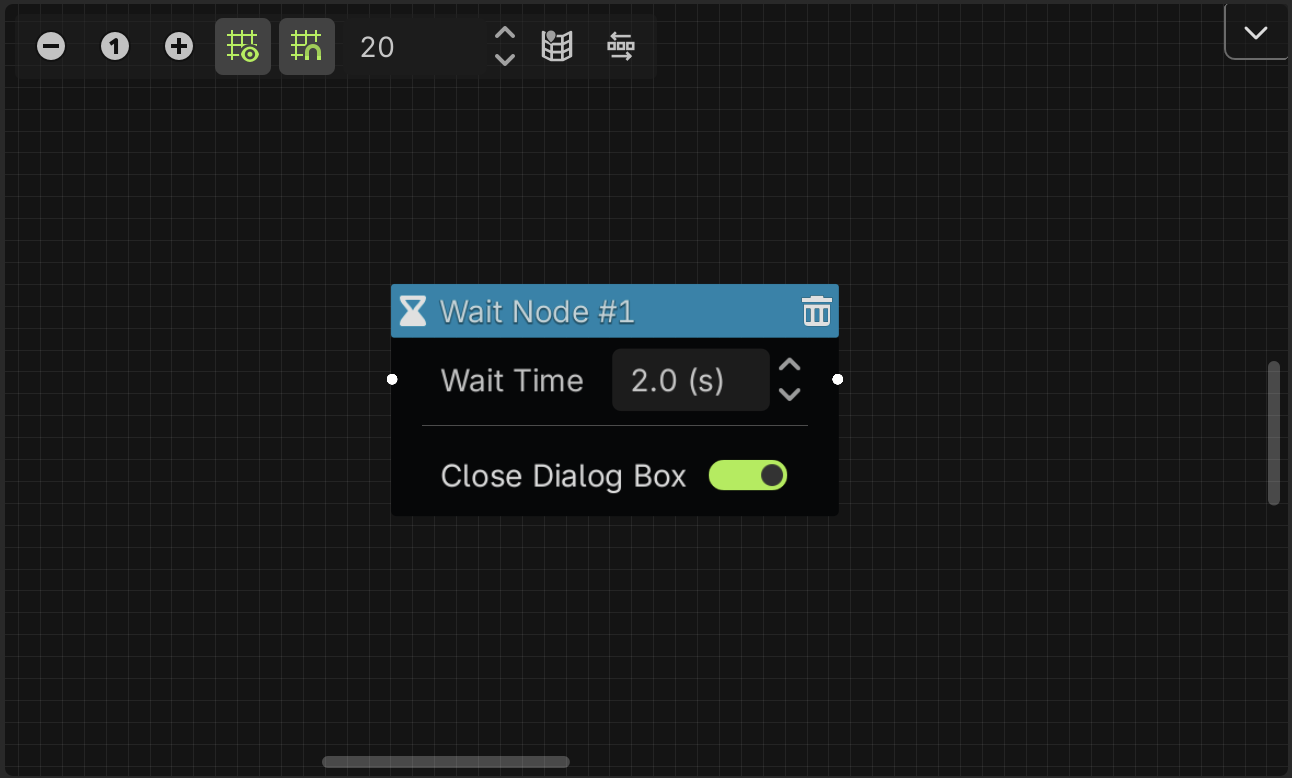
You can also choose whether the dialog box will close while you wait or remain on the screen. This can be useful for example if you want to wait for a few seconds before showing the next dialogue, but you don't want the dialog box to remain with the previous text on the screen.
Jump To Node
This node allows you to jump to another dialogue tree. You need to specify the ID of the dialogue tree that you want to jump to, that is defined in the Start Node of the dialogue tree.
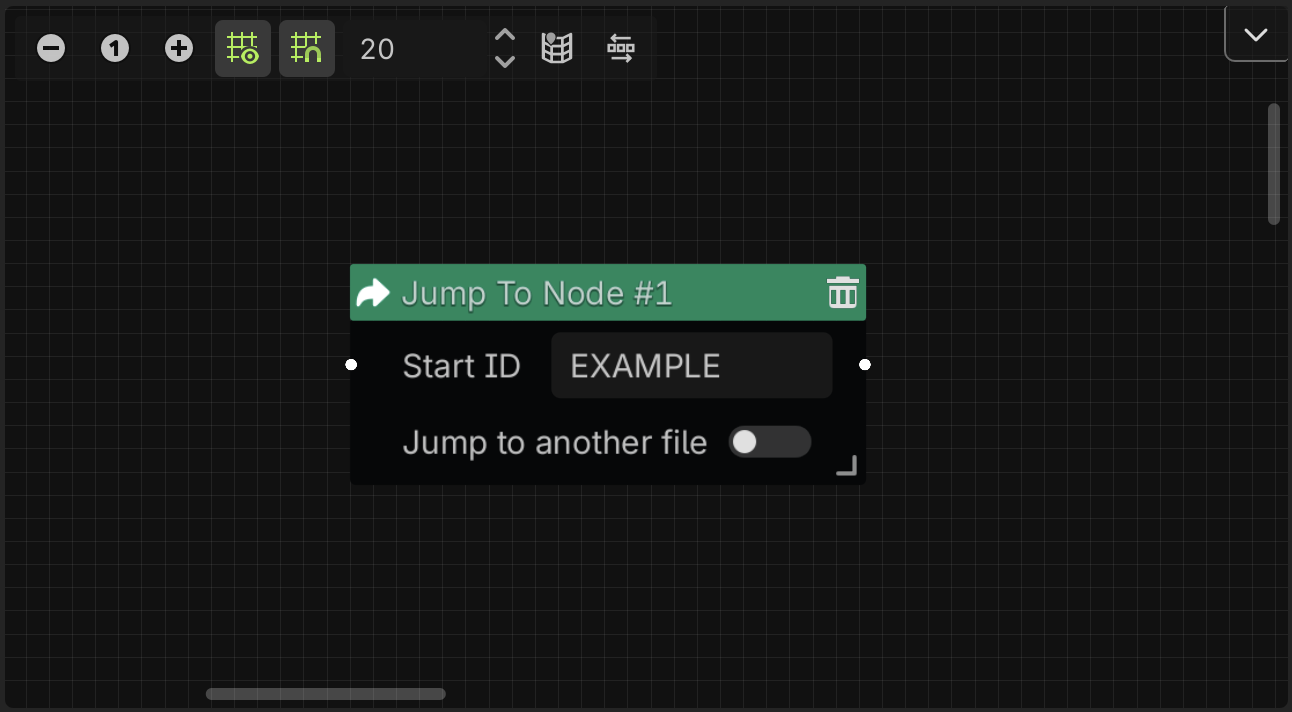
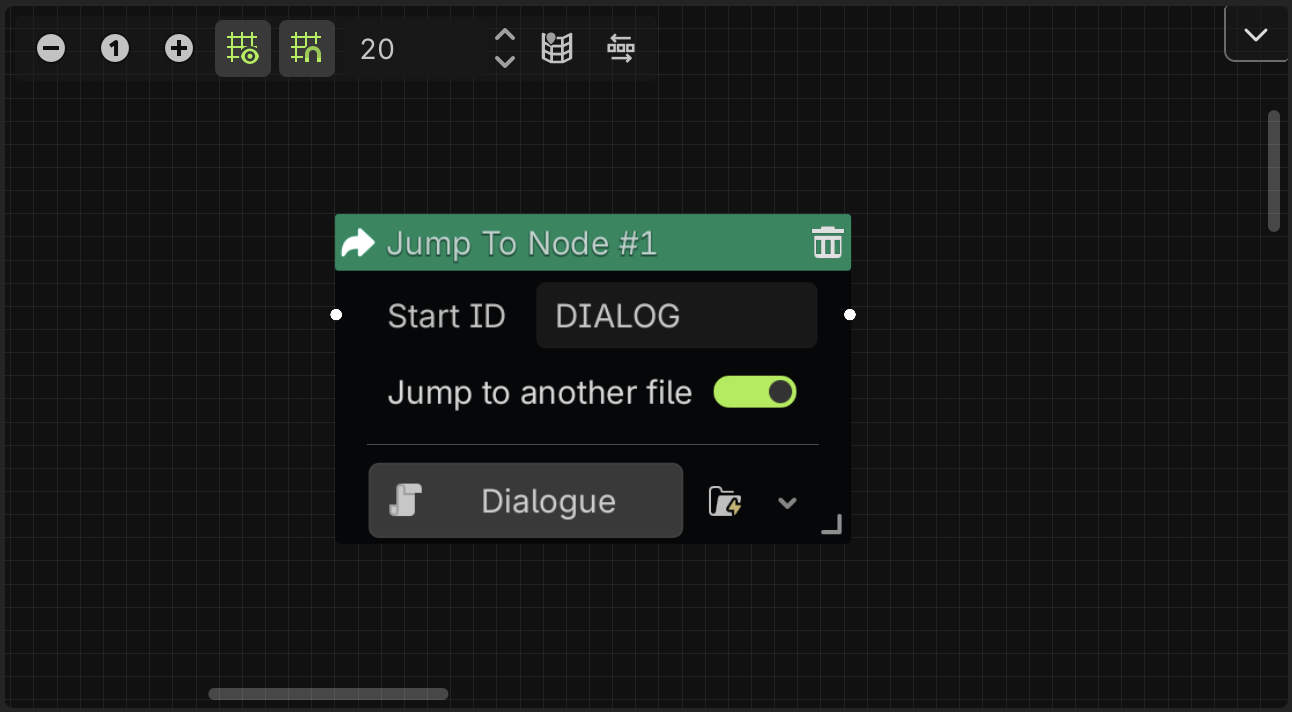
You can also jump to a dialogue tree from another dialogue file. For that, you need to check the Jump to another file toggle, assign the dialogue file and then specify the ID of the dialogue tree you want to jump to.
If the node has an output connection, the dialogue system will return to the current dialogue tree after finishing the jumped dialogue tree, and continue from the connected node.
Otherwise, if you don't connect any node to the output slot, the dialogue system will not return to the current dialogue tree after finishing the jumped dialogue tree.
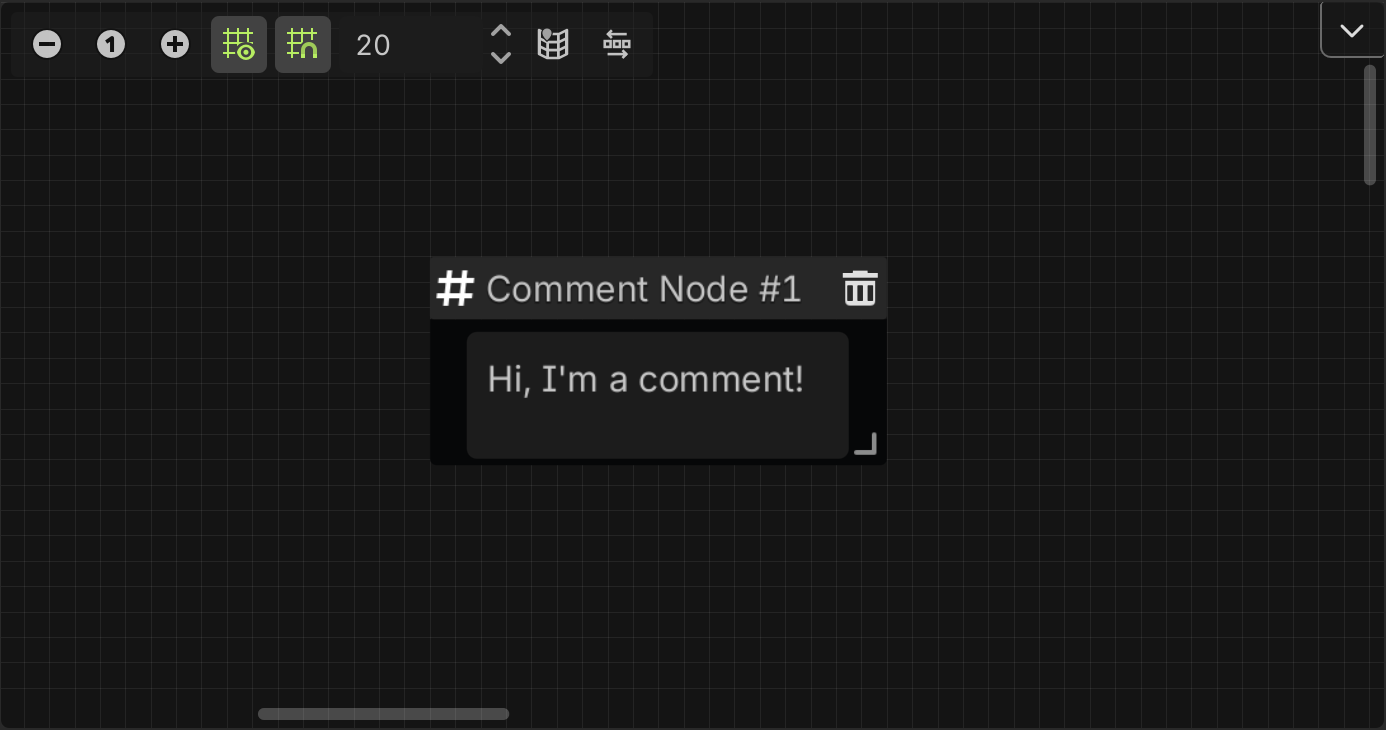
Comment Node
The node is useful to add comments in the graph. Do nothing, it is only for reference.
In the future, more event nodes will be added!
Also, you can create your own custom event nodes. See the custom event nodes section for more information.