Create a Dialogue
In this section you'll go to learn how creating your own dialogs and use it in your games.
Dialogue data
First, you need to create a new dialogue data file that will contain all the dialogue information, which will later be used by a DialogPlayer node to display the dialogues in your game. The dialogue data files are saved as .tres resource files.
To create a new dialogue data file, click on the New Dialogue button, locate where you want to save the file, give it a name and click on Create File.
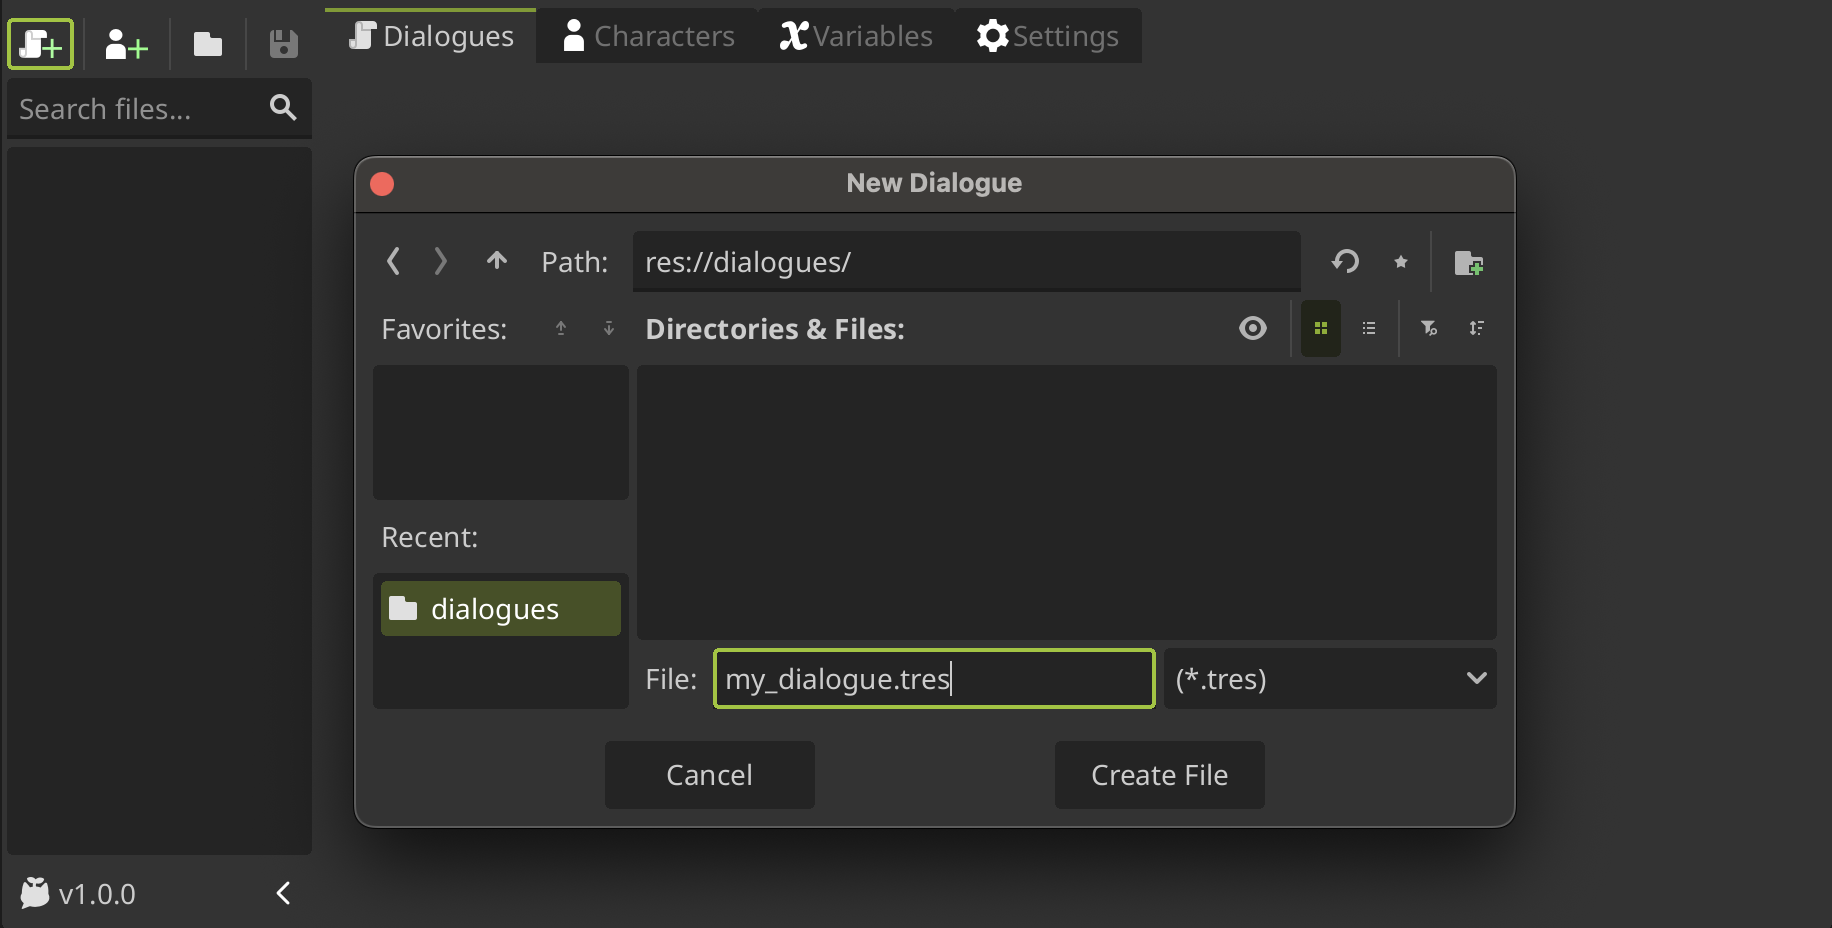
It is recommended to create a folder only to store your dialogues, especially if you want to use translations later on.
Making a dialogue tree
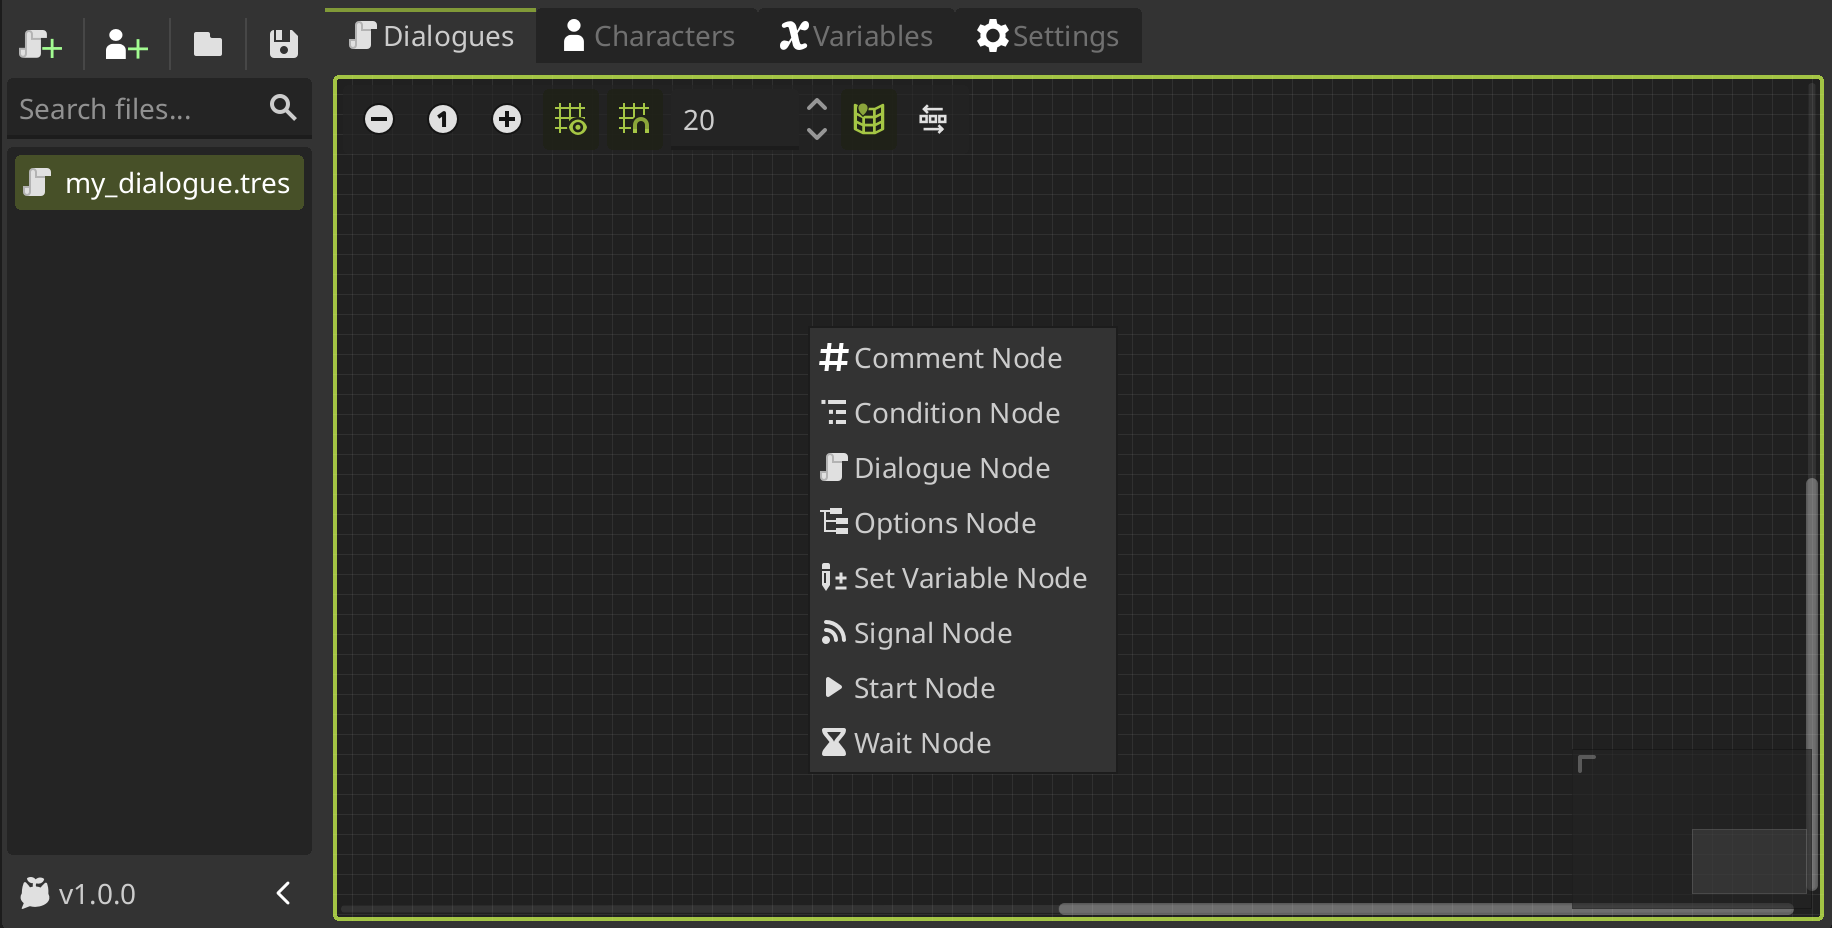
Now you can start to create your dialogue adding event nodes to it. Each node represents a event in a dialogue tree. To add a new node, right click anywhere in the graph and select the node you want from the popup list.
Adding a Start Node
To create a dialogue, you must first add a Start Node. This node define the beggining of a dialogue tree. You must assign it an ID that will be the name or reference for calling the dialogue tree.
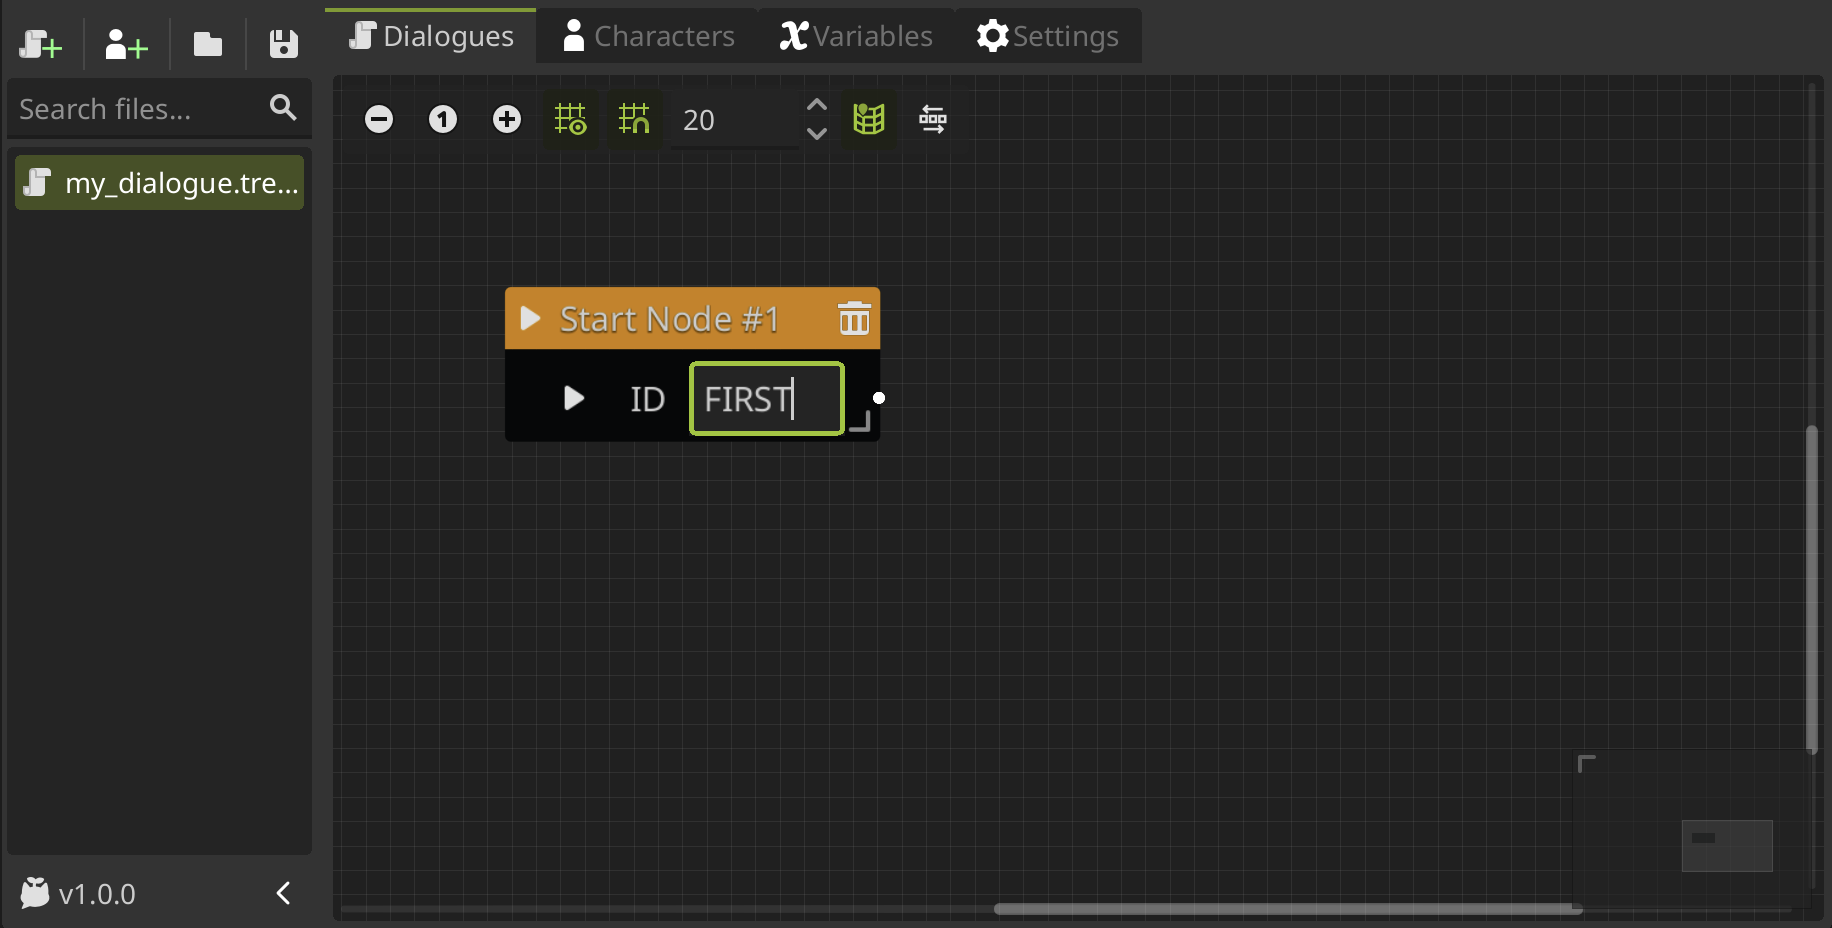
You can have more than one dialogue tree in the same dialogue data file. So for reference which dialogue tree you want to play from the file you need to set the ID.
The
Start Nodealso have a play button, you can click on it to test your dialogue tree.
The same ID cannot be used in more than one start node. If you want to use translations, you must ensure that all dialogue trees have unique IDs.
Connecting nodes
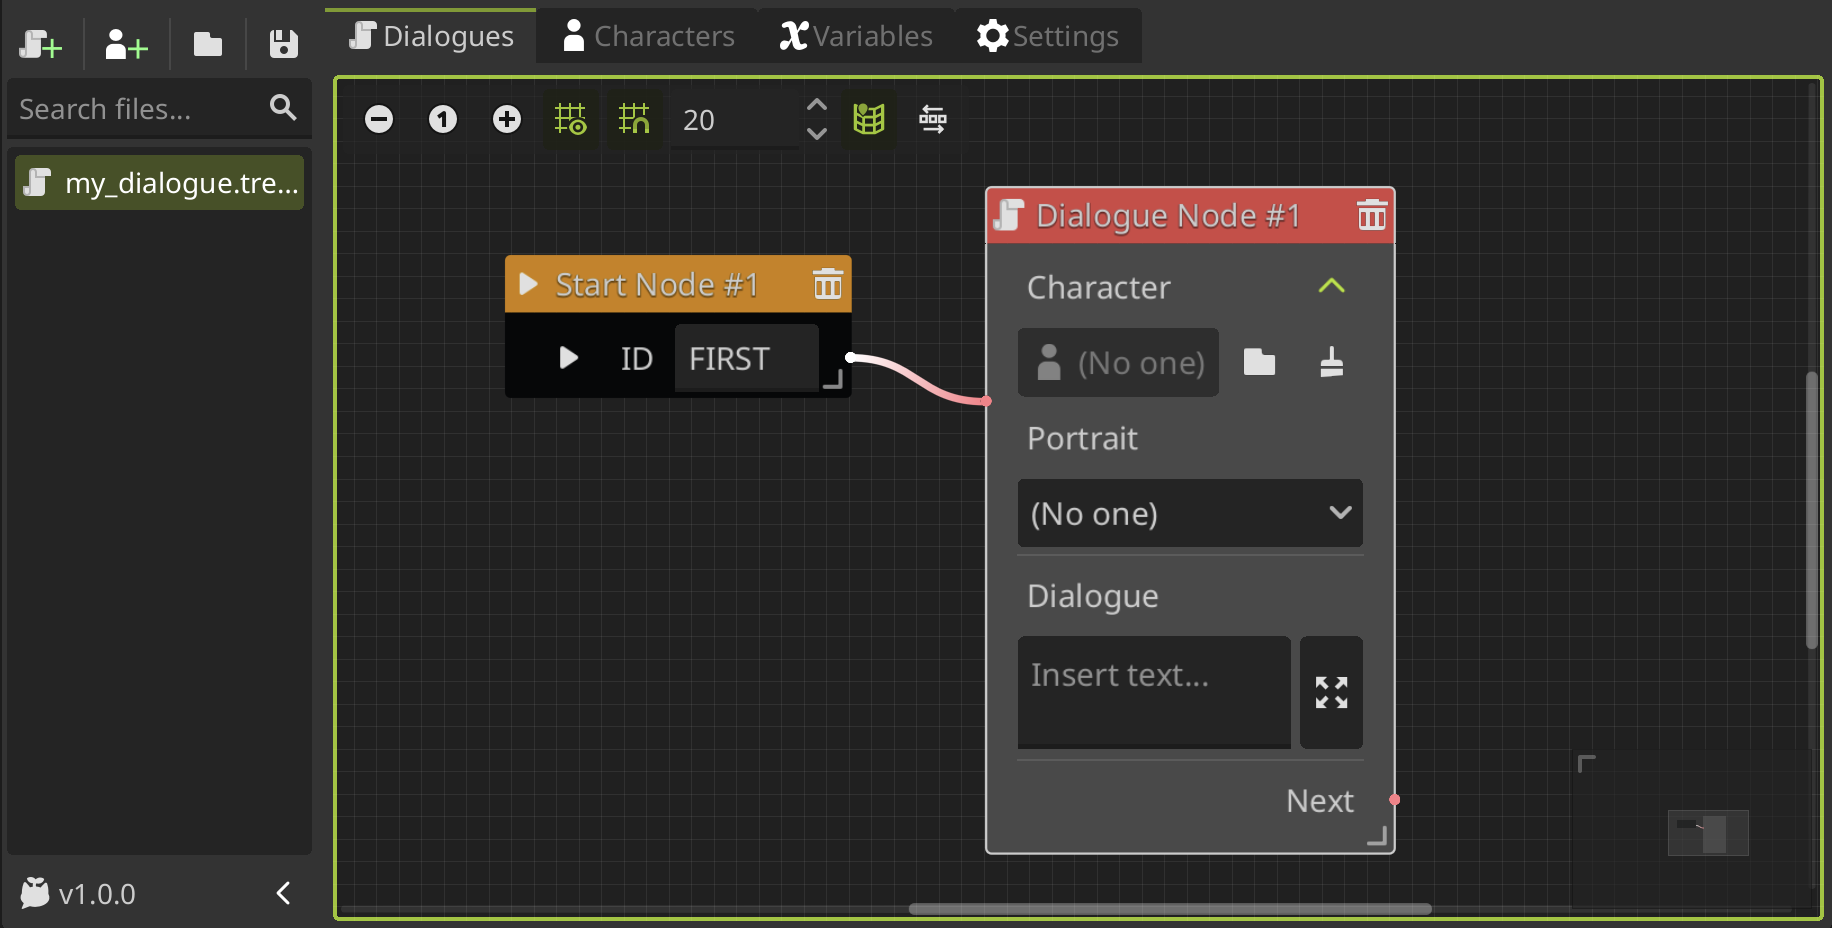
Then you can add nodes and connect them to the Start Node. You can click and drag the slot in the right side of the node and release it anywhere on the graph to add a new node selecting it from the node list. The node will be added and will be automatically connected to the Start Node.
Otherwise, you can right click on an empty space in the graph, add a new node from the list, and then connect it to the previous node by dragging from the left slot to the right slot of the Start Node or vice versa.
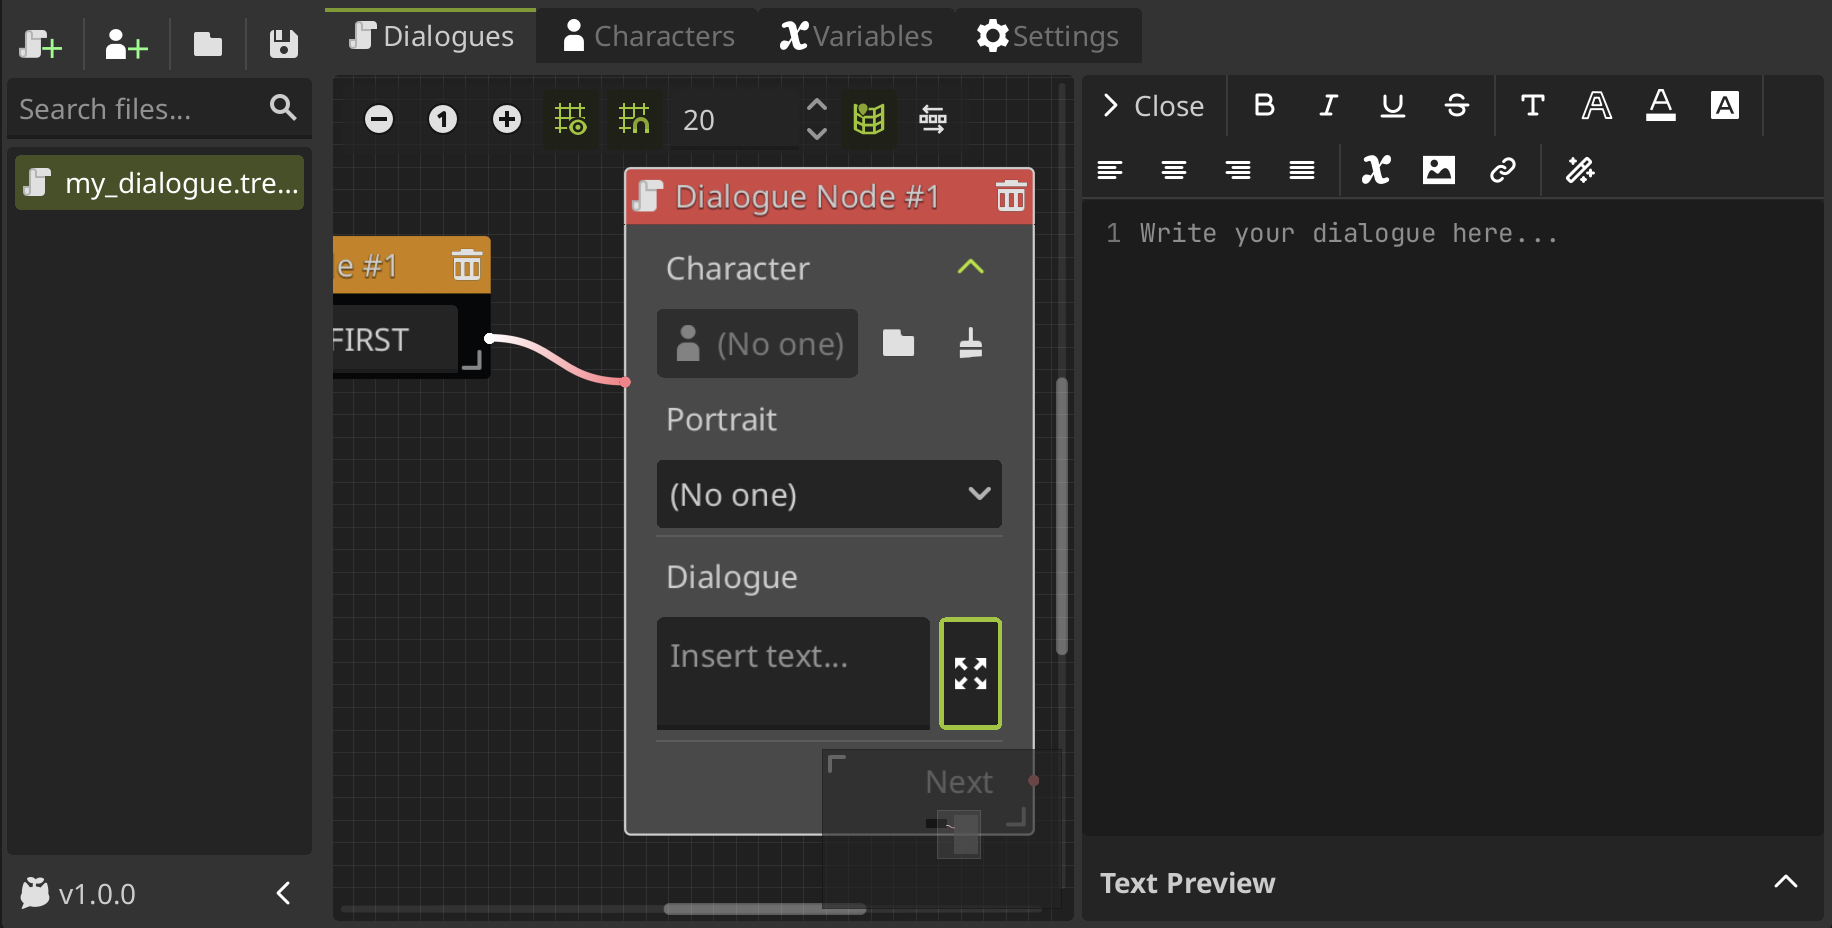
To create a dialogue to display, we'll going to add a Dialogue Node which allows to write dialogue text.
Write a dialogue
The Dialogue Node allows you to write dialogue text that will going to be displayed on screen. This node allows you to assign a character and portrait to the dialogue, but we'll going to skip this for now, because we don't know how to create characters yet.
Therefore, you can write the dialogue in the dialogue text box, but it is a bit small and may be inconvenient, so you can expand the text box clicking on the right button that will open the text editor on the right side.
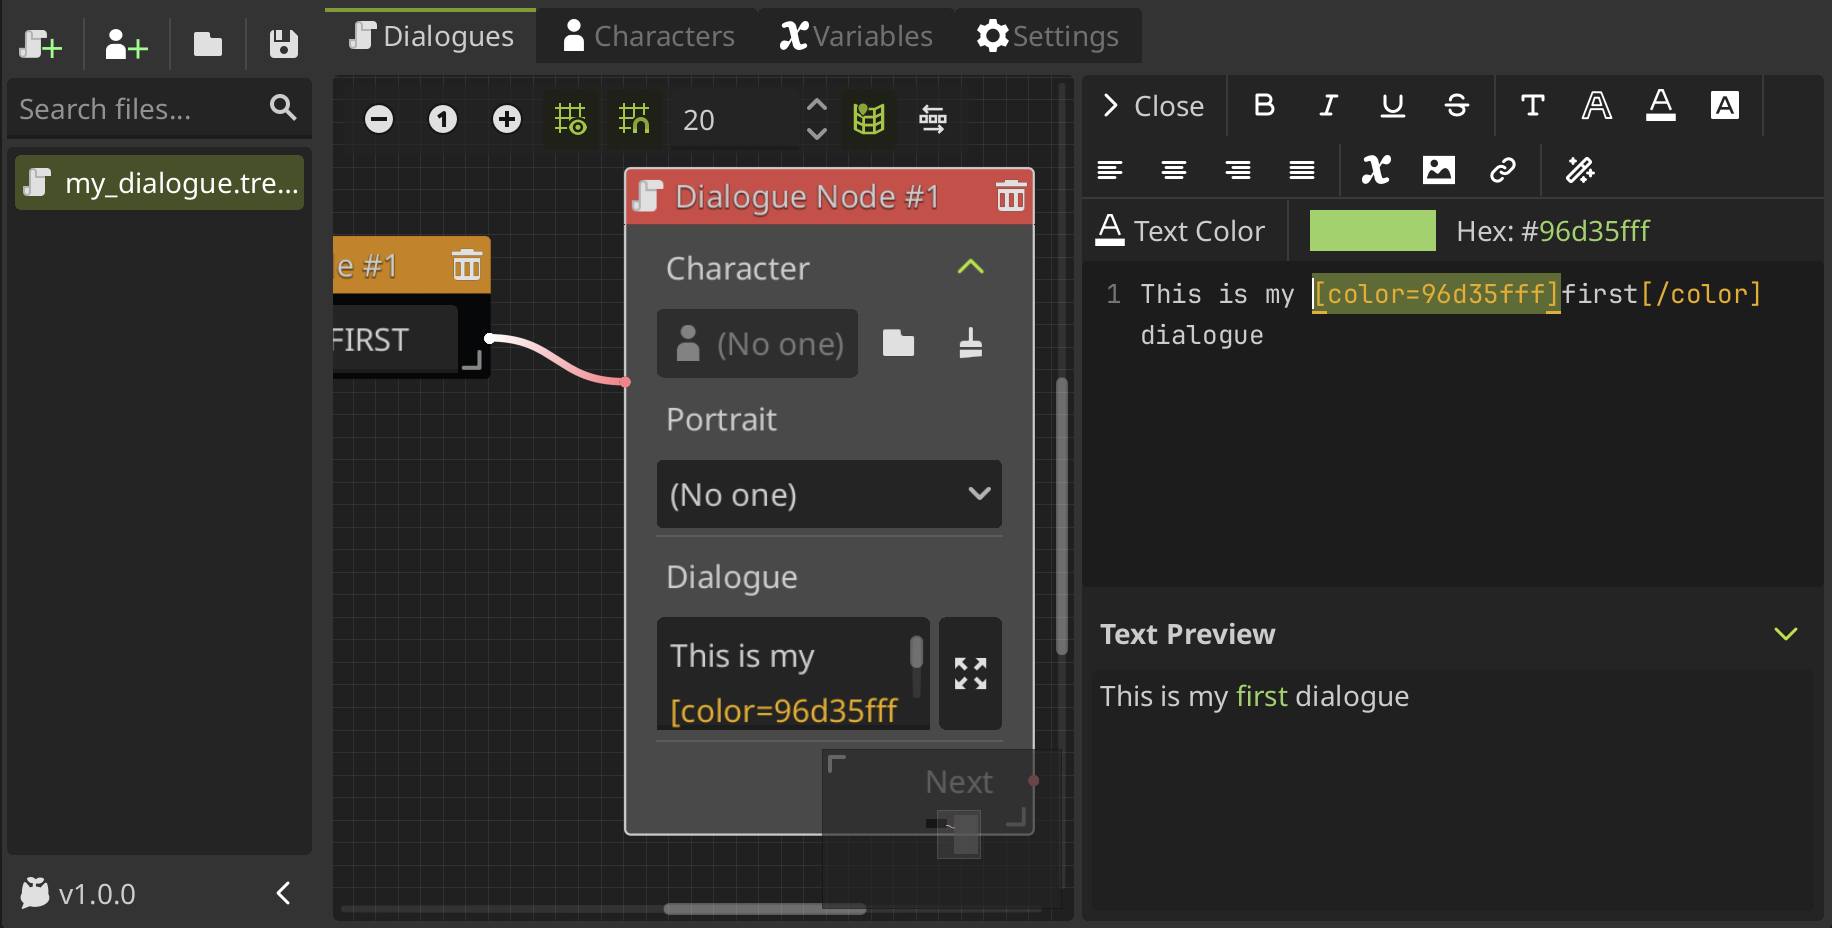
In the text editor you can easily add BBCode tags to the text in a user-friendly interface, so you don't have to remember all the tags and its properties. You can add styles and effects selecting the text what you want to be affected by the tags and then click on the desire feature to add the tags around the selection.
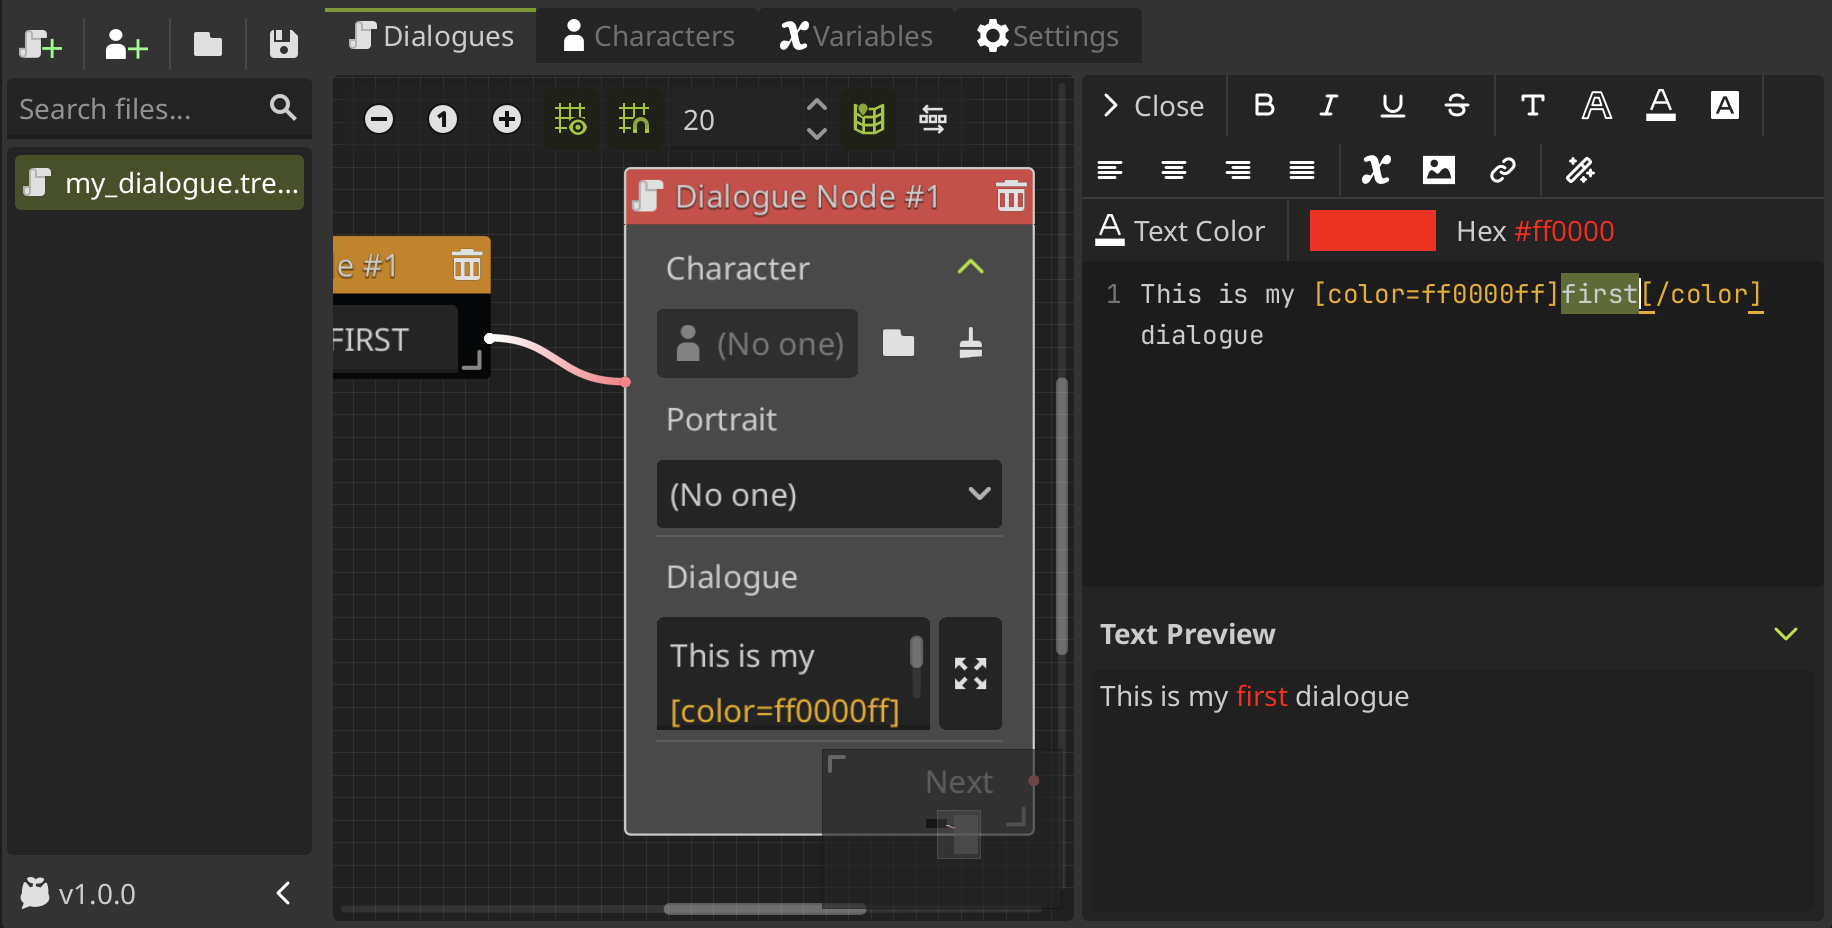
You can change the properties of the tag while you have the tags selected, for example in this case, we can change the color of the text having selected the color tag.
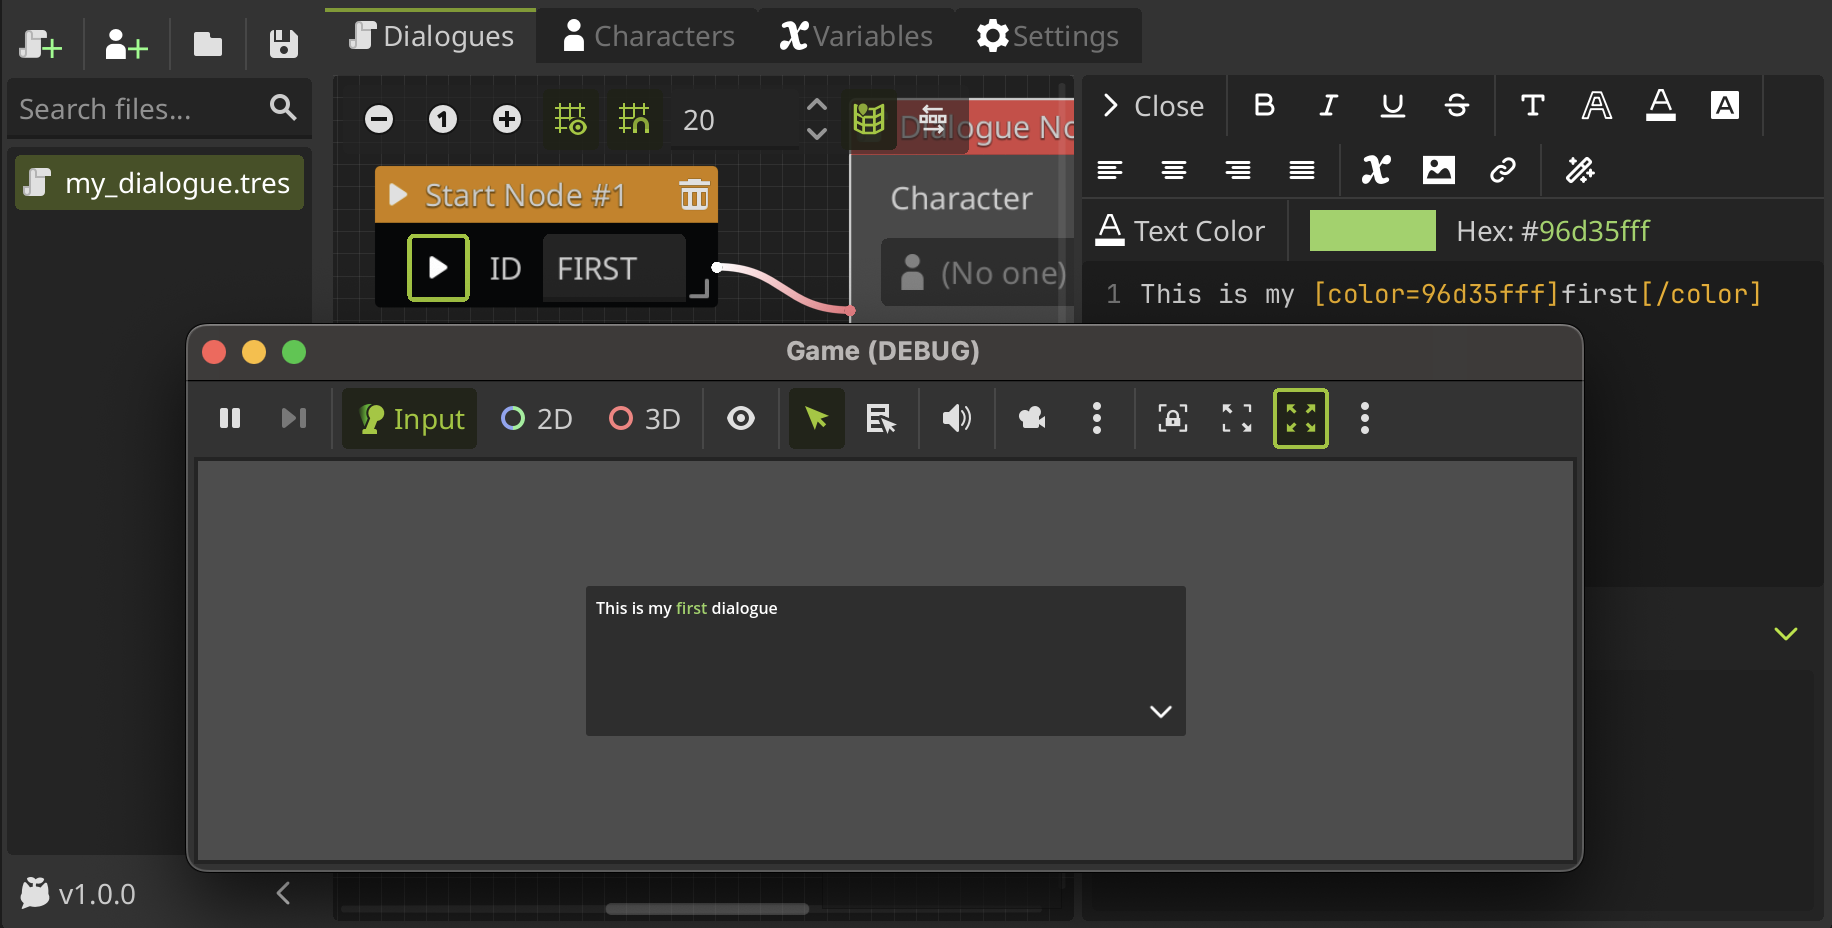
Test the dialogue
You can test your dialogue playing it in a preview in-game view. To do this, click the play button on the Start Node of the dialogue tree you want to test and you will be able to see and interact with the dialogue.
Using dialogues in your game
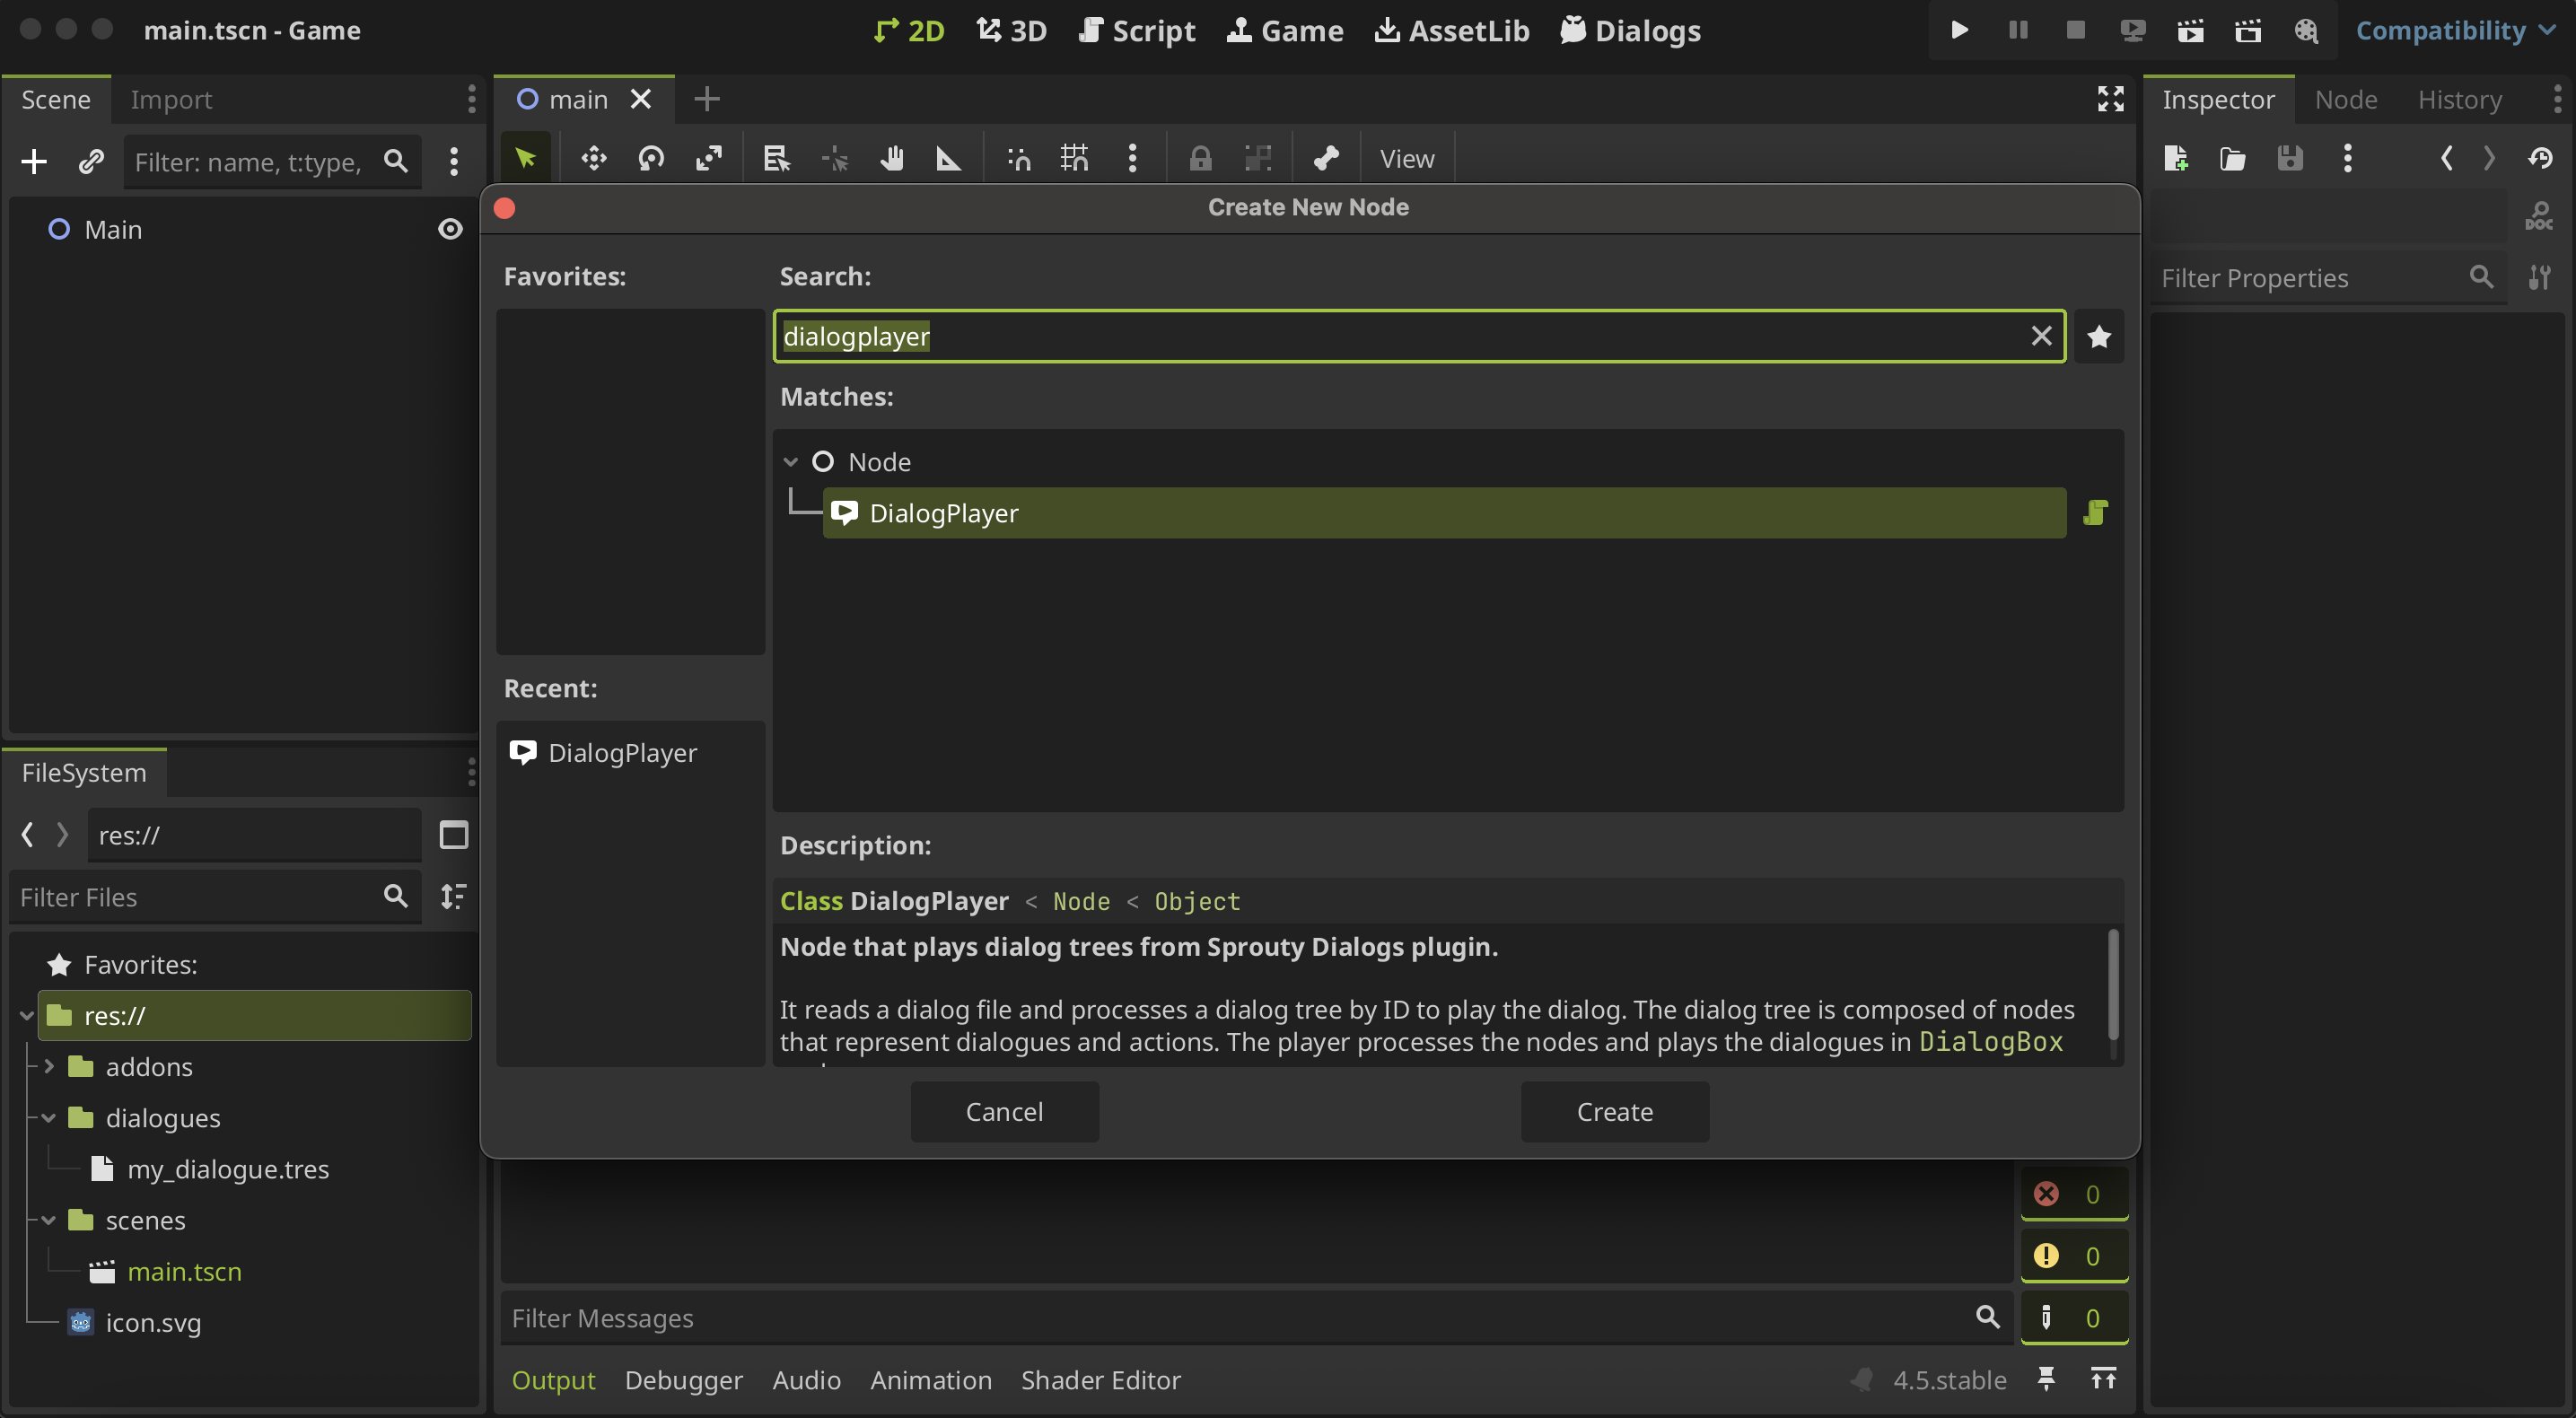
To use the dialogue in your game, you need to add a DialogPlayer node to the scene where you want to run the dialogue. In this case, we'll add the DialogPlayer to a 2D scene.
Next, you must assign the Dialog Data or dialogue data file you want to use; we will select the file created earlier.
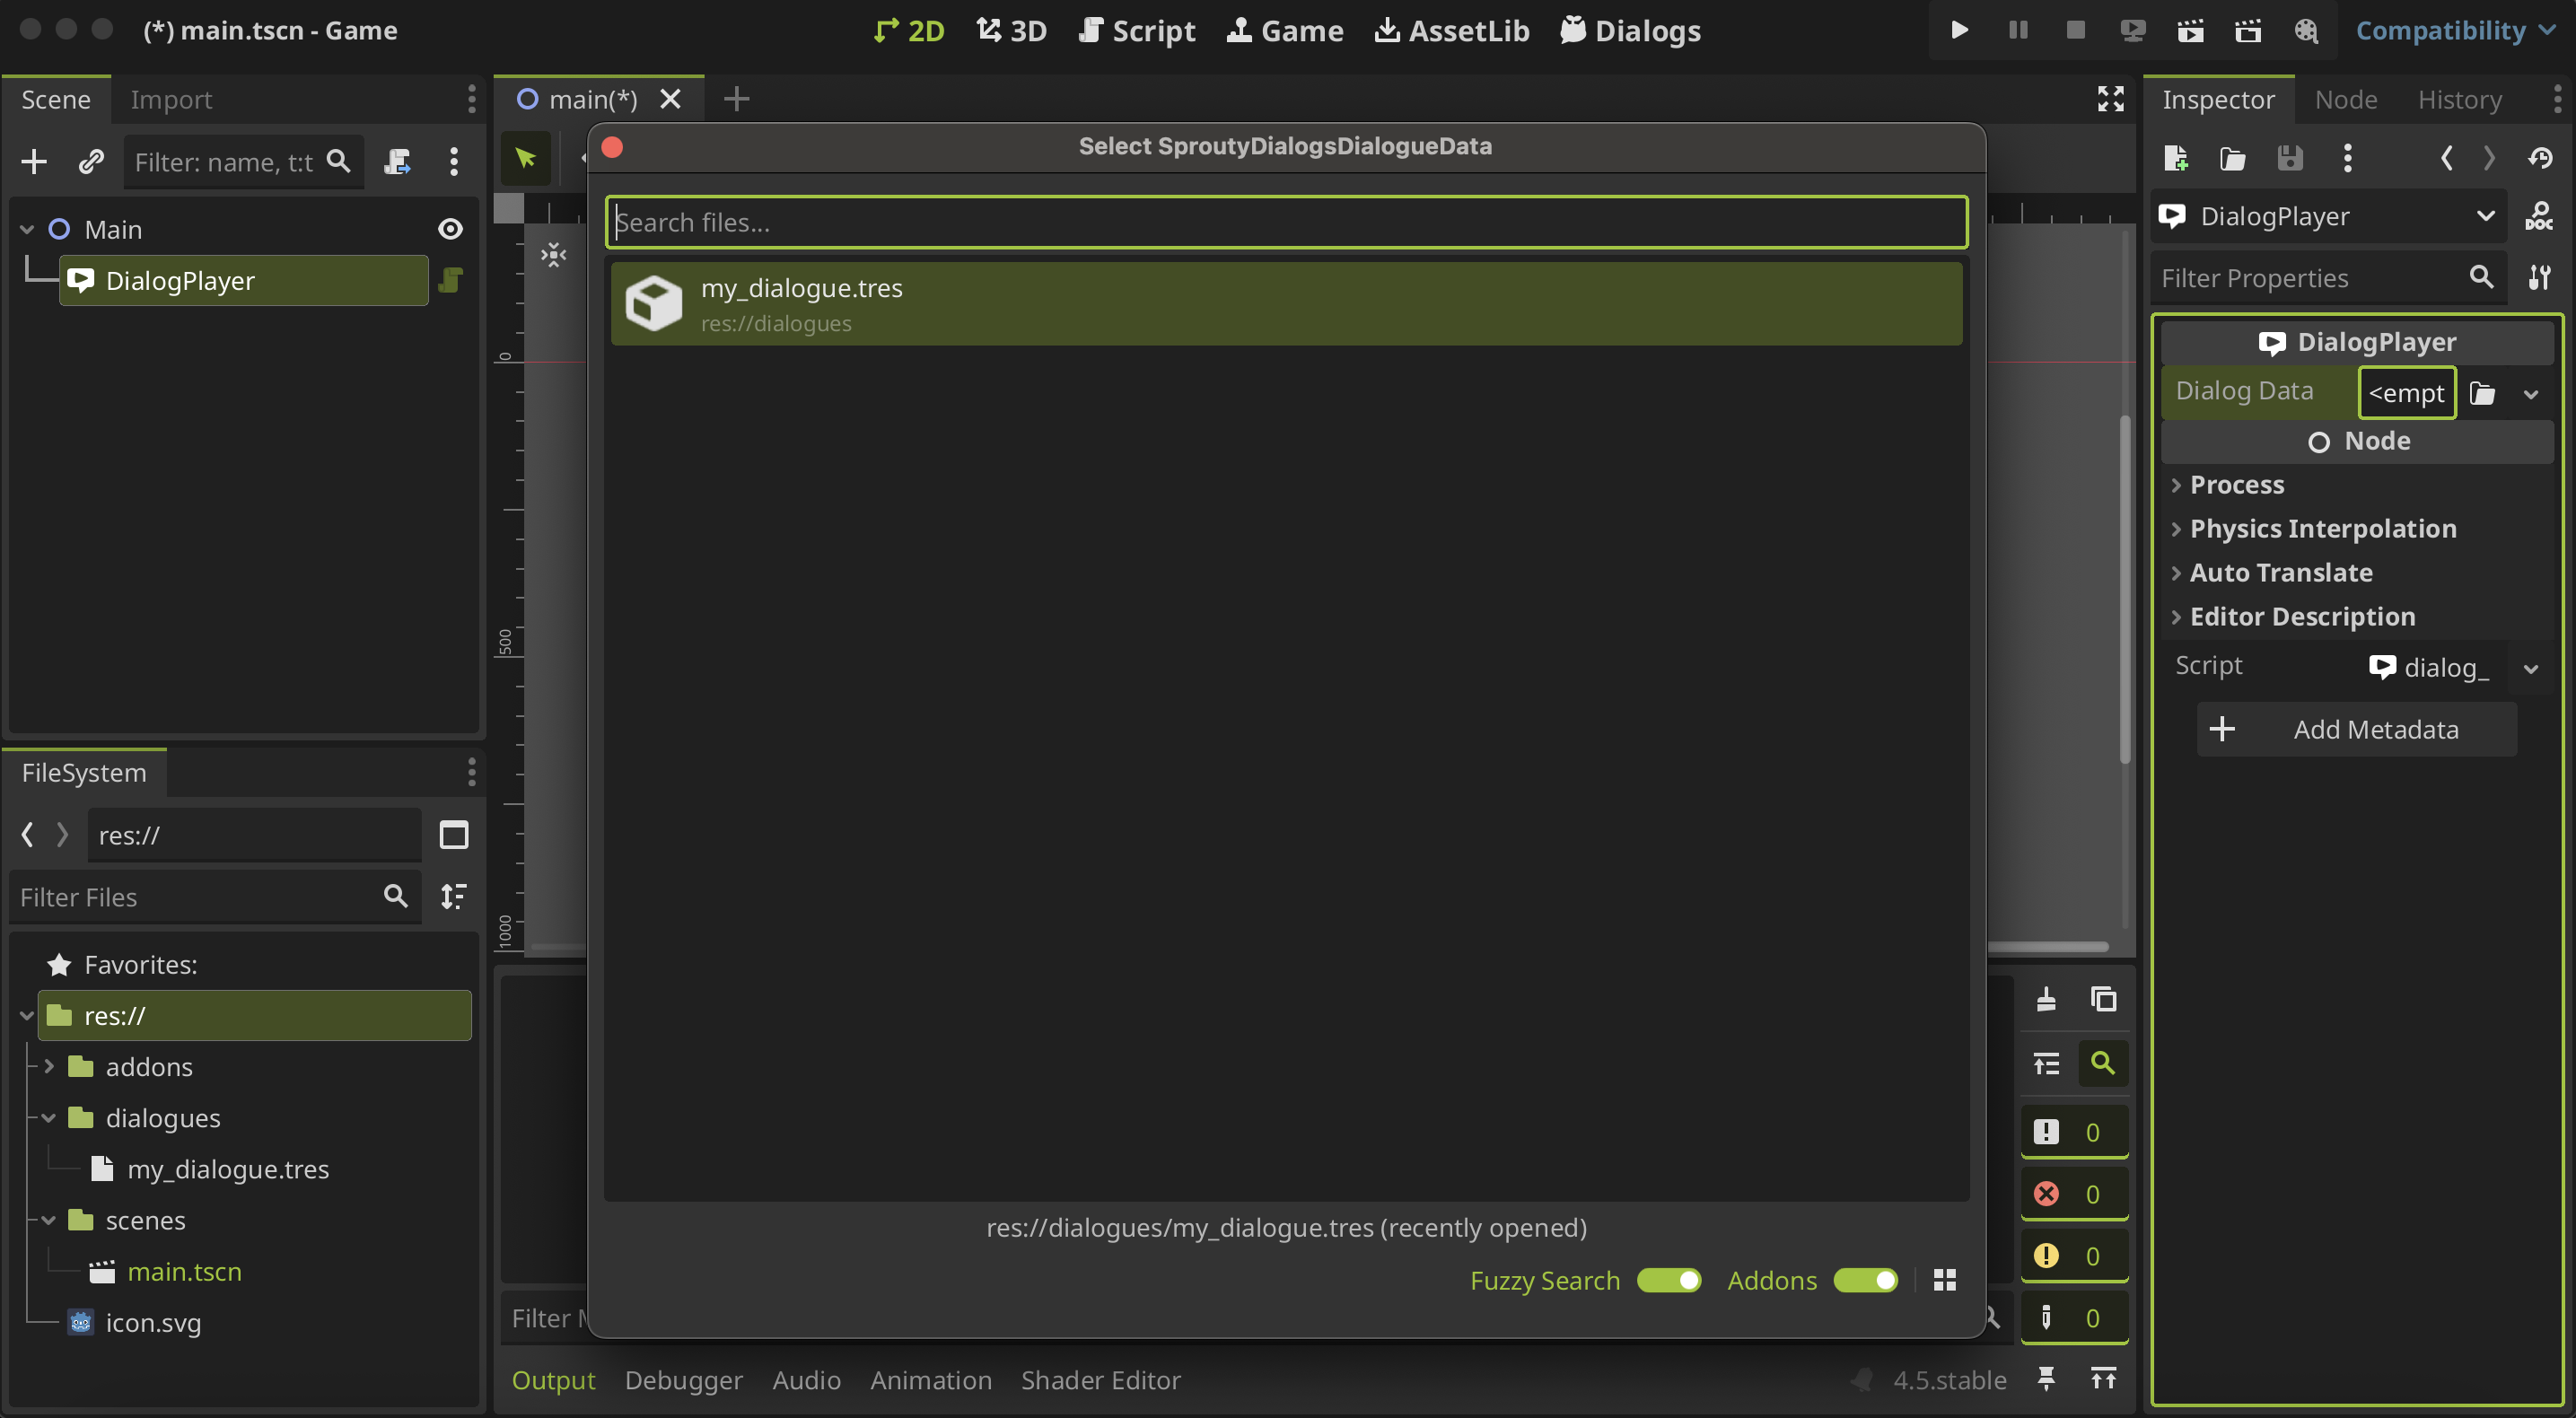
When you select a file, the inspector automatically going to update and now you will see some settings for the DialogPlayer. You must choose the dialogue tree ID from the dialogue file you want to play in the Start ID property; otherwise, the player will not know which dialogue tree to run.
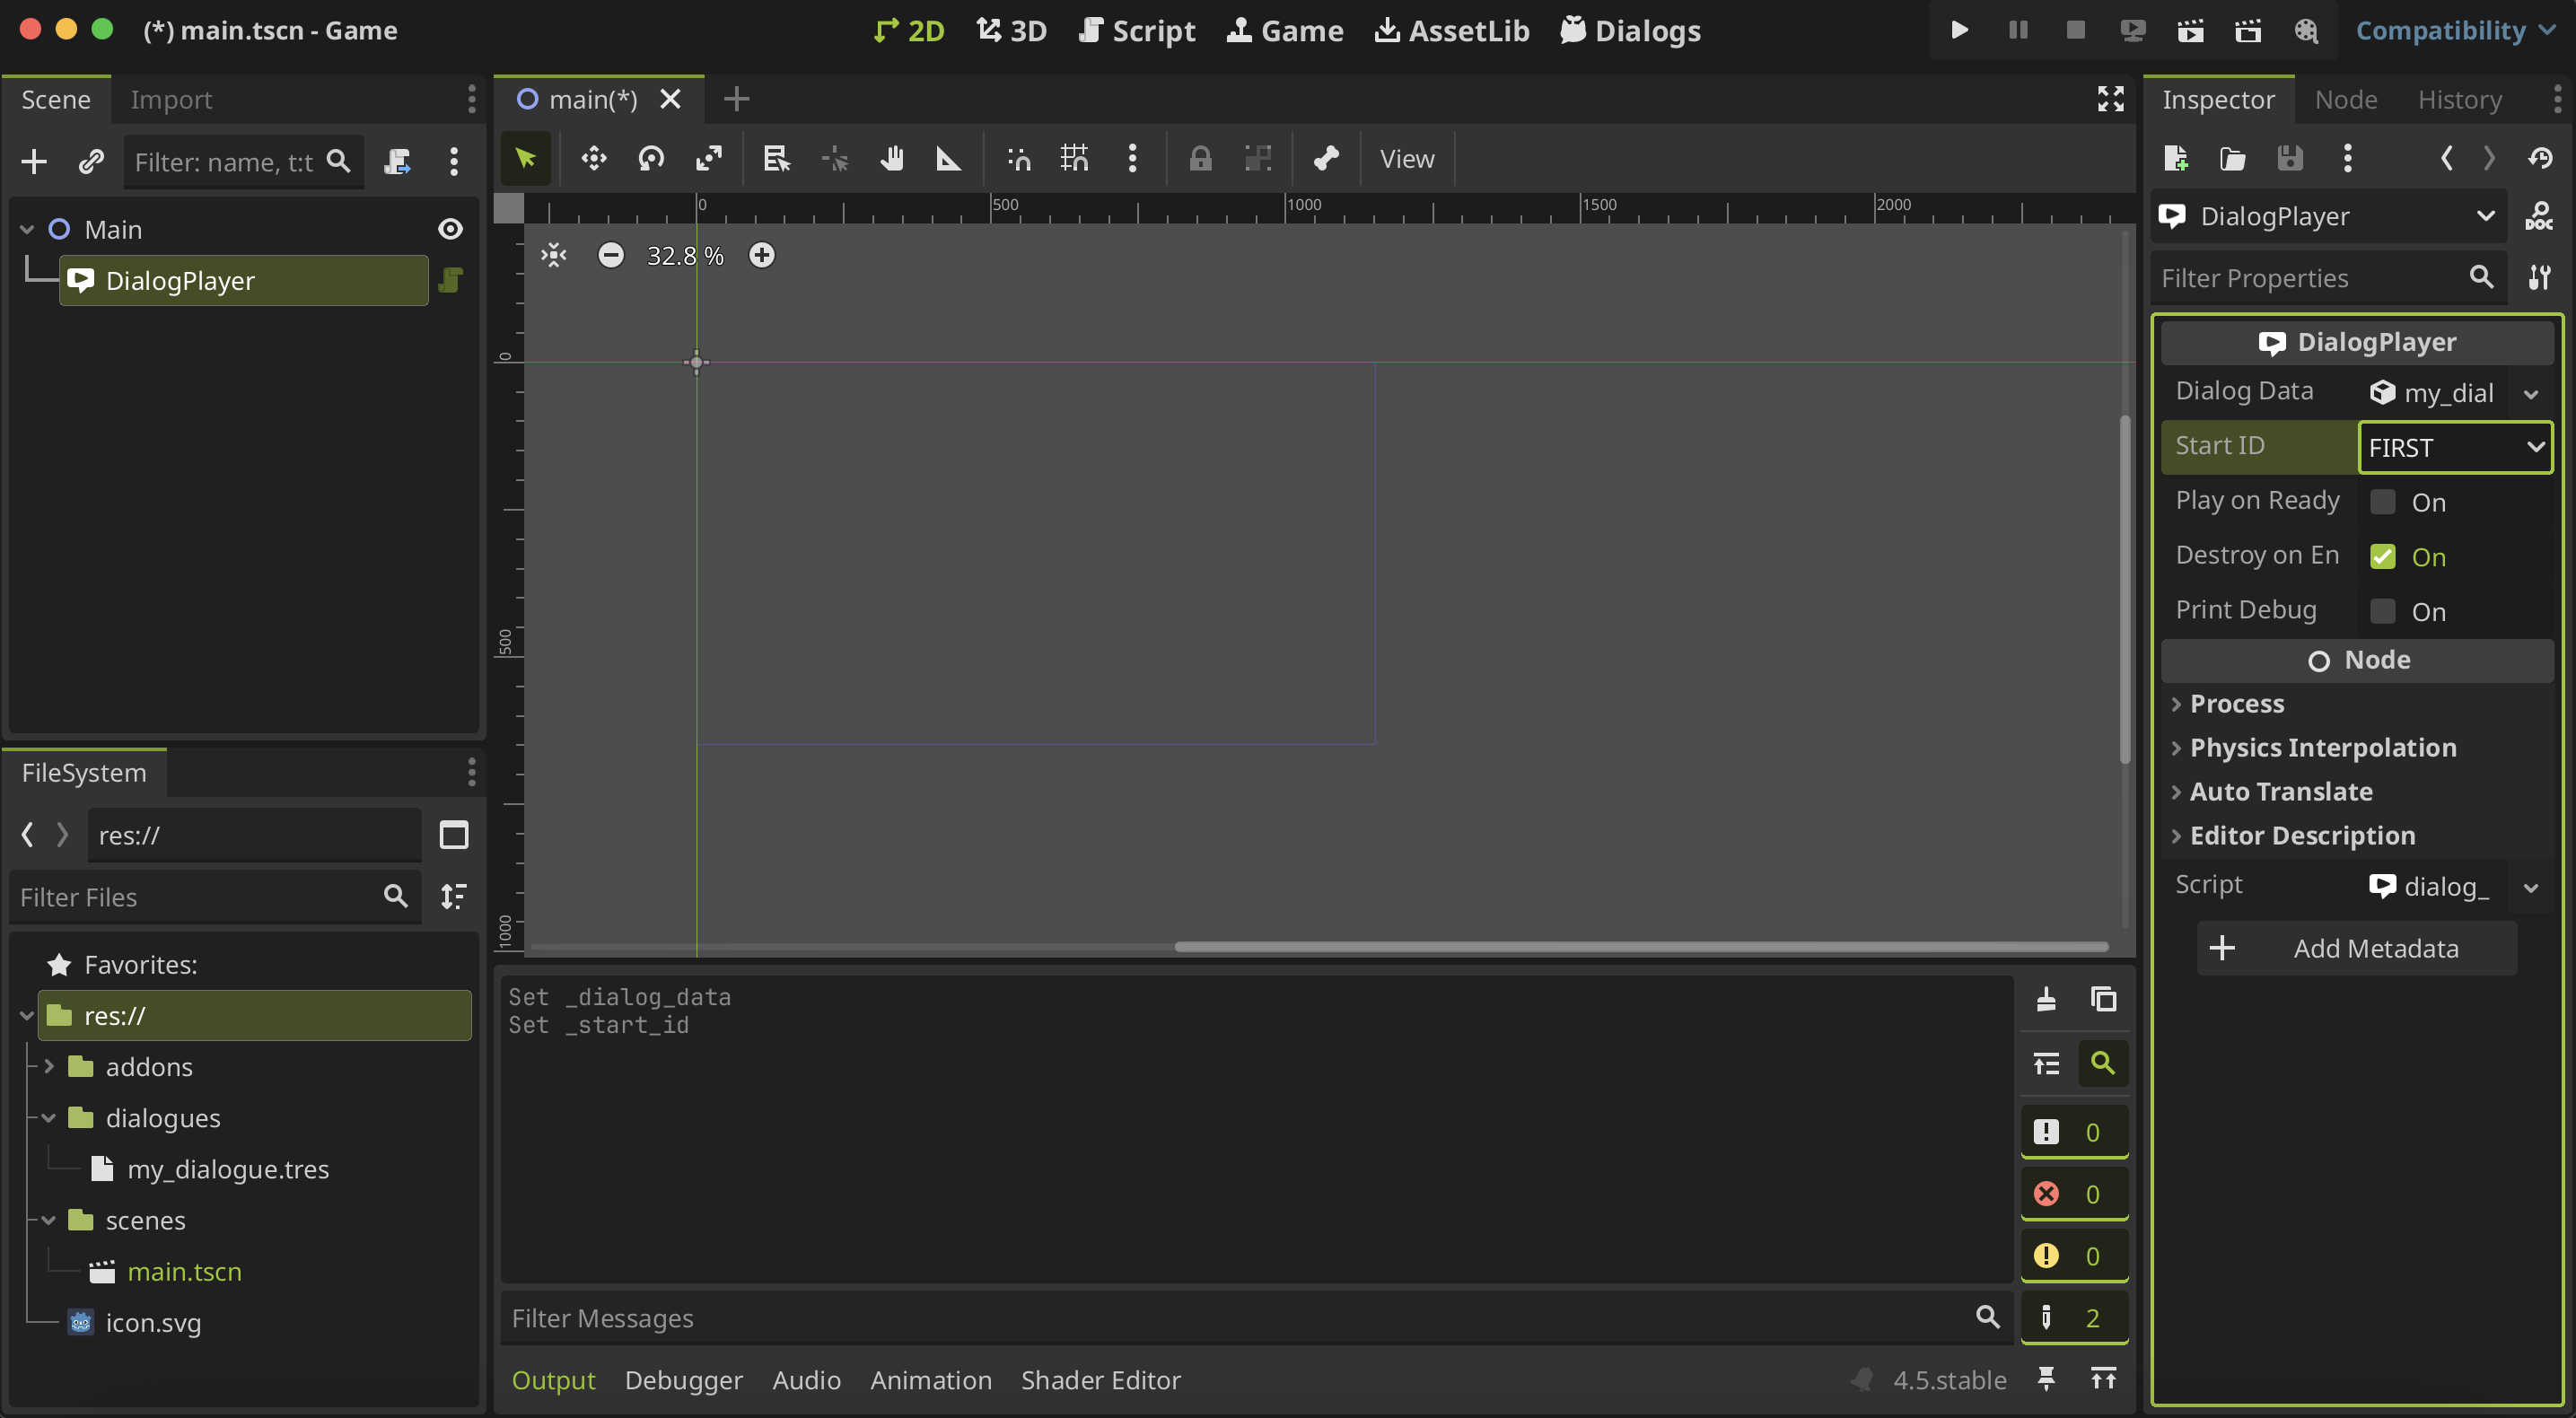
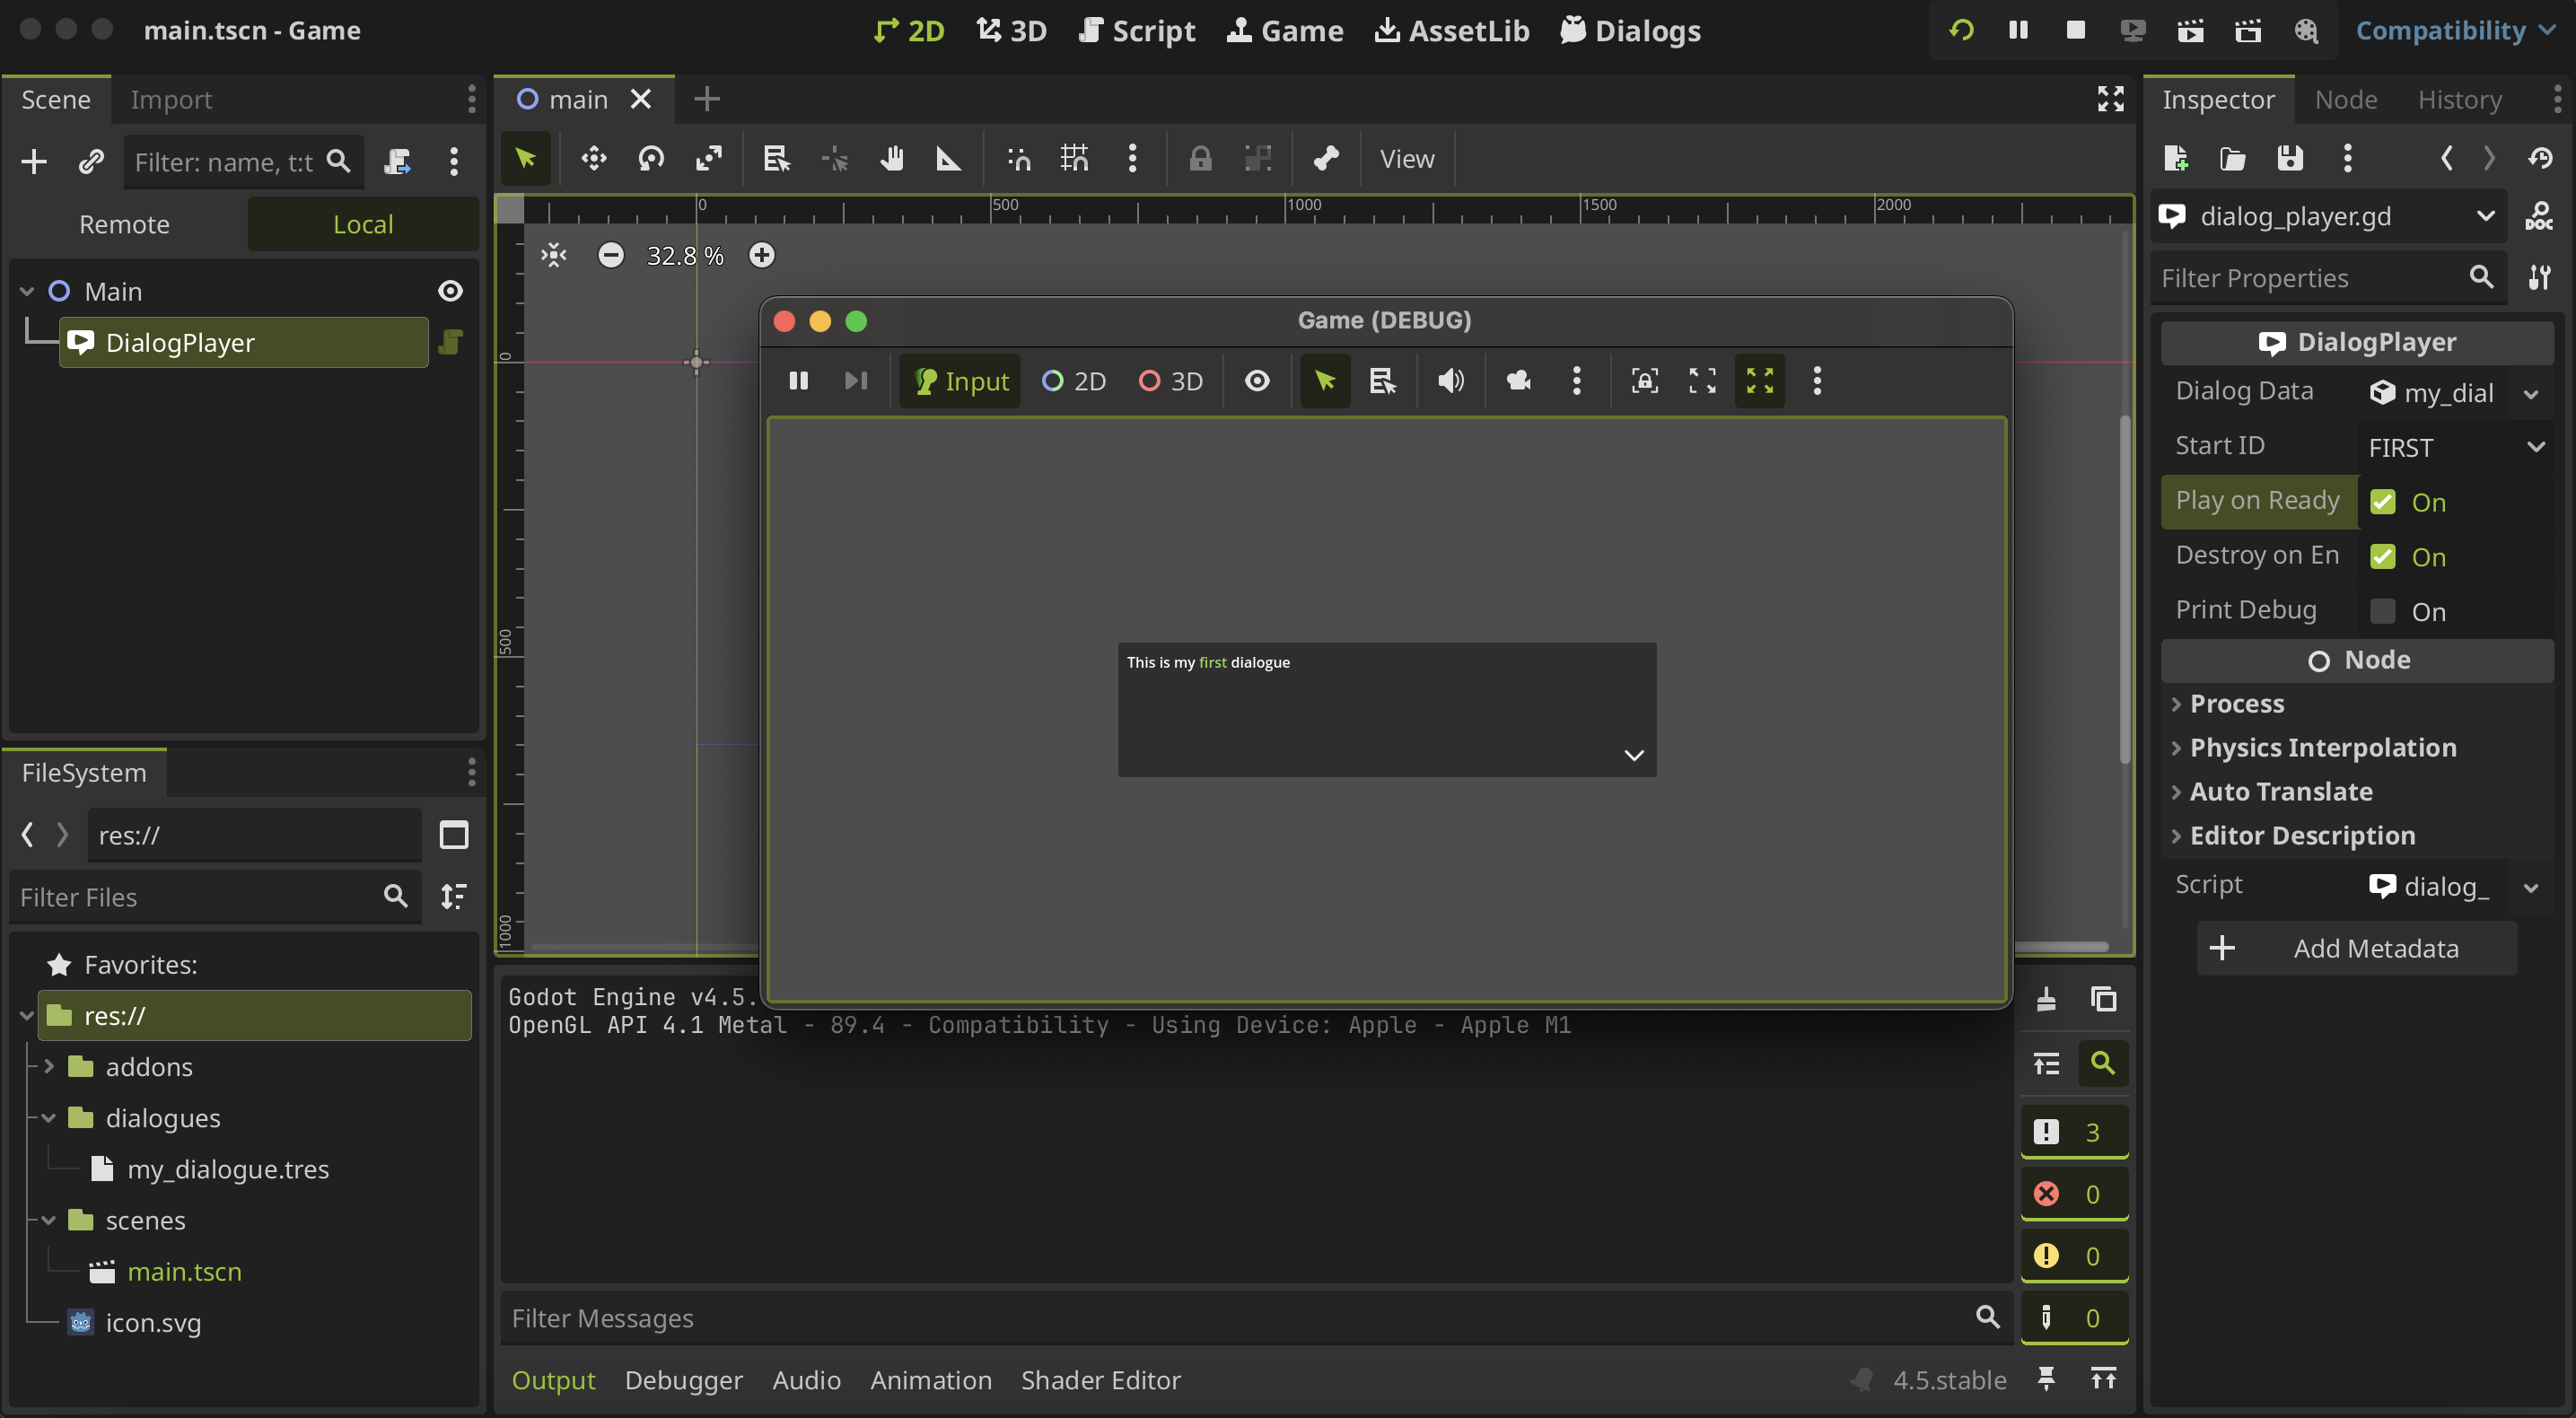
Also, you can set other settings, such as Play on Ready, that will run the dialogue when the DialogPlayer node is ready on the scene tree. If we enable this property, you'll see the dialogue when you play the scene.
Generally, you'll want to trigger the dialogue at a specific moment, not only when the scene begins. Therefore, you can call the dialogue in other ways.
Trigger the dialogue
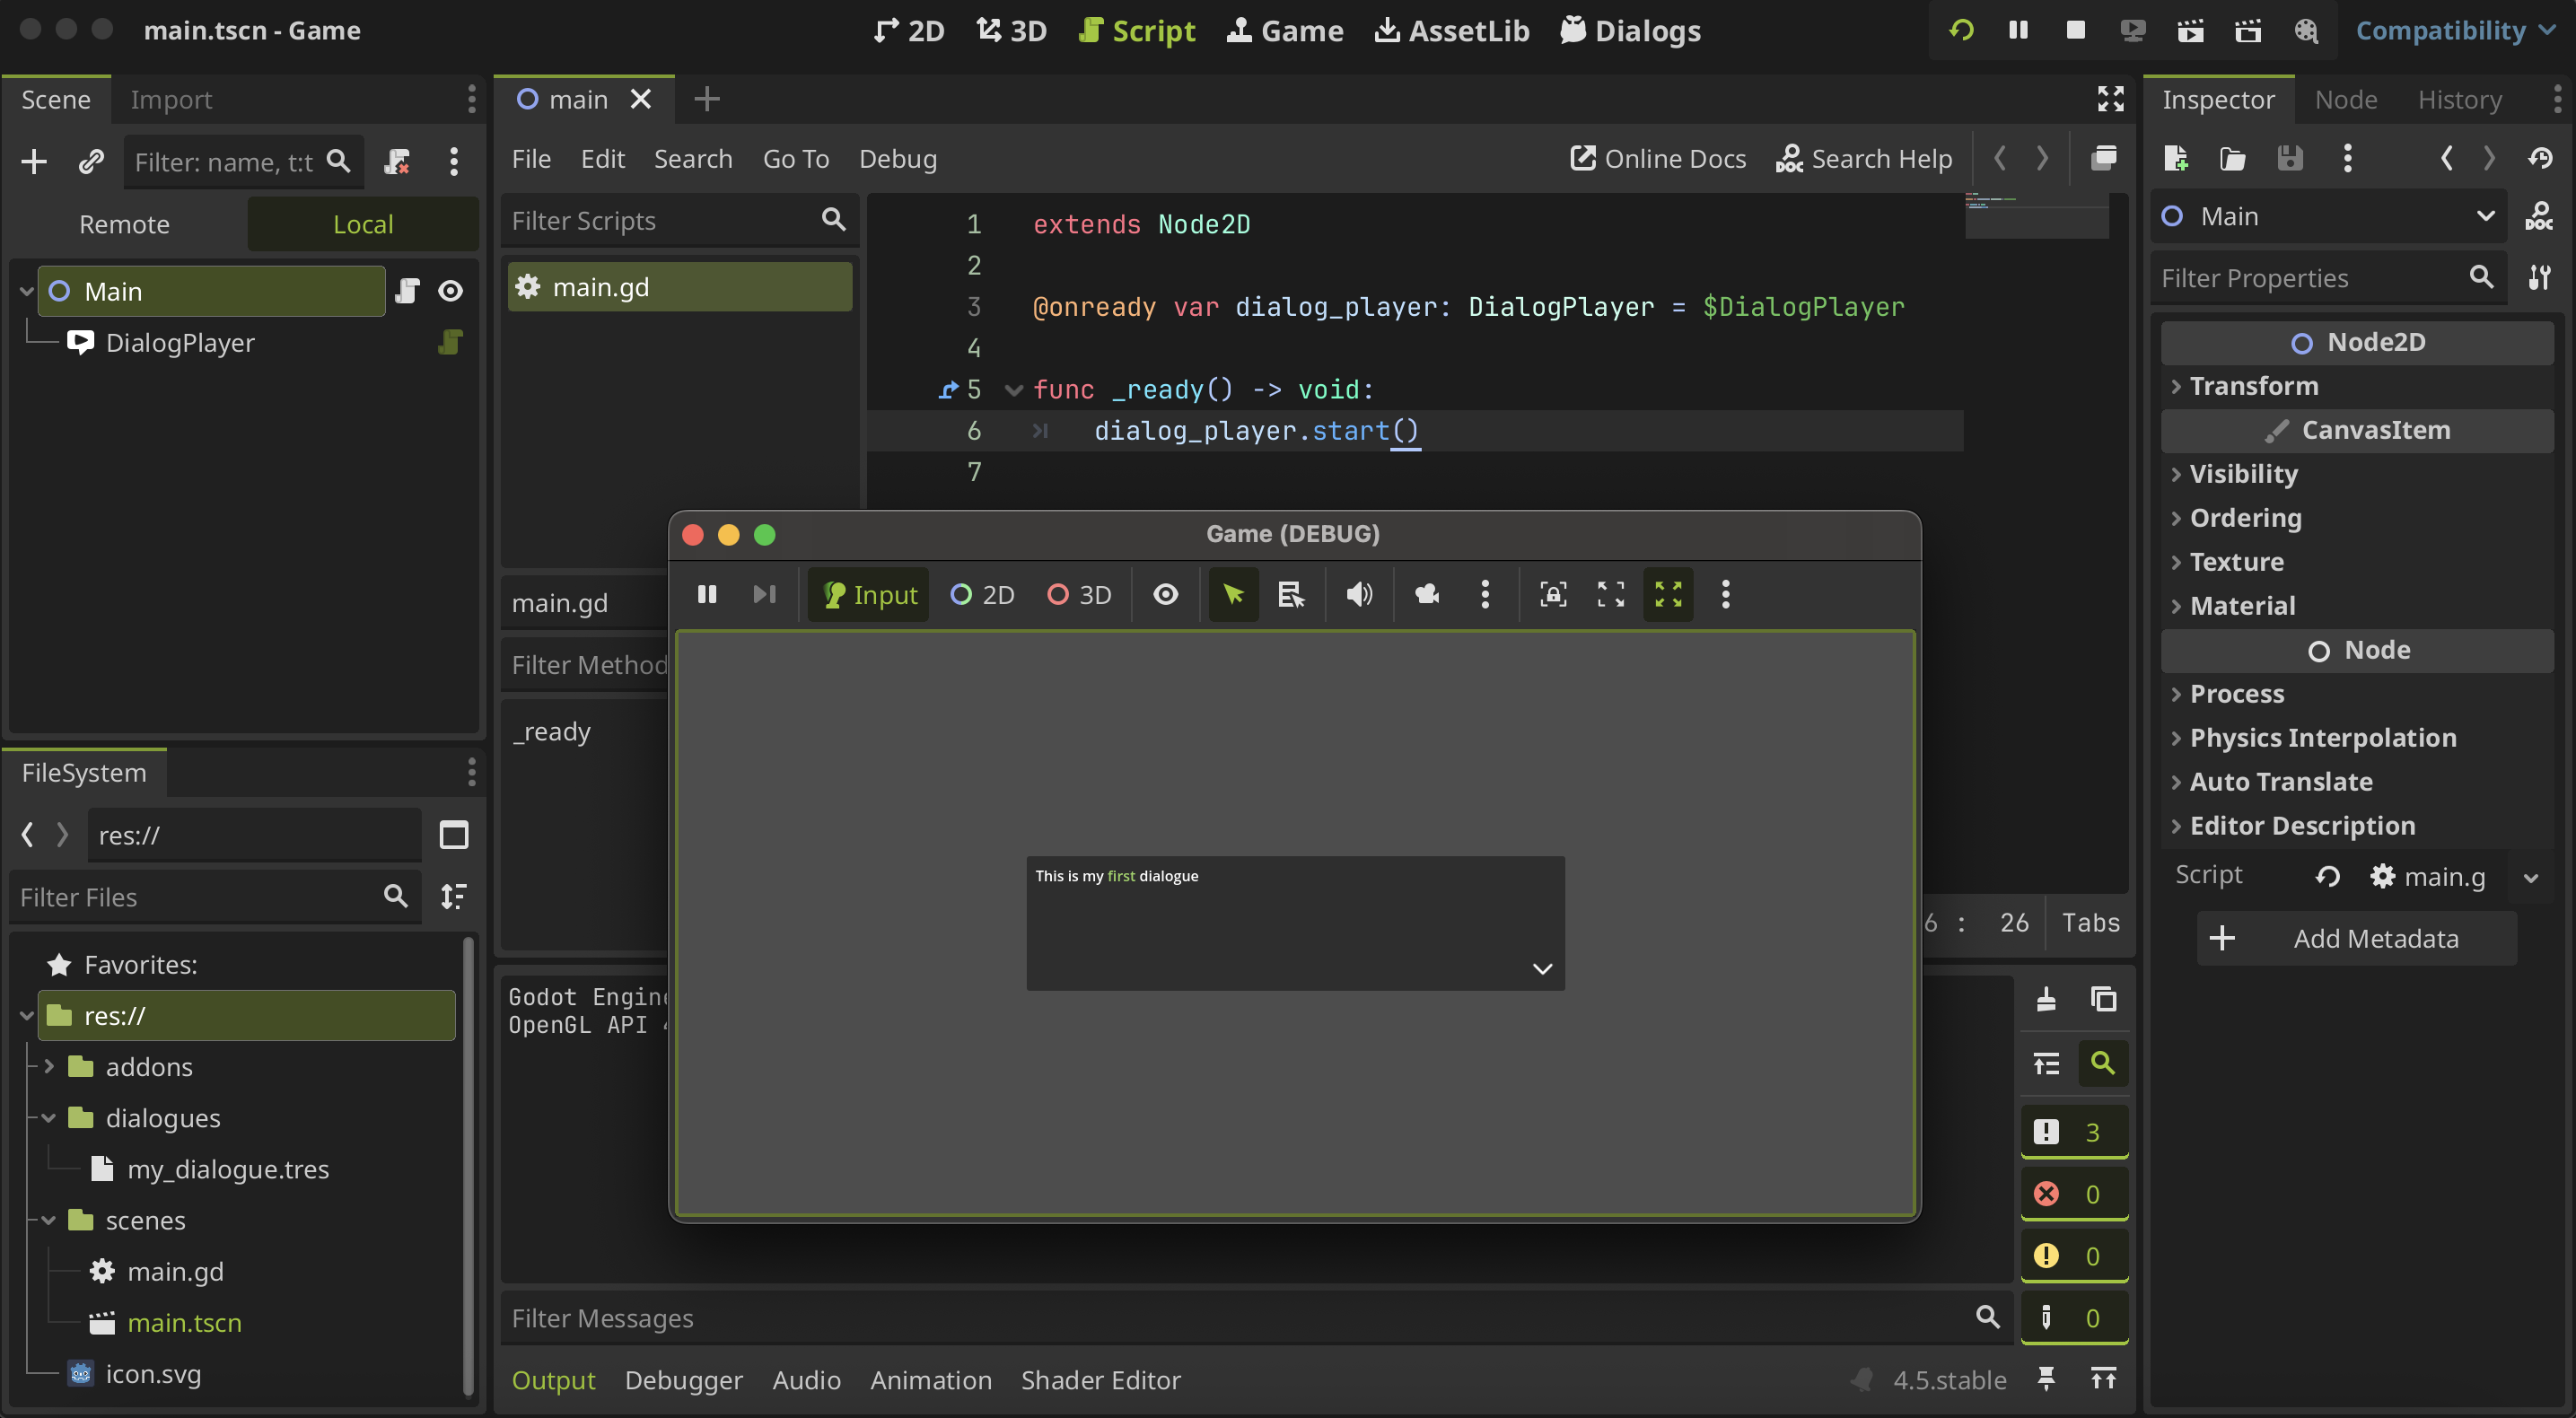
You can call the dialogue from code, using the start() method from the DialogPlayer node.
For example, we can add a script to the main node and add a reference to the DialogPlayer that we create before to then call the start() method where we want in the script.
extends Node2D

@onready var dialog_player : DialogPlayer = $DialogPlayer

func _ready() -> void:
	dialog_player.start()
In this case, we run the dialog in the _ready() method of the main node or when the scene begins again, so when you run the scene, you will see the dialogue as before.
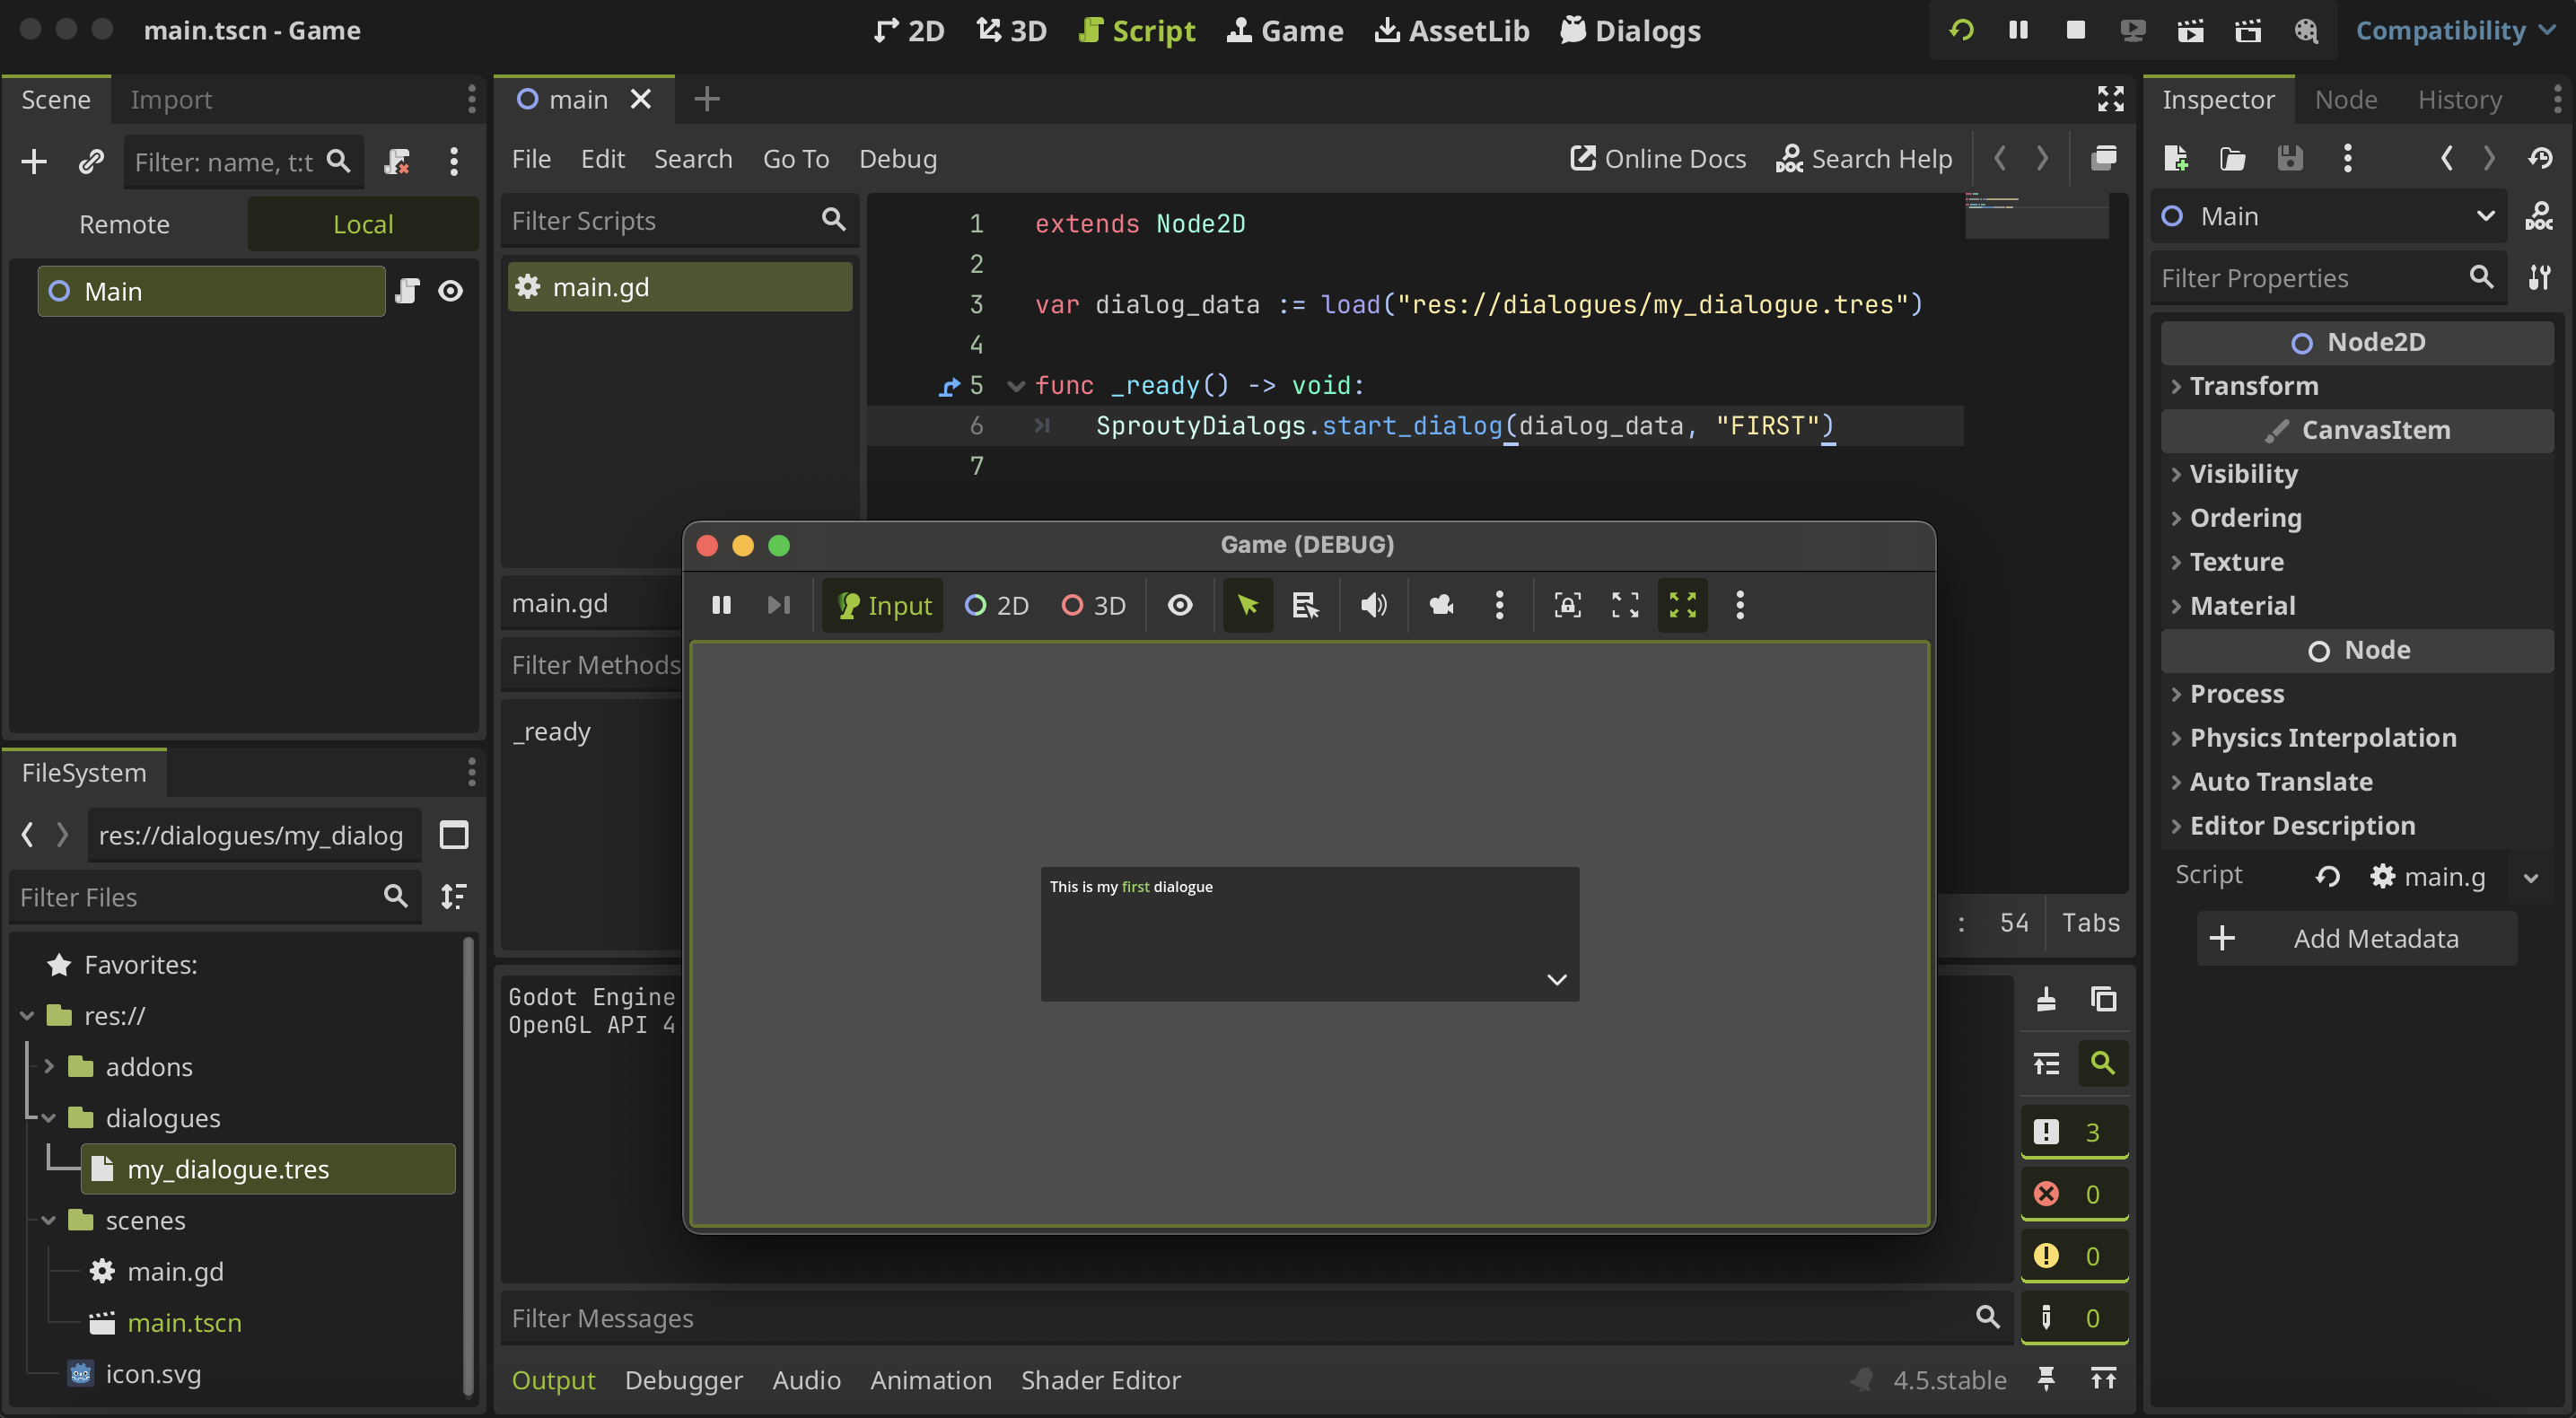
Otherwise, instead of create a DialogPlayer node in the scene, you can play a dialogue using the Sprouty Dialogs Autoload. You can call the start_dialog() method from the SproutyDialogs autoload passing the dialogue data resource and the ID of the dialogue tree you want to run.
extends Node2D

var dialog_data := load("res://dialogues/my_dialogue.tres")

func _ready() -> void:
	SproutyDialogs.start_dialog(dialog_data, "FIRST")
And in this way you can also see the dialogue when you run the scene.
This method loads all the resources needed for the dialogue at once when the method is called, so may cause a slowdown if you have large resources to load, such as complex portraits scenes, dialog boxes, etc.
So, if you have large resources in your dialogue, it is not recommended use the autoload to play the dialogue, instead use the DialogPlayer nodes that load the resources on ready.
For more details see about dialogue resources.
Congratulations! You have created your first dialogue and added it to your game.
Now you may be wondering, how do I customize the dialog box? Or how do I use characters in my dialogue? Well, we'll see that in the next section about creating characters.